
Events App
This document provides you with an experience of a sample application (Events App), developed using Kony AppPlatform. It helps you gain an understanding of how to set up the Events application and how to preview the Events application with sample data, using Kony Visualizer App Viewer. Events app highlights the Progressive Web and Responsive design features of Kony AppPlatform. Furthermore, it gives you an insight into the Kony AppPlatform and its capabilities.
It consists of the following sections:
Getting Started
Kony AppPlatform offers you a full stack solution to develop end-to-end digital omnichannel applications that include Mobile, Tablet, and Desktop Web among other things. The AppPlatform offering is divided into two parts:
- Kony Visualizer – an integrated, intuitive development environment, to build native and Web experiences across mobiles, tablets, wearables, and desktops – all from a single code base.
- Kony Fabric – a multi-purpose back-end integration environment.
Use Case: Events
Events app provides you with an option to browse through and register for upcoming events in your organization. You can search and filter through the list of events and also check the details of events such as schedule, location and the list of presenters, and so on. Also, the app comes with an admin console for an app admin to create and edit events as well as manage users.
The following video walks you through the various features of the Events sample app.
App Features
_90x81.png)
|
_84x83.png)
|
||

|
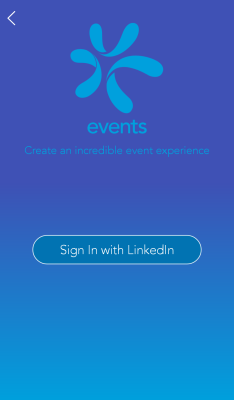
Login through LinkedIn |
|
Login with username and password
|

|
Search and filter events
|

|
View all Events
|

|
View event details
|

|
Create Events
|

|
Event Schedule
|

|
Update/Delete Events
|

|
Map view of event location
|
||

|
Presenter profiles
|
||

|
Register for an event
|
||
|
|
Push notifications
|
||

|
Share events
|
App Functionality
Events is a fully functional sample application that is available for two personae - Events App (Consumer) and Events Admin Console Desktop Web App
Events App (Consumer)
The consumer Events application lists the upcoming events for the users. You can view, search and filter through the event list. You can also view the details of the events such as description, schedule, location and presenters. You can also register for the event, if you are logged in. You also have the option to browse through your past and registered events from a separate listing. You can log on to the app using your LinkedIn account. The consumer app is available on both Mobile and Desktop Web.
Mobile
The app consists of the following screens and sub-screens:
- Event List
- Event Details
- Event Schedule
- Event Location
- Event Speakers/ Presenters
- Event Registration
The app also contains a Login and a Menu screen.
The following slides give us an overview of each of the screens and their sub-screens:
Event List Screen
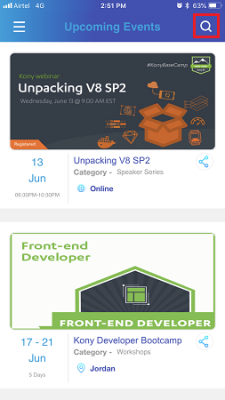
The Event List screen contains a list of all events in individual grids. Every grid contains the event name, category, date, location and the banner for the event. Every grid also contains a share button that opens the share menu of the device.
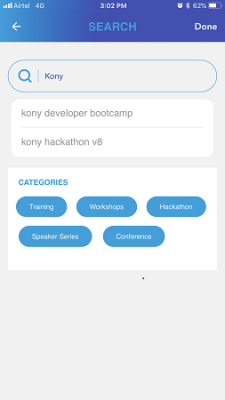
You can also search for events by tapping the search button at the top right corner of the screen. The search screen contains options to search for an event by its title, and to filter the results by category.When you tap an individual grid, the app navigates to the Event Details screen.
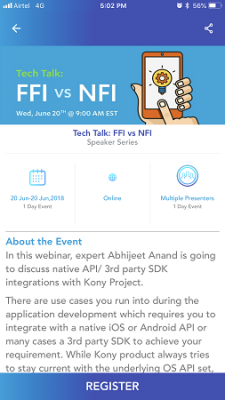
Event Details Screen
The Event Details screen contains the details about the selected event. These details include schedule, description, location, details of the speaker, and registration. The Event Details screen contains the banner of the event at the top, followed by the event title. The horizontal strip below the title contains the date, location, and details of the presenter. The section below the horizontal strip provides the description of the event.
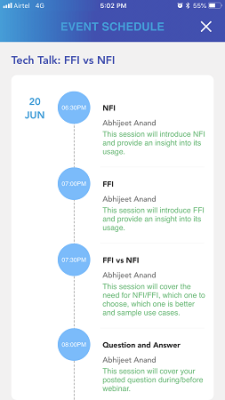
Event Schedule
When you select the event date grid on the Event Details screen, the app navigates to the Event Schedule page. This page displays the sessions in the event with their timings.
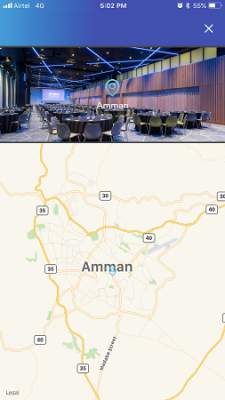
Event Location
When you select the event location grid on the Event Details screen, the app navigates to the Event Location page. This page displays the location of the event on a map.
Event Speakers/ Presenters
When you select the event speakers grid on the Event Details screen, the app navigates to the Speakers Profile page. This page displays the presenter for every session on a single screen.
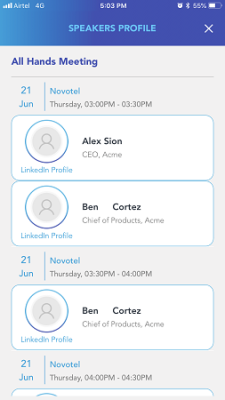
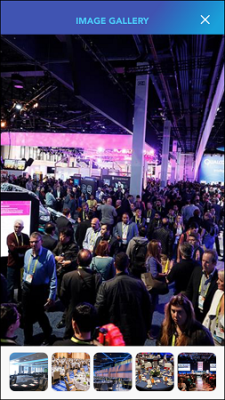
Image Gallery
An event creator can upload images that are related to the event apart from the banner image. These images are present in the image gallery. The Image Gallery is present at the bottom half of the event details screen, above the event description. When you select an image, it takes you to a gallery view of the images from the event.
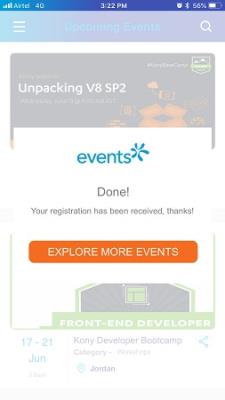
Event Registration
The Register button is present at the bottom of the Event Details screen. You need to log in to the application to register for events. If you are not logged in to the app and you select the register button, the app navigates to the Login Screen. Otherwise, the app shows a confirmation note for the registration.
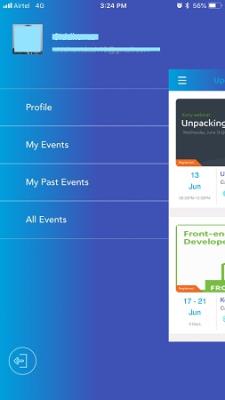
Application Menu
You can access the Application Menu by tapping the hamburger icon on the landing page of the application. The menu contains options to navigate to different parts of the application. The menu also contains the details of the current user. The menu contains the following options:Profile (Profile of the user), My Events (Upcoming events), My Past Events (Past registered events of the user), and All Events (List of all the events).
Note: Logging in is not mandatory for browsing through events, but it is mandatory to register for an event.
Desktop Web
The Events Desktop Web application is a Progressive Web App and is Responsive in nature. The Desktop Web app consists of two main screens: Event List and Event Details. Event Details screen, in this case has a different layout. Following is the list of screens and sub-screens:
- Login
- Event List
- Event Details
- Event Schedule
- Event Location
- Event Speakers/ Presenters
- Event Registration
The following slides give us an overview of each of these screens:
Login Screen
The Login Screen for the Events Desktop Web app has two sections. The first section is for consumer log-in. The consumers can log in with their LinkedIn credentials. The second section is for admin log-in. The admins can log in with their User ID and Password. The admin credentials are the same as the ones stored in the Kony User Store.
.png)
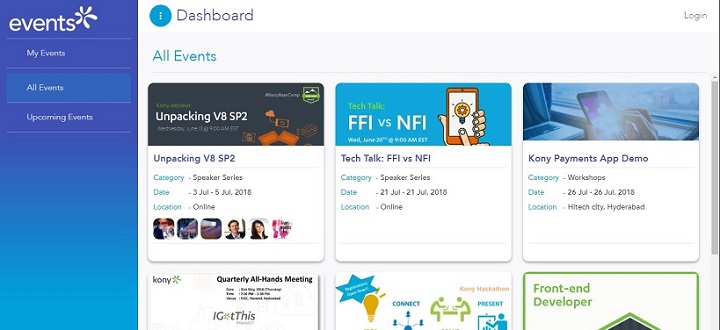
Event List Dashboard
The Event List screen contains a list of all events in individual grids. Every grid contains the name, category, date, location, and banner for the event. Every grid also contains a share button that opens the share menu of the device.
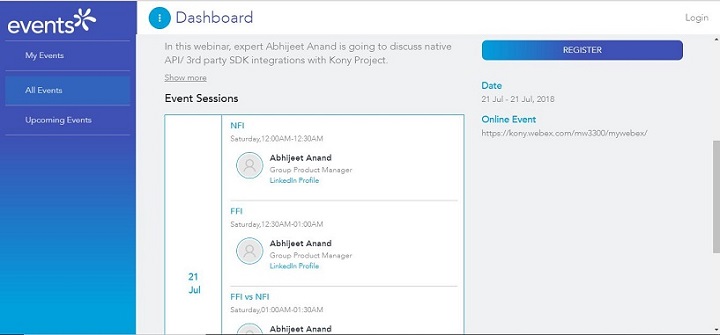
Event Details
The Event Details screen contains more details about the selected event. The details include schedule, description, location, details of the speaker, and registration. The Event Details screen contains the banner of the event at the top, followed by the event's title. The remaining part of the screen is divided into two columns. The left half contains the description of the event and the sessions in the event. The right half contains the location of the event and the registration details for the event.
Events Admin Console Desktop Web App:
The Events Admin Console is where an admin user can create and edit events as well as manage the users in each event. The Admin Console is available only on Desktop Web channel. The Event Admin console version of the Desktop Web is also a Progressive Web app and Responsive in nature.
The following slides give us an overview of all the screens present in Events Admin Console:
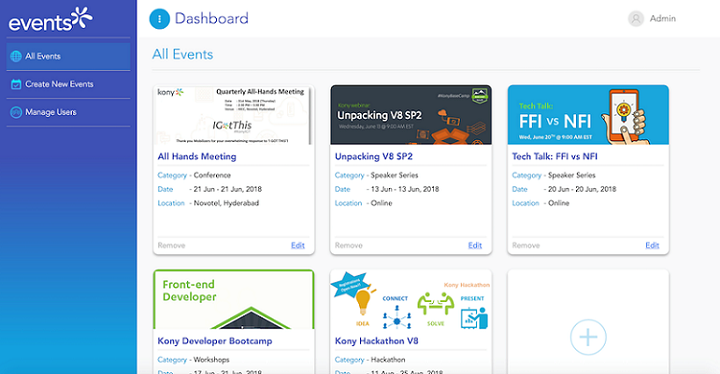
Event Dashboard
The Event Dashboard is the landing page of the Events Admin Console. The Event Dashboard contains a list of all the events on the main canvas of the screen. There are individual grids that contain the basic metadata of all the events such as the name, category, date and, location. You can edit an event by clicking the Edit present at the bottom right corner of the event grid. You can also remove an event from the dashboard.
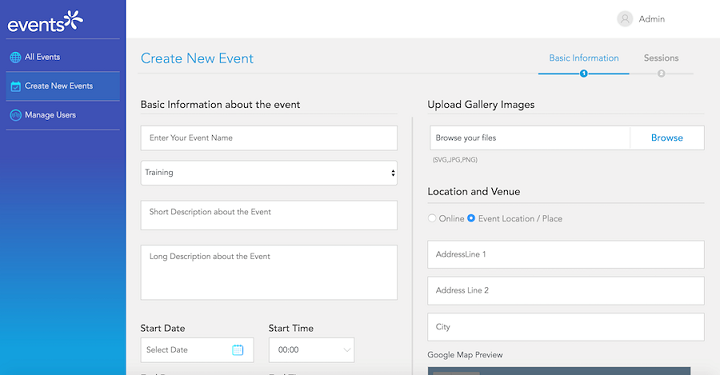
Create/ Edit Event
Create event is the second page of the Events Admin Console. When you click the Create New Events item in the menu, the app navigates to a screen where you can configure the given fields to create an event. The fields are divided into two parts:
- Basic Information
This section contains fields that configure the title, description, date, banner images, other images, and location of the event. - Sessions
This section contains fields where you can configure the sessions that you want to have in your event. As planning for event sessions in not mandatory, and there can be events without any session splits, this section is optional. If you want to have sessions, you need to provide the name, duration, description and speakers of the session.
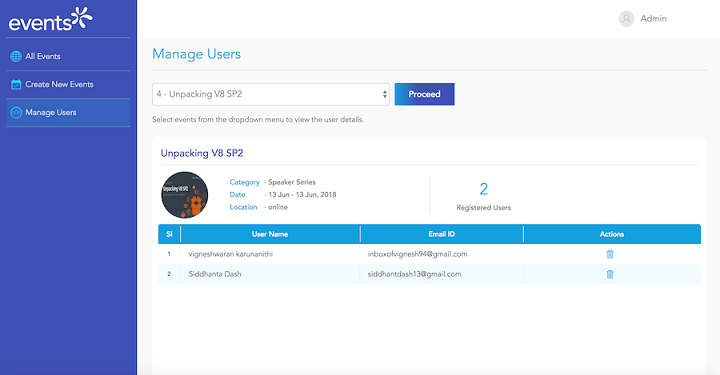
Manage Users
The Manage Users screen contains a drop-down which has the list of events present on the portal.
When you select an event from the list, the app shows the number of users who have registered for the event along with their name and email ID. The user listing also contains a delete button against each entry.
On click of Login, two options are provided:
- Consumer Login (Login using LinkedIn): This option enables consumer log-in and uses your LinkedIn credentials to log-in to the consumer app and register for the required events.
- Admin Login (Login with username and password): This option takes in username and password from the admin user, and authenticates it with the Kony User Store identity provider. Kony User Store identity service is managed by the event admin only, and hence the credentials set in the Kony User Store should only be limited to event admin(s).
Prerequisites
- A Kony account
- Download and install the latest edition of Kony Visualizer Enterprise. Kony Visualizer is a powerful yet easy-to-use integrated development environment (IDE) for developing, building, testing, debugging, and deploying omni-channel digital applications (apps) for multiple platforms—all from a single code base.
- Install the Visualizer App Viewer mobile app on your device. All mobile applications developed by using Kony AppPlatform can be previewed through the App Viewer. You can download the application by searching for “Kony Visualizer” from the following app stores:
- Google Play
- Apple App Store
- You can create a Kony Fabric cloud account or download and install the latest edition of Kony Fabric. Kony Fabric allows you to define the back-end to build native mobile apps for iOS, Android, and HTML5-based apps for modern browsers.
Note: Once you install and run Visualizer, you should see a notification banner asking you to update Visualizer to the latest version. Click on Update Now to start the update.
If you do not see this notification, you can manually check for updates from the Help menu.
Now that you have successfully installed Visualizer, it is time to experience the Events app. We will now walk you through the process of importing the Events app into Visualizer and publish the same in the cloud. You can then view the app on your device by using App Viewer.
Launch Visualizer
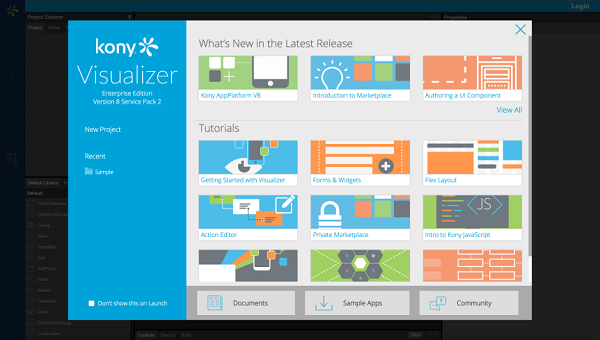
When you launch Visualizer, you can see the following screen.
Sign in to Kony AppPlatform Account
You need to sign in to Kony AppPlatform to experience all the features of the Events application. This application stores data and has authentication attached to it. The import and usage of the Events app in Visualizer would also require you to publish associated services on Kony Fabric. If you do not have a Kony AppPlatform account, you need to create one.
Follow these steps to create a Kony AppPlatform Account:
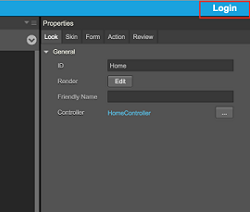
- Click Login from the upper right corner of the Visualizer screen.
- Follow the step-by-step instructions to activate your Kony account.
Now that you have created your Kony account, sign in to your account to ensure Visualizer is connected to the back-end system that is provided as part of the account.
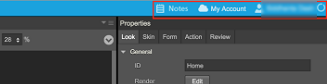
After you successfully sign in, your username is displayed at the upper right corner of the Visualizer screen.
Import the Application to Visualizer
- On the Marketplace menu, click Browse.
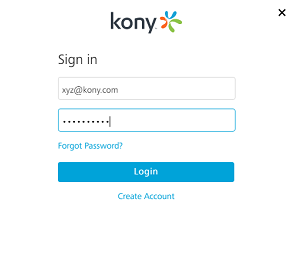
- A Login page appears. Sign in to your Kony account.
- Kony Marketplace window appears.
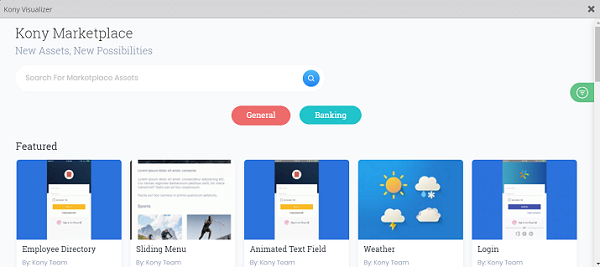
- Search for Events app in the search bar and click Import to Workspace. This imports the app into Visualizer.
- Once the application is imported to Visualizer, you can view the app name and associated forms in the project explorer as shown here.
.png)
The Events app is pre-packaged with associated Kony Fabric services. These services are automatically imported into Kony Fabric with completion of the steps mentioned above.
We will now walk you through the steps to setup and preview the app.