Device Policy
The primary purpose of a device policy is to control the end user device with respect to the business rules defined by the Administrator. Device policies are applied to a device set as per supported platforms.

From the Device Management section, click the Device Policy from the left panel. The Device Policy page appears with a list of the device policies. The list view displays a list of all the policies along with other details. You can search the device policies based on each column and also sort on each column.
In the Device Policies page, several default policies are available. Using these policies, you can understand various types of device policies that you can create. You can apply these policies on various groups, or users, or device sets.
Default device policies are associated with default device sets and to default group types. When a user is assigned to a group, devices enrolled by the user are associated with the corresponding device set and device policies.
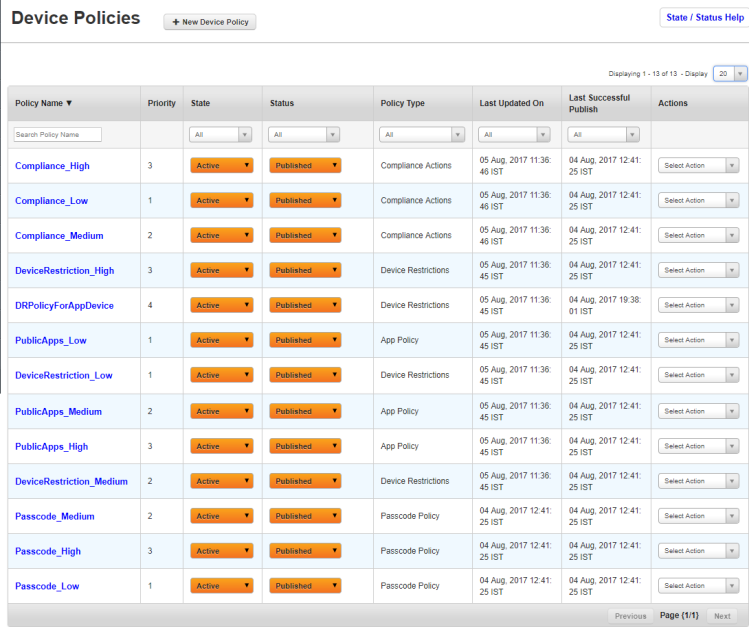
The Device Policy list view displays the following columns:
| Columns Description | |
|---|---|
| Policy Name | Displays the unique identification name of the device policy. The Device Policy details can be sorted on the Policy Name column. |
| Priority | Displays the set priority value of a policy, for example 1. |
| State | Displays the current state of the device policy, for example, Draft or Active. |
| Status | Displays the current status of the device policy, for example, Published or Unpublished. |
| Policy Type | Displays the type of policy, for example, Passcode. |
| Last Updated on | Displays the date when the Device Policy is last updated by the Administrator. |
| Last Successful Publish | Displays the date when the Device Policy is last published by the Administrator. |
| Actions | Displays the current action done with the device policy, for example, Copy device policy. |
You can scroll the grid view through Previous and the Next button.
You can perform the following activities from this page:
- Creating a New Policy
- Publishing a Device Policy
- Copying a Policy
- Changing Priority of a Policy
- Searching for Policies
- Updating Policy Details
- Updating Published Device Policy Details
- Deleting a Policy
- Unpublishing a Policy
Creating a New Policy
To create a new policy, you need to specify a unique name, type of the policy and an appropriate description for the same.
To create a new Device Policy, follow these steps:
- To open the New Device Policy window, click the + Create New Policy button next to the Device Policy label at the top of the page.

New Device Policy window appears. Enter details for the following fields:

- Policy Name: Enter a logical name for the device policy.When you create a device policy, it is recommended that you give it a unique name that clearly describes its purpose. If you enter the already existing policy name, system displays the error message.
- Policy Type: Select the required policy type from the drop-down list. By default it is set to Passcode Policy. The policy types are Passcode Policy, Device Restrictions, Email and Calendar, Network, Certificate Distribution, Webclips, App Policy and Compliance Actions. Each device policy comprises rules for all the supported operating systems.
- Description: Enter a precise description for the device policy. The description should accurately describe the features and functionality of your device policy.
- If you wish to update newly created device policy later, click the Create button. The Device Policy is created and the device policy appears in the list view.

- If you wish to update newly created device policy immediately, click the Create and Edit button. The newly created Device policy opens into Device Policy Details page. You can define the properties and rules of the Device Policy.
Click the Cancel button to close the window.
Publishing a Device Policy
Based on existing business rules, policies are published and then applied to appropriate device sets.
Once a new device policy is created, it is displayed in list view
By default, the newly created policy is in Draft mode and the Status is set to Unpublished. As a prerequisite, to make changes in State and Status of a device policy, you should own that device policy.
Device Policy State
State indicates the specific action state set to the device policy. It indicates the type of action that is done or needs to be done to the Device Policy. By default a device policy appears as a draft in list view. Until the Device Policy definition is completed and you submit the same to be active, the state remains as a draft. You review the draft mode and after confirming the details, change the State as Active. Once the State is converted to Active, you can publish the device policy.
Device Policy Status
Status indicates the readiness of the Policy to be used. Policy Status can be Unpublished or Published. When a new device policy is created, the Status is set to Unpublished. Once activated, you can publish the device policy with appropriate permissions.

You can change the state and status of the device policy from the list view and also from the device policy details page. You can change the State and Status of the device policy from the list view through options available under State and Status columns.
Note: If you face any issues with Internet Explorer 9, See Annexure.
The following procedure explains how to publish a device policy from the device policy details page.
To publish a Device Policy, follow these steps:
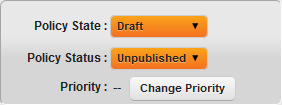
By default, a newly created Device Policy appears in Draft mode.
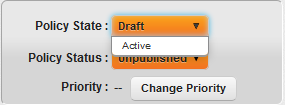
- Select the State as Active from the drop-down menu.
The State Change window appears.
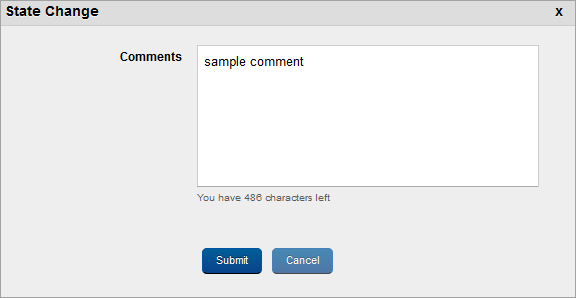
- Enter a valid comment justifying State Change in the Comments box.
- Click the Submit button to submit the Status change details. In the Confirmation message that appears, click OK to continue.
The State changes to Active.

- To publish the Device Policy, select the Device Policy Status as Published from the drop-down menu.
Status Change window appears.

- Enter a valid reason in the Comments box justifying publication of the device policy. Click the Submit button. In the Confirmation message that appears, click OK to continue.
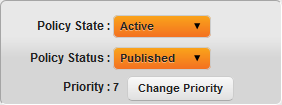
The Policy Status changes to Published.
Copying a Policy
If you wish to build a new device policy with similar conditions applied to an existing device policy, you can copy an existing device policy to create a new device policy.The copied policy comprises all the configurations provided in the parent policy. You can update the copied policy to generate a new policy definition.You also need to rename the copied policy as policy names are unique.
To copy a policy, follow these steps:

- Select the Copy Policy option from the drop-down menu under Actions column.
Copy Policy Window appears. Enter details for the following fields:
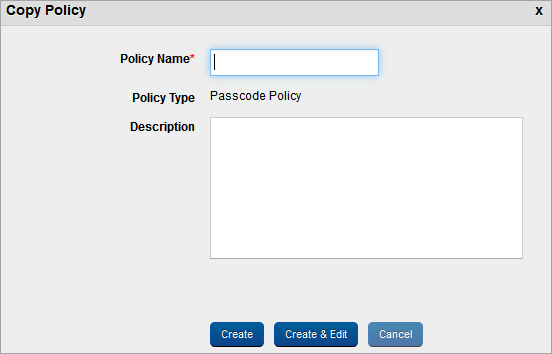
- Policy Name: Enter a unique name for the policy.
- Description: Enter a brief and appropriate description for the policy.
- Click the Create button.
The created policy appears in the list view.
- Click the Create and Edit button to do immediate changes in the policy.
The newly copied policy is in draft mode and status is set to unpublished.To change the priority of the policy, you need to publish it.
Changing Priority of a Policy
Only one policy can be applied to a device at any point of time. As devices may belong to multiple device sets, there is possibility of several policies are applied to the same device. To resolve this conflict, every policy has a unique Priority value. You must save a policy with a Priority value.Policies with lower Priority value are more important and override policies with higher Priority value, for example, 1>2>3 …
By default a newly created Policy is given the least priority. You need to change the policy priority to reflect its requirements. No two policies can have the same priority.You can change the priority only of a published policy.
You can change the priority of the policy from the two locations:
- From the List view under Actions column.

- From the Policy Details page through the Change Priority button.
The following procedure explains how to change the priority of a device policy from the device policy details page.
To change a policy priority, follow these steps:
- Click the required policy in the list view to open Policy Details page.
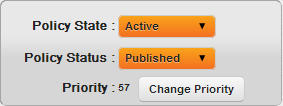
- Click the Change Priority button.
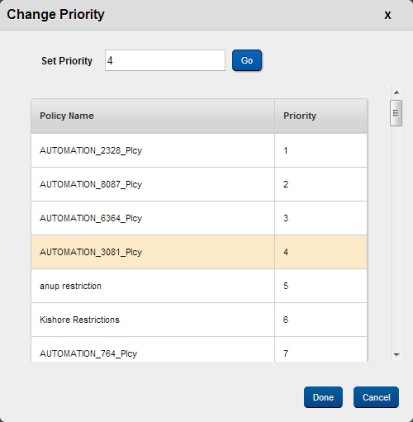
Change Priority Window appears. In current example the system generated priority is set to 57.
- Enter details for the following fields:
- Set Priority: Enter a value in Set Priority Text field. Click the Go button.
The set priority is highlighted with different color in the list view.
- Set Priority: Enter a value in Set Priority Text field. Click the Go button.
- Click the Done button to submit the priority value. In the Confirmation message that appears, click OK to continue.
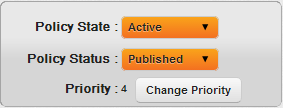
As per set priority, the priority value is set to 4.
- The changed policy value is reflected in policy details page next to Priority label.
Click the Cancel button to close the window.
Searching for Policies
You can search a desired device policy through search filters based on all grid columns. You can apply a single or a combination of search filters to define the search criteria and get the refined outcome. To search a device policy, follow these steps:

- Enter or select details for the following search filters:
- Policy Name: Enter partial or a complete device policy name in the Search Policy Name text field.
- Policy Type: Select the desired policy type from the drop-down list.
- Last Updated on: Select the period when device policy was last updated.
- Last Successful Publish: Select the period when the device policy was last published successfully.
- According to your search filters criteria, the list view is updated with respective policy details.
By default, the list view displays ten policies according to Display settings, which you can modify through the Display drop-down list.You can also scroll the list view through Previous and the Next button.
Updating Policy Details
Based on business rules, an active and published device policy can be applied to a device set. You may also require updating the settings for any or all the supported platforms through device policy details page.
Click the required device policy in list view, which you need to publish. The Device Policy Details page appears with four tabs. By default, Description tab is set to active. Other four tabs pertains to all the supported platforms.
If a limited administrator tries to modify a policy (Edit, Set as Approved/Draft, Publish/Unpublish, and Change Priority) and if the policy is applied to a device set that is not in the administrator's purview, an error alert displays that the administrator does not have permission to modify the policy.
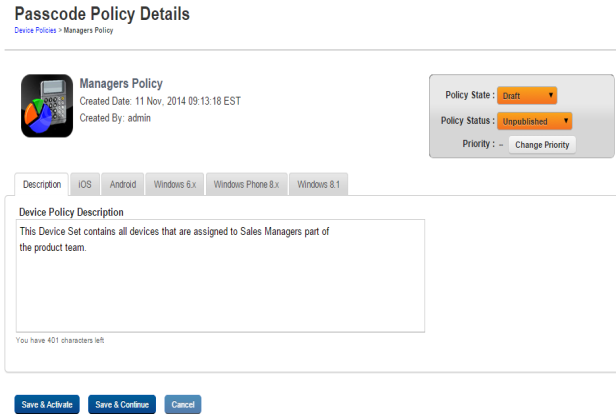
The Device Policy Details Page includes the following screen elements:
| Screen Element Properties Description | |
|---|---|
| Page Title | This is available on extreme right corner on top of the screen, for example, Device Policy Details. |
| Navigation Link | This link navigates you to main page, for example, click Device Policy>Device Policy Details link to navigate to Device Policy main page. |
| Priority | This label displays the priority of the policy. |
| Change Priority | You change priority of the policy through this button. |
| Policy Status button | You change the policy status through this button. |
| Policy State button | You change the policy state through this button. |
| Policy Name | Displays the policy name next to icon. |
| Created Date | Displays the date and the time when the policy was created. |
| Created By | Displays name of the Administrator who created the policy. |
By default Description, tab is set to active. The other four tabs pertain to each platform supported by the device policy.
To update a device policy, follow these steps:
- Description: Enter the appropriate description for the device policy or if required, update the existing content
- Other four tabs pertain to respective platforms, iOS, Android, Window 6.x and Windows 8. According to the selected policy type, tabs for the supported platforms are displayed. If required you may need to update the default settings for specific platforms.
You can specify details for the various policies in Policy Types:
- Passcode Policy
- Device Restrictions Policy
- Email and Calendar Policy
- Network Policy
- Certificate Distribution Policy
- Webclips policy
- Public App Policy
- Compliance Actions Policy
Updating Published Device Policy Details
If there are changes to the device policy definition, you may require to update the published device policy. After updating a published policy, the status remains Published but it undergoes a change of state to Draft state. To validate the carried out updates, you need to republish the device policy.
A stale state icon next to the corresponding device policy status is used to indicate that changes have been made to the definition of the device policy. Once all the active policies are updated and republished, the updates are pushed to all the active devices. For iOS, the updated Profile is pushed. For Android, the new update is conveyed to the Device Agent.
The state must be changed to active and published again for the changes to take effect. You can update the published device policies from the list view and also from the device policy details page.

In List view, you need to select the Republished option under Status column.
The following procedure explains how to update a published device policy from the device policy details page.
To republish a Device Policy, follow these steps:

Currently the device state is changed to Draft state.
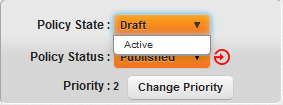
- Select the device state as Active from the dropdown list.
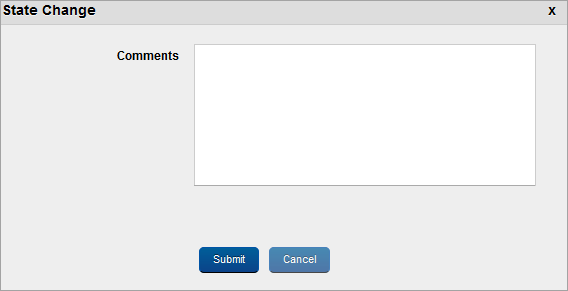
State Change window appears.
- Enter a valid reason for state change in the Comments text box.
- In the confirmation (State Change) message that appears, click OK to continue. The policy state changes to active.
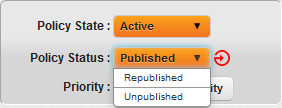
- Select the policy Status as Republished from the drop-down menu.

Status Change Window appears.
- Enter a valid reason for status change in the Comments text box.
- Click the Submit button to submit the status change details. In the confirmation (Status Change) message that appears, click OK to continue.
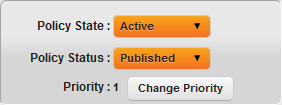
The Status changes to Published.
Deleting a Policy
You can delete only Unpublished Device policies. Once a device policy is deleted, it is removed from the Device Policy list.

To delete a device policy, follow these steps:
- To delete the required Device Policy, click the Delete option under the Actions column.
- In the confirmation message that appears, click Yes to continue.
- The system displays the Delete Policy confirmation message. Click OK to continue.
The Policy is no longer displayed in the list view.
Unpublishing a Policy
Unpublishing a Device Policy signifies that Policy is deactivated and its rules are no longer applicable to any device. Prior to unpublishing a device policy, it must be ensured that it is not applied to any device set.
To unpublish a Device Policy, follow these steps:

- To unpublish a Device Policy, select the Status as Unpublished from the drop-down menu.
Unpublished Device Policy window appears with a warning message.

- If the policy is not applied to any device set, click the Next Step button.

Step Two – Reassign Policy window appears.
-
Click the Submit button. In the confirmation message (Unpublish Policy) that appears, click OK to continue.

The Policy Status changes to Unpublished.
| Copyright © 2018 Kony, Inc. All rights reserved. |
