
Installing Kony EMM for Windows
The user interface for Kony EMM Installer displays information to a user, and prompts a user for information needed to install and configure EMM on the system. Kony EMM Installer user interface also displays information about the progress of system changes as they are installed.This section explains the installation on the Windows platform. You can upgrade Kony EMM on your system after installation.
EMM - New Installation
To install Kony EMM for Windows, follow these steps:
- Click
KonyEMM.exe fileas an administrator.Note: Ensure that firewall and antivirus software allows the
KonyEMM.exefile to launch.Note: If you are unable to open the .
exe. file, then follow the instructions given below:
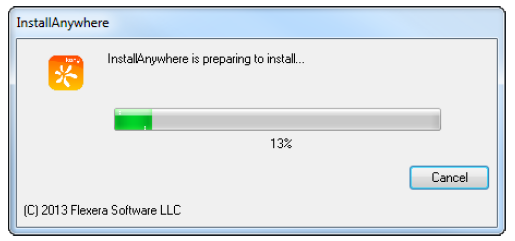
StartKonyEMM-X.X.X.X_GA.exe LAX_VM "<Java installed folder>\jre7\bin\java.exe"from the command prompt.The InstallAnywhere dialog appears. InstallAnywhere extracts the installer resources.
A dialog with the Kony logo appears.
- Read the instructions carefully before installing Kony EMM.
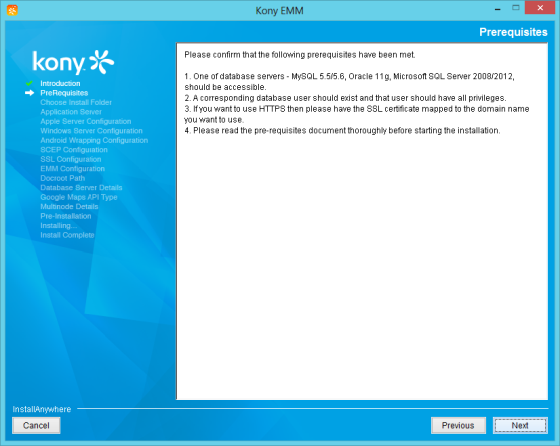
- Click Next to continue.
The License Agreement window appears.
- Select the "I accept the terms of the License Agreement" option after carefully reading the text.

- Click Next to continue.
The Get User Input window appears.
- Select the installation option. By default, it is set to New Installation.

- Click Next to continue. The Please Wait window appears.
The Kony EMM–Licensing Assistant window then appears.

Note: If you use a MAM Only or Store Only license, then you cannot use the SCEP services.
- Click Next to continue.
The Kony EMM-Licensing Assistant window displays the Location search field.
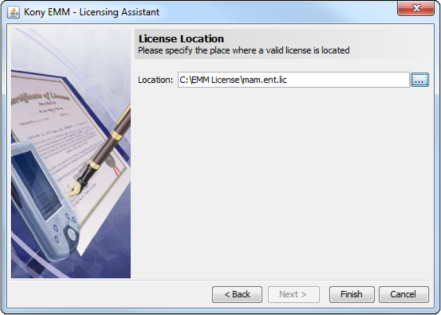
- Click Browse, select the license location, and click Finish.
The Please Wait window appears and informs a user that Kony EMM configuration is in progress.
Note: Kony EMM runs only with a valid license, which you must supply. The License File activates the installation, identifying which products you can run.Store the license file in an accessible location, such as in the default Downloads folder on your computer.
- Click Choose to browse the required folder from your system.
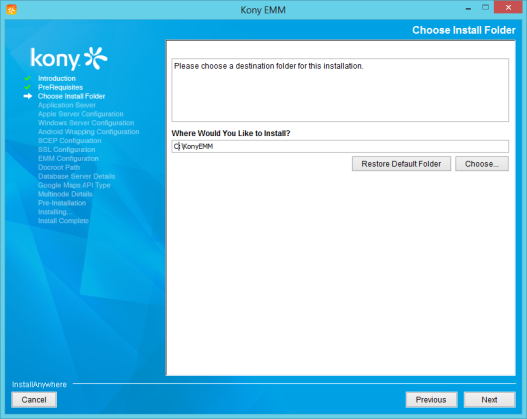
Note: Do not use spaces in the Install Folder name. If you use spaces, then the system displays an error message that the installation path is invalid.
Note: By default, the install location is in the C drive. However, a non-OS installed partition is recommended.
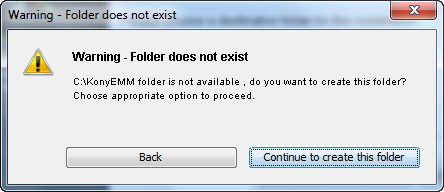
- If the selected folder is not available, then the warning message – Folder does not exist appears. The alert also asks if you want to create the folder.
- Click Continue to create this folder.
- Click Next to continue.
The Application Server window with default Tomcat HTTP Port number and default Tomcat Shutdown Port number appears.

Note: A user can define customer, specific valid ports. Ensure that Tomcat HTTP Port and Tomcat Shutdown Port are different and not in use.
- Click Next to continue.
The Application Server window displays JVM Maximum Memory and JVM Minimum Memory fields.
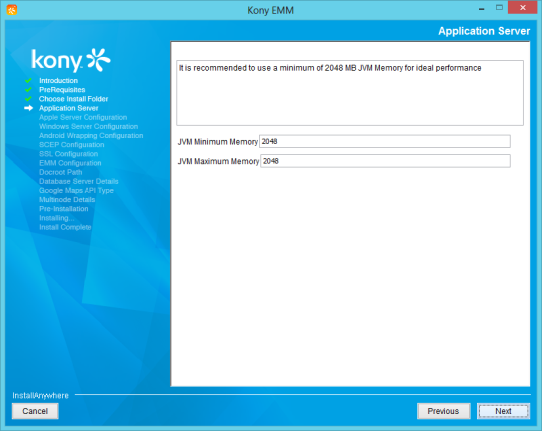
Note: Use a minimum of 2048 MB JVM memory for an ideal performance. This is the memory that EMM Server requires.
The Memcache Server Details window appears.
- Enter the Port Number to be used for Memcached.
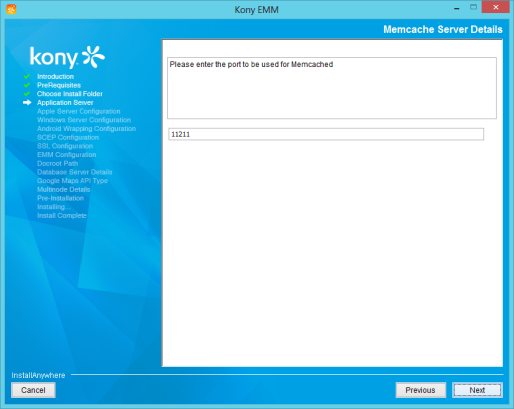
- Click Next to continue.
The Host name and IP address window appears.
- Enter details for the following fields:
- Frontend Hostname: Enter the host name URL that is mapped to this server. For multinode installation, enter the Load Balancer URL.
- Frontend HTTPS Port: Enter the Load Balancer HTTPS port number.
Note: The Frontend HTTPS port is the same as the Apache HTTPS port, if there is no load balancer. If a load balancer is present, it should be the load balancer's HTTPS port.
- Local System Private IP Address: Enter the local/private IP mapped to the server where installation is in progress.
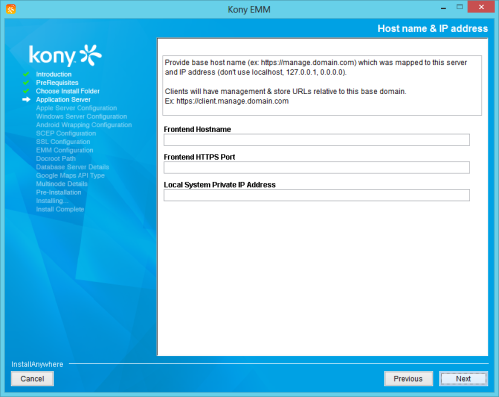
Note: The installation of Kony EMM might fail if there are network configuration and connectivity problems. Ensure that the IP address is valid (do not provide the public IP address of the server), and the Hostname URL is correct.
- Click Next to continue.
The Context root window appears.
Note: The Context element represents a web application, which is run within a particular virtual host. Each web application is based on a Web Application Archive (WAR) file, or a corresponding directory containing the corresponding unpacked contents.
You may define as many Context elements as you want. Each such Context must have a unique context path within a virtual host. In addition, a Context must be present with a context path equal to a zero-length string. This Context becomes the default web application for this virtual host, and processes all requests that do not match any other Context's context path. For example, if the context root is given as EMM, then the war file will be named as EMM and all the requests will be processed to EMM.
- Define your Context root.
- Click Next to continue.
The Apple server configuration window appears. You can configure a maximum of four Apple servers.The Apple server configuration window displays Host, Port, and Username fields.
- Enter Host details, Port number and Username for Apple server used for iOS wrapping.
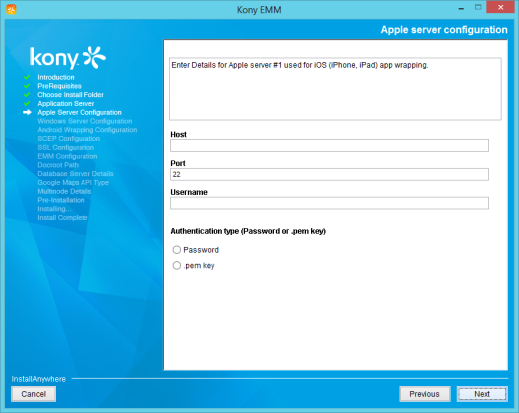
- Based on your requirement, choose the user authentication type as:
Password
- If you select the Password option, enter a password in the Password field.

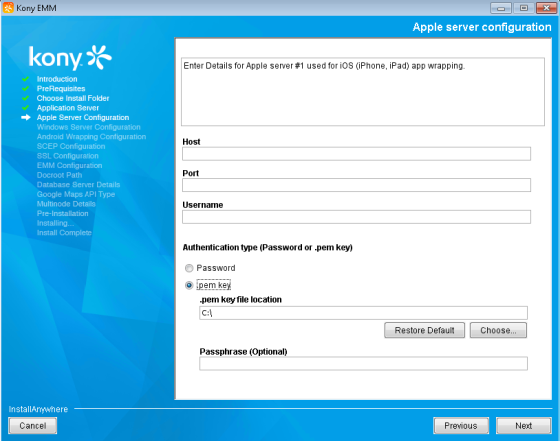
.pem key
- If you select the .pem key option, click Choose to browse the .pem key from your system.
Note: If your .pem key is associated with a passphrase, then you are prompted for the passphrase details.
- If the Apple Server is not reachable, the following warning message appears:

- Click Back to reset the server connection.
- Click Next to continue.
The Do you want to configure one more Apple server? query appears.
- Based on your requirement, select Yes or No.
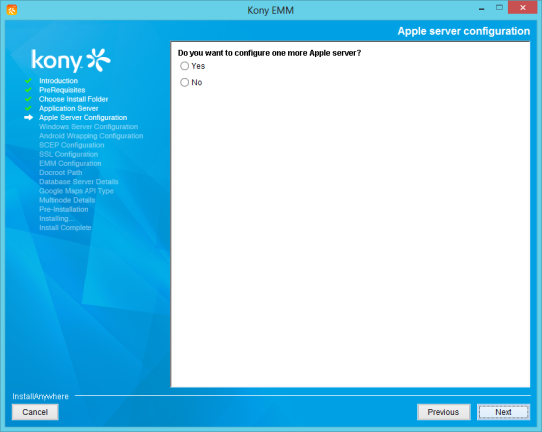
Note: If you select Yes, then Apple Server window #2 appears and prompts you to enter the appropriate details.You can configure four Apple Servers. If you click No, the Windows Server Configuration panel appears
- Select the option, and click Next to continue.
The Windows Server Configuration window appears.
- Enter Host details, Port number and Username for Windows server used for app wrapping.
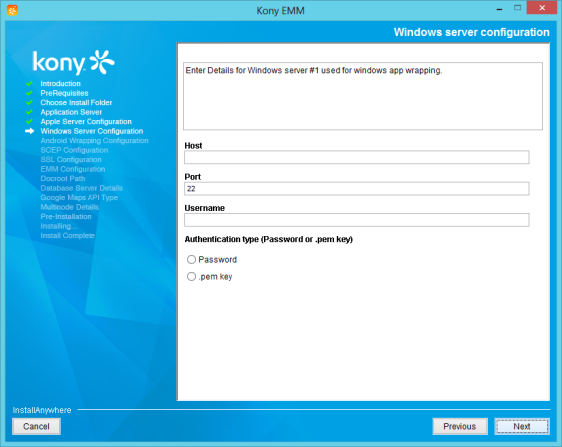
- Based on your requirement, choose the user authentication type as:
Password for Windows Server Configuration
- If you select the Password option, then enter a password in the Password field.
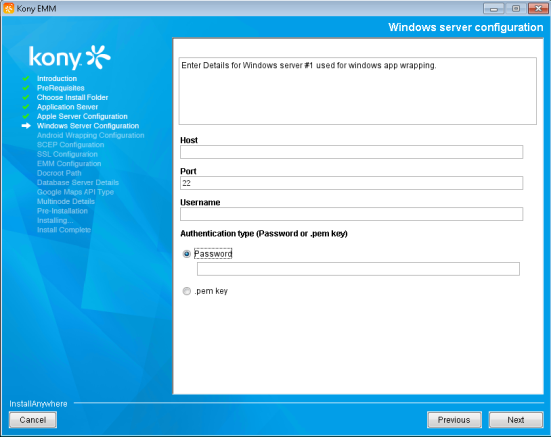
.pem key for Windows Server Configuration
- If you select the .pem key option, then click Choose to browse the .pem key from your system.
The Do you want to configure one more Windows server? query appears.
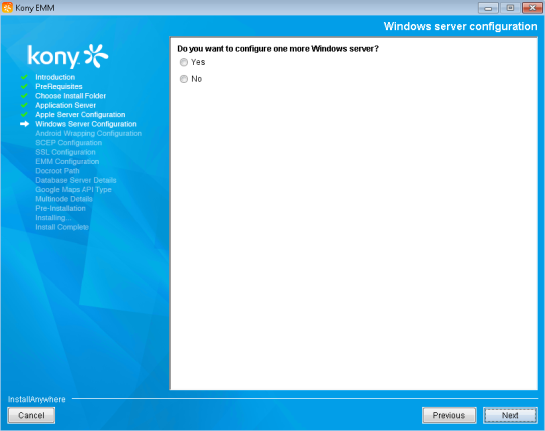
Note: If you select yes, then Windows Server window #2 appears and prompts you to enter the appropriate details.
- If you select No, click Next to continue.
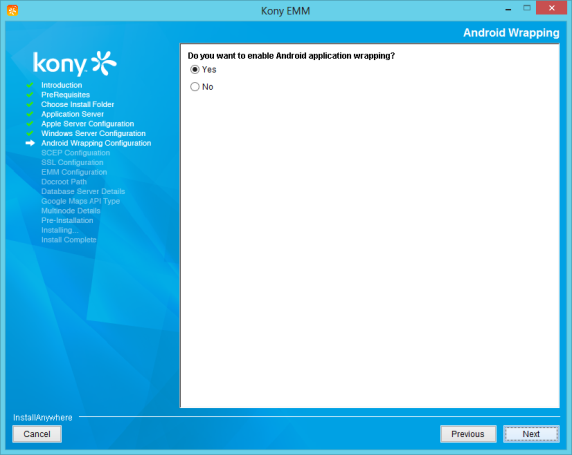
The Android Wrapping window appears.
-
Select the yes option to continue.
The SCEP Configuration window appears. All the certificates required by iOS devices during enrollment are distributed through the SCEP server. If you select the No option,, then you will not be able to enroll any iOS devices.
Note: The SCEP configuration option appears only when the user has enabled the iOS wrapping and or Android wrapping.
Note: If you do not select Enable Android Wrapping, then EMM cannot provide support to Android devices.
- Select the yes option to continue.
The SCEP Configuration window appears with the entry fields.
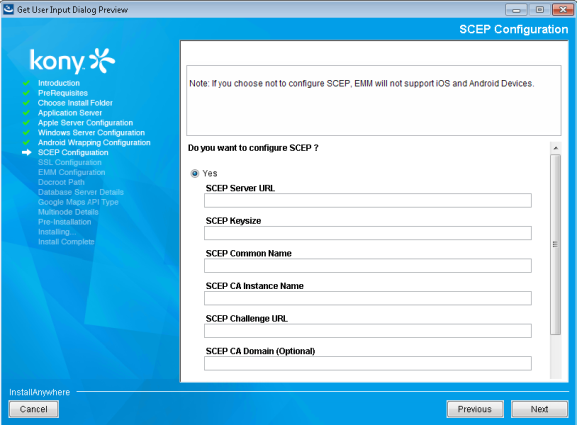
- Enter details for the following fields:
- SCEP Server URL
- SCEP Keysize
- SCEP Common Name
- SCEP CA Instance Name
- SCEP Challenge URL
- SCEP CA Domain (Optional)
- SCEP CA Username
- SCEP CA Password
- Click Next to continue.
The Please Wait window appears, alerting the user that KonyEMM configuration is in progress.
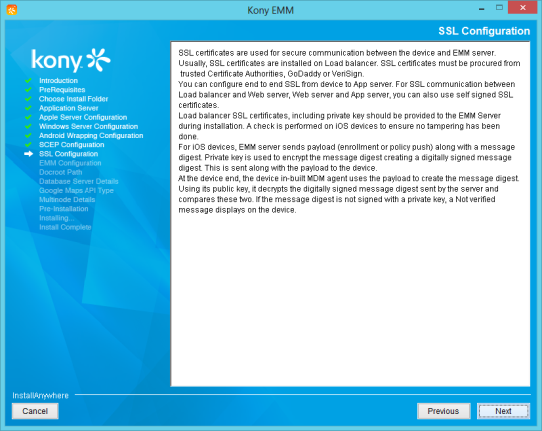
The SSL Configuration statement window appears.
- Click Next to continue.
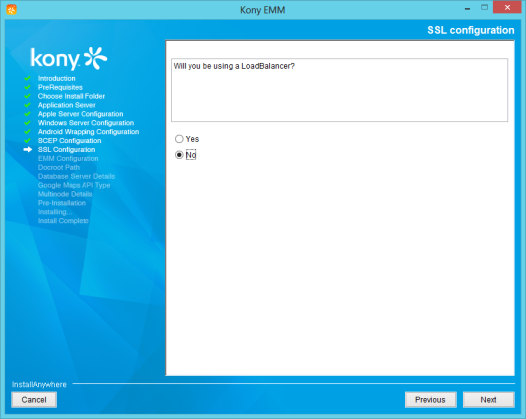
The SSL Configuration window appears.
- To use LoadBalancer, select the option as Yes. By default, the option is set to No.
- You need LoadBalancer Certificates to enroll iOS devices. Click Choose to browse the following files from their location. Ensure that you select the appropriate certificates.
- LoadBalancer SSL Cert File
- LoadBalancer SSL Key File
- LoadBalancer SSL Chain File
Note: LoadBalancer SSL certificates, including private key, should be provided to EMM Server during installation. A check is performed on iOS devices to ensure no tampering has occured.For iOS devices, EMM Server sends payload (enrollment or policy push) along with a message digest. Private key encrypts the message digest creating a digitally signed message digest, which is sent along with the payload to the device.
At the device end, the device built-in MDM agent uses the payload to create the message digest. Using its public key, it decrypts the digitally signed message digest sent by the server and compares these two. If the message digest is not signed with a private key, a Not verified message is displayed on the device.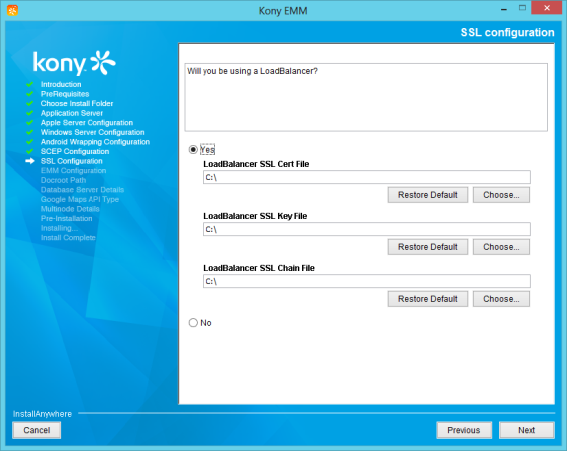
- Select the No option, if you do not want to use LoadBalancer.
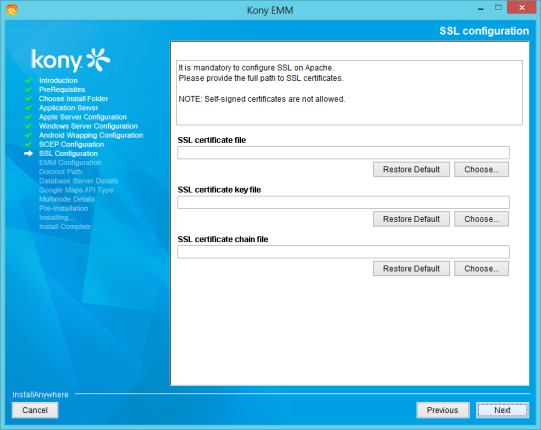
- To configure SSL on Apache, click Choose to browse the following files from their location. Ensure that you select the appropriate certificates.
- SSL certificate file
- SSL certificate key file
- SSL certificate chain file
Note: A publicly signed SSL certificate must be available for import during the installation. Self-signed certificates are not allowed.
- Click Next to continue.
The SSL Configuration window appears with default values for the Apache HTTP Port and the Apache HTTPS Port.
- Based on your requirement, you can enter the values for the following fields:
- Apache HTTP Port: Enter the HTTP Port number.
- Apache HTTPS Port: HTTPS.This port number will be same as the Frontend HTTPS port, if you do not want to configure LoadBalancer.
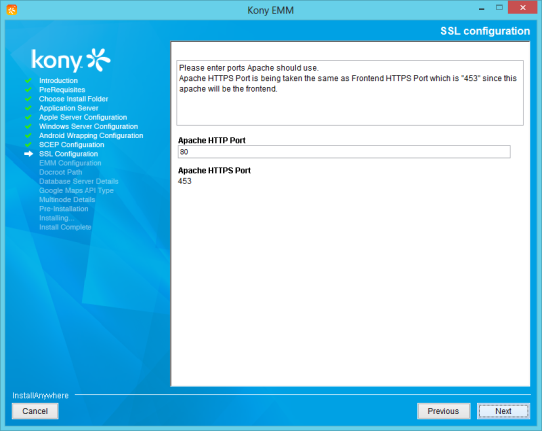
- Click Next to continue.
The EMM Configuration Path window appears.
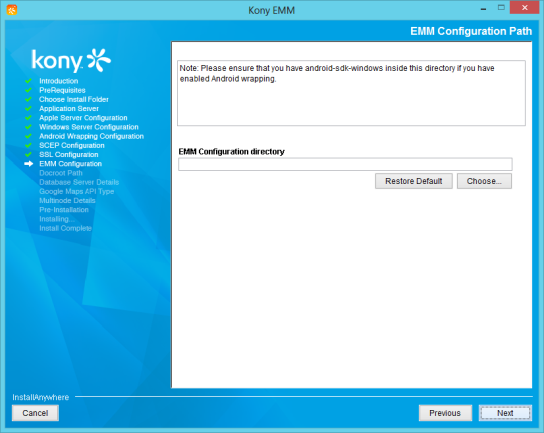
Important: Ensure that you have android-sdk-windows in this directory if you have enabled Android wrapping.
- If the Android SDK is not found, then the warning message Error –android –sdk- windows dialog appears. The alert also asks you to go back or abort the installation.
- Click Choose to browse the EMM Configuration directory.The path you define stores all dynamic content created in EMM application, such as device details, device sets, app details,categories, and settings.
Important: Do not include spaces in the name of EMM Configuration Directory. If you include spaces, an error message will appear to warn that the installation path is invalid.
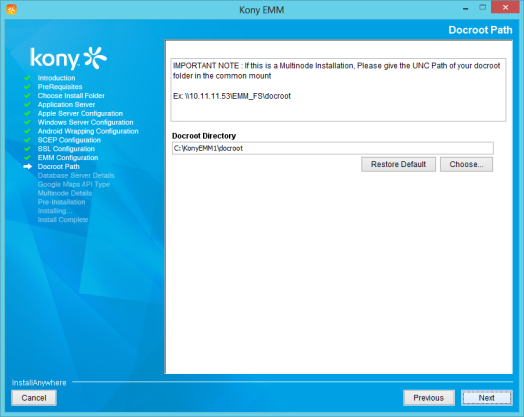
The Docroot Path window appears.
- Click Choose to select the desired path - for example <installation folder>/docroot.For multinode installation, enter the UNC path of your docroot folder in common mount, for example
The selected path will appear in the Docroot Directory field.
The docroot or docbase is the storage location which EMM uses to store all admin or user uploaded content. For on-premises installations, the docroot is a hard-mounted location within the application server; a local file-system or an SAN mounted device. The docroot can be hosted on an Amazon Simple Storage Service.
The docroot comprises of four separate directories for the EMM modules: Store, MAM, MDM, MCM, MDM., and emm_common.
For local file systems, Static resources like screen shots or header images or icons are navigable if one is familiar with directory structure and the generated file names. There are no access regulations. Access to secure assets like binaries are restricted via Apache through secure URLs over web. Ensure that unintended users do not have file system read/write permissions. Access to critical assets like certificates are completely blocked. They may only be accessed internally and never by a client.
For Amazon Simple Storage Service, access to static resources is through static URLs available publicly. For secure assets like binaries, access is restricted through secure URLs generated with an expiring schedule. Links to critical assets like certificates are never generated. These are only used internally via secure Amazon APIs.
- Click Next to continue.
The Database server details window appears.
- Select the required database.
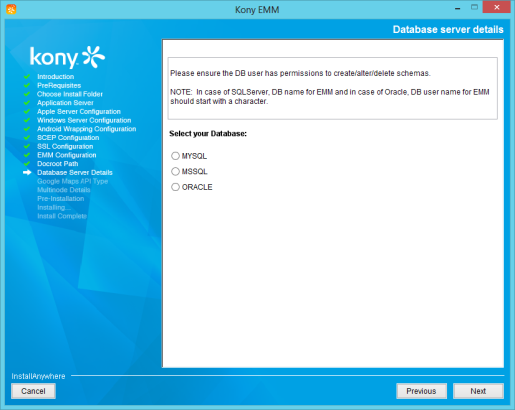
- Based on your requirement, choose the database as:
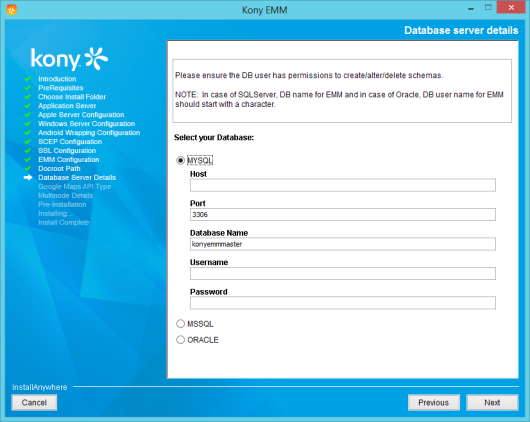
MySQL
- If you select database MySQL, enter details for the following fields:
- Host: Enter the host name used while creating the database user. By default, the host name is set as localhost.
- Port: Enter the Port number. By default, it is set as 3306.
- Database Name: By default, the Database Name is set as konyemmmaster. The name konyemmmaster was created during preinstallation.
- Username: Enter the Database Administrator (DBA).
- Password: Enter the database password of Database Administrator.
Note: You might receive warning messages regarding database connection failures while using existing databases. Ensure your MySQL version is greater than 5.5.
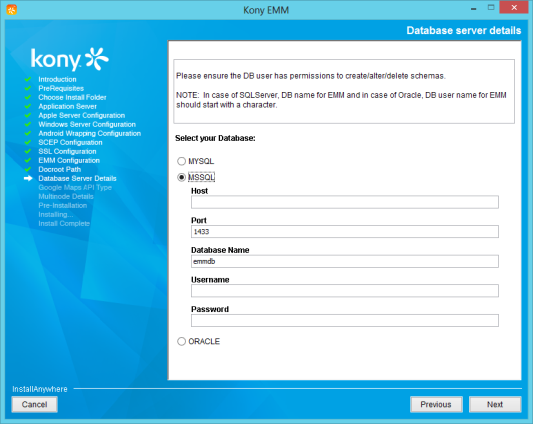
Microsoft SQL
- If you select the database as Microsoft SQL, then enter details for the following fields:
- Host: Enter the host name used while creating the database user. By default, the host name is set as localhost.
- Port: Enter the Port number. By default, the Port number is set as 1433.
- Database Name: By default, the database name is set as emmdb.Emmdb was created during preinstallation.
- Username: Enter the user name of the DBA.
- Password: Enter the database password of the DBA.
Note: You might receive warning messages regarding database connection failures and using existing database. Ensure that an instance of the SQL Server is running on the host and accepting TCP/IP connection at the port.
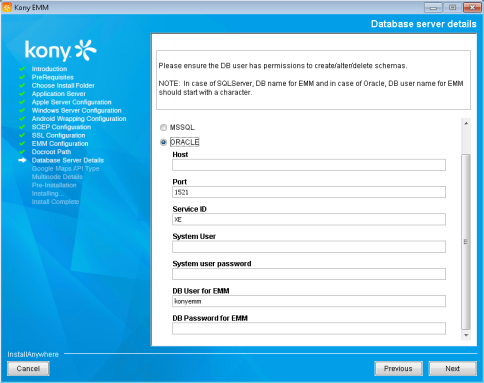
ORACLE
- If you select the database as Oracle, enter details for the following fields:
- Host: Enter the host name used while creating the database user. By default, the host is set as localhost.
- Port: Enter the Port number. By default, the port number is set as 1521.
- Service ID: By default, the Service ID is set as XE.
- System User: Enter the user name of the DBA.
- System User Password: Enter the database password of DBA.
- DB User for EMM: Enter your desired databse user name for EMM. By default, the user name will be set as konyemm.
- DB Password for EMM: Enter your desired databse password for the user you created.
Important: Before installing the Oracle database, the following Database Tablespaces should be created.
EMM_DATA
EMM_INDEX
EMM_LOB_DATA
If database/schema already exists, the system will display the following warning.
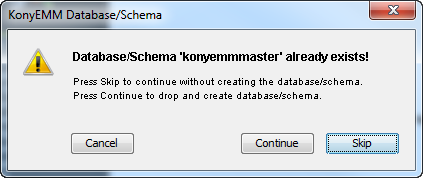
Note: Based on your requirement, you can click Skip without creating the database/schema. You can click Continue to drop and create database/schema.
Note: You might receive warning messages regarding database connection failures using existing database. To ensure database connectivity, follow these steps:
The TCP/IP connection to the local host and port fails. Ensure to enter correct credentials to ensure database server connectivity.
Make sure that the TCP connection to the port is not blocked by a firewall..The Please Wait window appears, advising a user that KonyEMM configuration is in progress.
- Click Next to continue.
The Google Maps API license type window appears.
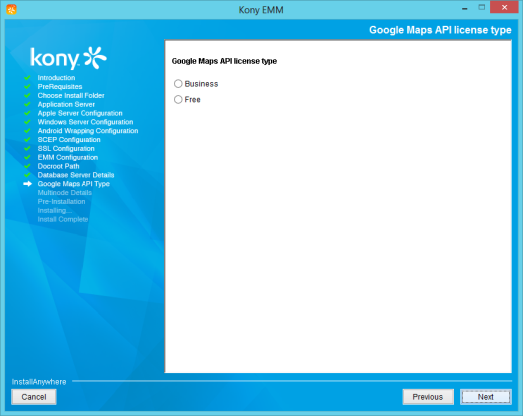
Note: Google Maps application is essential to provide features, such as the identification ofi device location and geo-fences. If you want to have these features, you must provide an appropriate license and client ID details.
Refer to the following tutorial to generate the maps key
https://developers.google.com/maps/documentation/javascript/tutorial
Based on a customer account, use the business key or free key.
For the business option,enter the client ID. For the Free option, enter the Maps key. - Based on your requirement, choose the Google Maps API License type as:
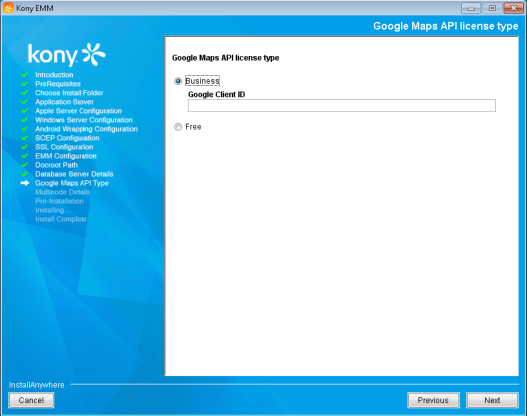
Business
- If you select the Business option, then enter the client ID in Google Client ID.
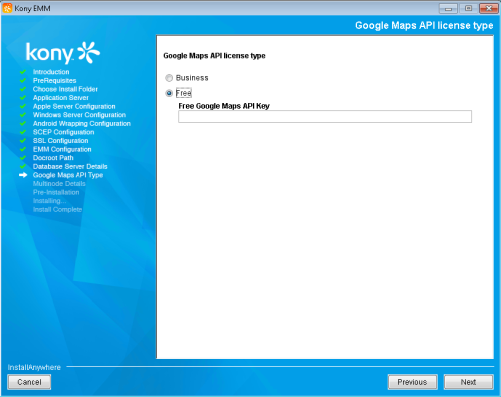
Free
- If you select the Free option, then enter the API key of Free Google maps in Free Google Maps API Key.
- Click Next to continue.
The EMM Administrator Details window appears.
- Enter details for the following fields:
- First Name: Enter your first name.
- Last Name: Enter your last name.
- Email ID: Enter your email-ID.
- Username: Enter your desired EMM console user name. By default, it is set as admin.
- Password: Enter your desired EMM console user password for the user you want to create.
Note: The user name and the password provided are the admin login credentials of the EMM Management Console.

- Click Next to continue.
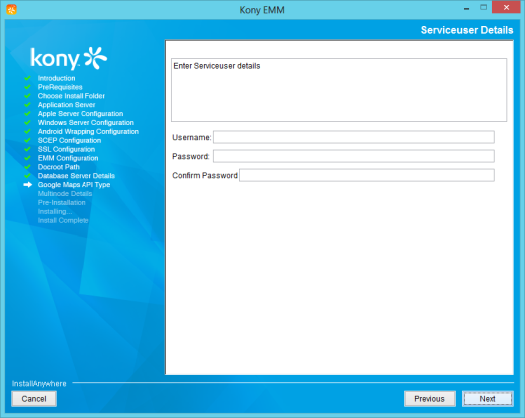
The Serviceuser Details window appears.
-
Enter details for the following fields:
- Username: Enter the service user name.
- Password: Enter a password.
- Confirm Password: Reenter the password to confirm it.
Important: A service user manages the services. The service user should be present on system. The EMM Installer will not create the service user.
- Click Next to continue.
The Please Wait window appears, alerting the user that Kony EMM configuration is in progres.
The Service Base Name window appears.
Note: Based on the service base name, services are installed. For example, if the service base name is KonyEMM , then services are installed as KonyEMMApache or KonyEMMTomcat1 and so on according to the number of Tomcat servers.
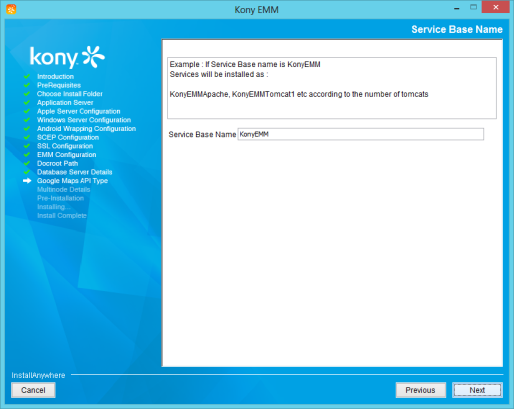
- Click Next to continue.
The Please select an option window appears
- For single node installation, select the Default option. To customize the default setup, select the Custom option for multinode installation.

- Click Next to continue.
Multinode Installation
Important: Before you go ahead with multi-node installation, ensure that User Account Control (UAC) is disabled on all the nodes you want to install Kony Management suite on. If you do not disable UAC, you may encounter UAC validation error. For information on how to disable UAC, see Microsoft documentation or see opensource documentation.
Important: Windows multi-node installation needs Powershell Remoting to be set up to communicate with other Windows instances. The Powershell Remoting topic is covered under the header about_Remote_Troubleshooting in Microsoft help topics. Users need to enable Powershell Remoting before using the EMM installer for multi-node installation on Windows.
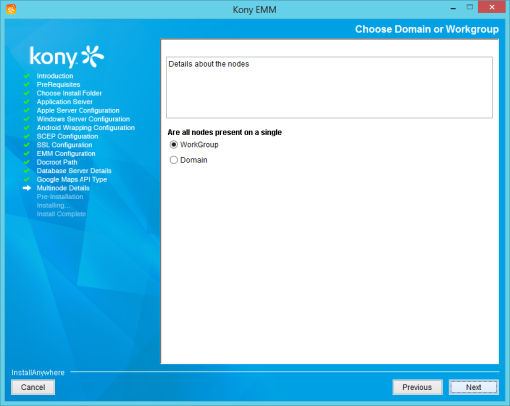
The Choose Domain or WorkGroup window appears.
- Based on the availability of all nodes in a single WorkGroup or Domain, select the WorkGroup or Domain option.By default the option is set to WorkGroup.
The Enter details for Local Node window appears.
- Enter the number of Tomcat servers you need to configure on local box in Number of Tomcat.

- Click Next to continue.
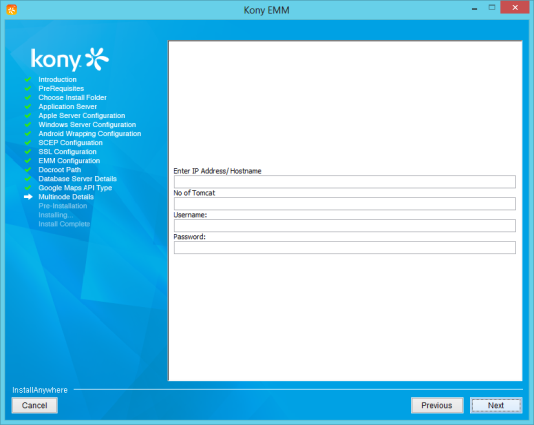
- Enter the details for the following fields:
- Enter IP Address: Enter the private IP address of the remote node.
- Number of Tomcat: Enter the number of Tomcat servers servers that you need to configure on specific node.
- Username: Enter the user name of the remote systems.
- Password: Enter user password of the remote systems.
Once the configuration is complete, system displays the Another Node dialog, asking if the administrator wants to configure an additional node.

- If you want to configure an additional node, click Yes to continue.
The system displays the entry fields to enter details for the additional Tomcat Server configuration. Once the configuration is complete, the system again displays the Another Node dialog, asking if the administrator wants to configure an additional node.
- Select No if the multinode configuration is complete.
- Click Next to continue.
The Pre-Installation Summary window appears.
- Review the details provided for installing the EMM Server. If you want to change other settings, you can click Previous, to navigate to the window, where the modification is required.
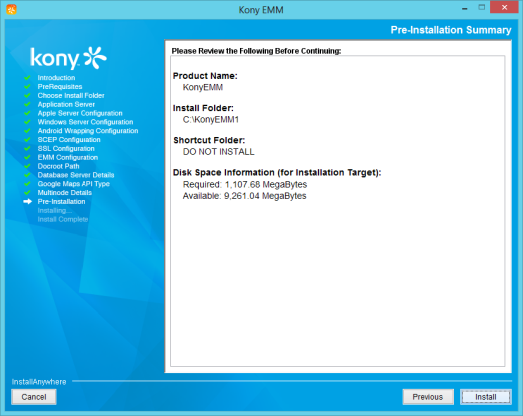
- Click Install to continue.
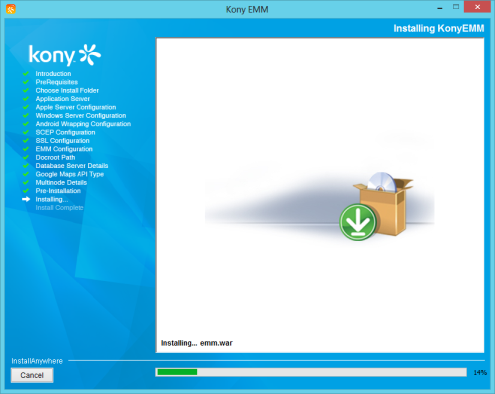
The Installing Kony EMM window appears. It displays the installation in progress message.
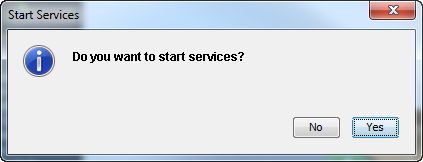
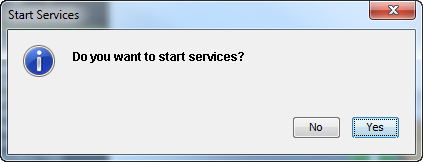
- After installation, the Start Services dialog appears, asking to start services.
- Click Yes to continue.
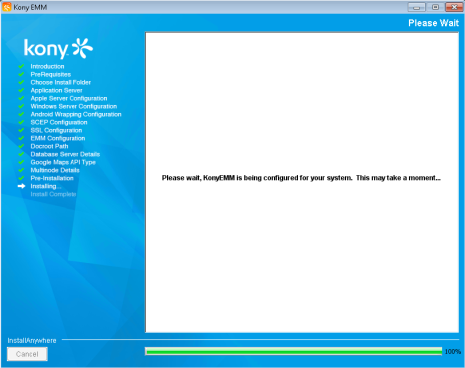
The Please Wait window appears. It displays the installation in progress message.
- Once the installation completes, the Install Complete window appears with the confirmation message.

- Click Done to close the window.
EMM - Upgrade Installation
This section explains the upgrade procedure on a Windows platform.
Based upon the type of installation you have, the upgrade procedure is two types.
Important: After upgrading from one version of Kony Management Suite to another version of Kony Management Suite, ensure that all Enterprise Apps (that launch directly from the springboard) are re-wrapped and updated on user devices. If you do not re-wrap, app will not launch.
Follow these steps to upgrade your Kony Management Suite for Windows. It ensures service interruption is kept to a minimum and safeguards all the tools to restore your original installation in case of a failure.
Important: You need to upgrade Kony Management suite (EMM) installation from the master node.
Important: Before you go ahead with multi-node upgrade, ensure that User Account Control (UAC) is disabled on all the nodes you want to upgrade Kony Management suite on. If you do not disable UAC, you may encounter UAC validation error. For information on how to disable UAC, see Microsoft documentation or see opensource documentation.
Important: Windows multi-node installation needs Powershell Remoting to be set up to communicate with other Windows instances. The Powershell Remoting topic is covered under the header about_Remote_Troubleshooting in Microsoft help topics. Users need to enable Powershell Remoting before using the EMM installer for multi-node installation on Windows.
Automated Installation (Single node, multi-node)
Prerequisites
- You can download the EMM Installer from http://community.kony.com/downloads/manual with your credentials. Navigate to the Kony Management section and click on the specific release related files you want to download. For example, if you want to download Kony Management 3.0, click on the Kony v3.0 GA tab.
- Ensure that you have a previous version of EMM installed.
- Ensure that
KonyEMM.exe (x.x)file has execute permission.
To upgrade Kony EMM for Windows, follow these steps:
- Execute the KonyEMM.exe file as an administrator.Files required for the EMM Console installation are extracted.
Note: Ensure that firewall /anti-virus allows to execute the file.
- The InstallAnywhere dialog appears.The InstallAnyWhere dialog displays information about the progress of the software installation at run time.

A dialog with Kony logo appears.
- Click Next to continue.
- Read the instructions carefully before installing Kony EMM.
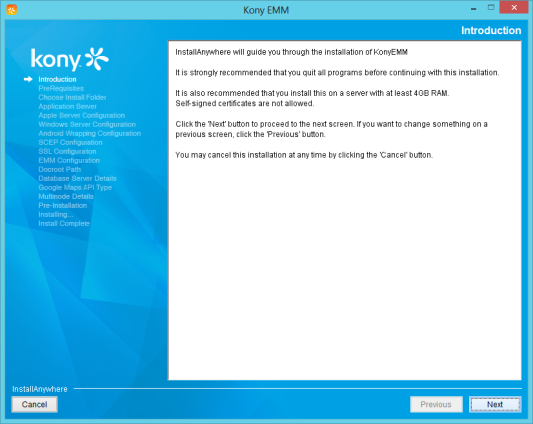
- Click Next to continue.
The License Agreement window appears.
- Select the I accept the terms of the License Agreement option.
Note: To activate the License Agreement option, carefully read the entire text.

- Click Next to continue.
The Get User Input window appears.
- Select the Upgrade option. By default, it is set to New Installation.
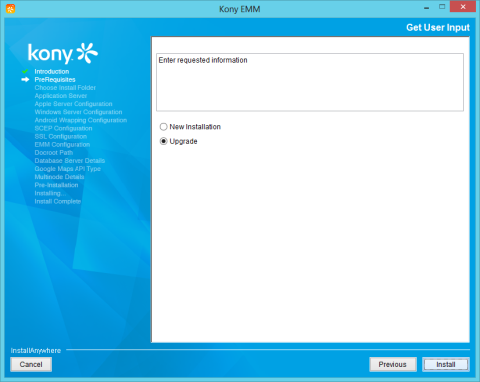
- Click Next to continue.
The Installation Directory window appears.
- Click Choose to browse the required folder from your system, or enter the path for the EMM Installation that needs to be upgraded.
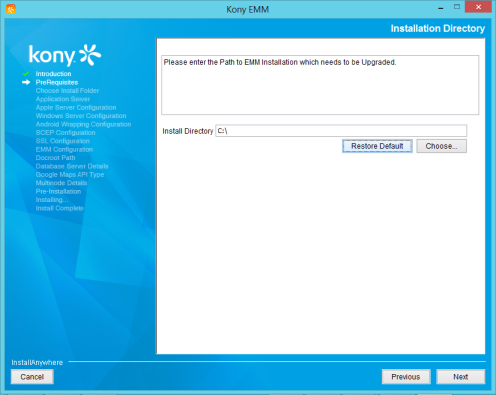
- Click Next to continue.
The Current Installation Summary window appears.
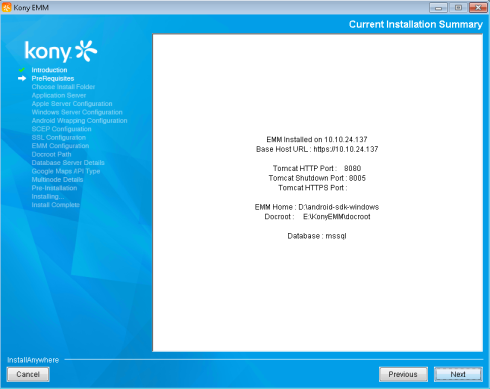
- Click Next to continue.
The Please Wait window appears, informing a user that KonyEMM configuration is in progress
The Apple server #1 Details window appears.
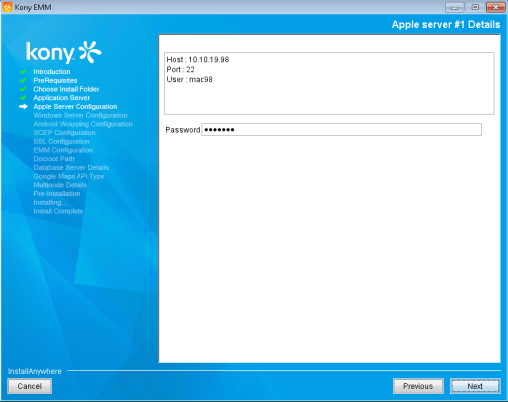
- Enter the password.
- Click Next to continue.
The Please Wait window appears, informing a user that KonyEMM configuration is in progress.
The Windows Server #1 Details window appears.
- Enter the password.
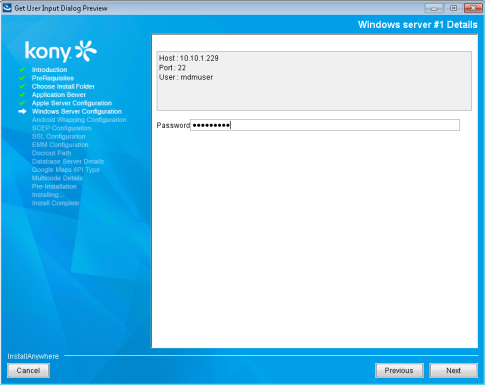
- Click Next to continue.
The SCEP Configuration window appears. All the certificates required by iOS devices during enrollment are distributed through the SCEP server. If you select the No option,, then you will not be able to enroll any iOS devices.
Note: The SCEP configuration option appears only when the user has enabled the iOS wrapping and or Android wrapping.
Note: If you do not select Enable Android Wrapping, then EMM cannot provide support to Android devices.If Android wrapping is supported, then choose the parent directory of Android SDK.
-
Enter details for the following fields:
- SCEP Server URL
- SCEP Keysize
- SCEP Common Name
- SCEP CA Instance Name
- SCEP Challenge URL
- SCEP CA Domain (Optional)
- SCEP CA Username
- SCEP CA Password
- Click Next to continue.
The Please Wait window appears, informing a user that KonyEMM configuration is in progress.
The Database Details window appears.
- Enter the password.
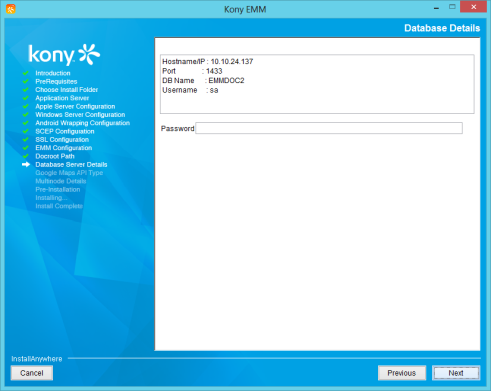
- Click Next to continue.
Important: System initiates the database backup process. Dump command is mandatory for taking backup of database(s) through installer. If database dump command is not found, restart the upgrade process with this command in path or take database backup manually.
The Please Wait window appears, informing a user that KonyEMM configuration is in progress.
The Database backup window appears.
- Enter the directory path.
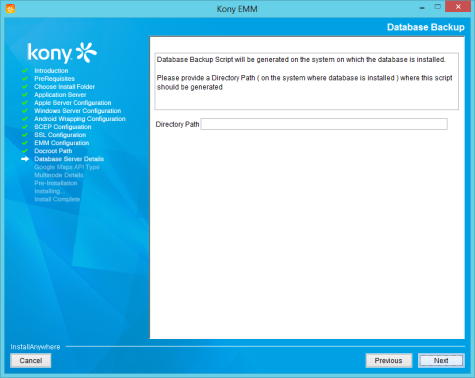
- Click Next to continue.
- The Database Backup window appears asking if to proceed or stop the backup process.
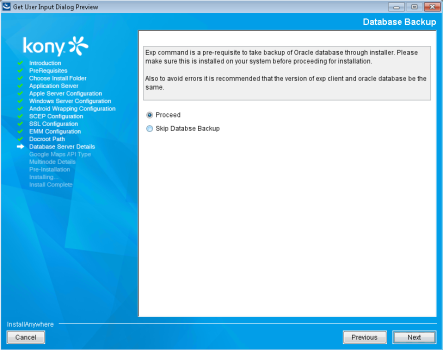
- Click Next to continue.
The Please Wait window appears, informing a user that KonyEMM configuration is in progress.
- Click Install to continue.
The Installing Kony EMM window appears.

The Start Services dialog appears, asking, if you want to start services?
- Click Yes to continue.
- Once the installation completes, the Install Complete window appears with the confirmation message.

- Click Done to close the window.
Important: If you are upgrading to 3.5 and DB is MSSQL, replace the entry below in the catalina.properties file.
Old: HIBERNATE.DIALECT=org.hibernate.dialect.SQLServer2008Dialect
New: HIBERNATE.DIALECT=com.kony.persistence.hibernate.core.EMMSQLServerDialect
Once you have upgraded the EMM server, upgrade the Launchpad app in the EMM management console. For more information, see Post Upgrade Tasks.
Manual Multi-node Installation
Upgrading Multi-node installation/instance involves six different steps.
- Download artifacts
- Stop Services
- Backup files
- Place downloaded files in appropriate folders
- Run DB scripts
- Restart Servers
Important: To add the Windows App management feature, you need to setup Windows 2012 Server. See the Windows 2008 2012 Server setup section for more details.
Important: For Windows multi-node installation, systems are recommended to be present in the same network.
Download artifacts
Download the artifacts below in a zip format from Kony.You may have to login using your kony developer portal login credentials. You can find all artifacts under EMM multi-node upgrade artifacts section.
- emm.war
- emm_static.zip
- wrap-android.zip
- wrap-ios.zip
- dbscripts.zip
- apps.zip
Stop services
You need to stop the following servers that are relevant for this upgrade.
- Tomcat Service
- Apache Service
- Memcached Service
The preferred sequence is to stop Apache first, followed by Tomcat and Memcached.
Backup of all relevant files and folders
Back up your files before replacing them, in case errors occur during the upgrade. Rename all files and folders with an extension upgrade_backup.
Navigate to /<Installation Folder>, make another copy of the docroot folder and rename it as docroot_upgrade_backup.
Important: You will not be able to rollback the upgrade if you do not backup your files and folders.
Placing files and folder at appropriate locations
Important: You should replace files and folders in all your nodes (individual servers)
You must place all downloaded files in their appropriate locations.
- emm.war (
/<Installation Folder>/apache-tomcat-7.0.42/webapps) - emm_static.zip (
/<Installation Folder>/emm-static) - Wrap-android.zip (
<EMM_HOME>/emm_config/) - wrap-ios.zip (
<User_HOME>/wrap-ios folder) - dbscripts.zip
- apps.zip
Replace emm.war, emm_static.zip,wrap-android.zip, and wrap-ios.zip files in their respective locations.
For emm.war
- Copy the emm.war file from the location you have downloaded the files.
- Navigate to
/<Installation Folder>/apache-tomcat-7.0.42/webappsfolder. - Place the emm.war file in it.
For emm_static.zip
- Copy the emm_static.zip file from the location you have downloaded the files.
- Unzip emm_static.zip in the
/<Installation Folder>/emm-staticfolder
For wrap-android.zip
- Extract the wrap-android.zip file
- Copy KONY_POLICYINJECT_ANDROID, tools, and tools-mac folders from the extracted files.
- Navigate to
<EMM_HOME>/emm_config/, and place all copied files in the emm_config folder.You must not modify any other files or folders in the emm_config folder.
For Wrap-ios.zip
On your MAC machine,
- Copy the wrap-ios.zip file from the location you have downloaded the files.
- Navigate to
<User_HOME>/wrap-ios - After unzip, the folder path will be as
<User_HOME>/wrap-ios/EMM-GA-2.5.5 - Navigate to
<User_HOME>/wrap-ios/EMM-GA-2.5.5/scripts.sh filesand make them compatible with linux using dos2unix tool.Chmod u+x scriptsInitiation.shdos2unix scriptsInitiation.sh.
/scriptsInitiation.sh
For wrap-win.zip
On your Windows 2012 server machine,
- Copy the wrap-win.zip file from the location where you downloaded the files.
- Navigate to <User_HOME>/folder and extract files from wrap-win.zip. The folder path of extracted files is <User_HOME>/wrap-win/EMM-GA-x.x.
- From your list of installed programs, open Cygwin terminal.
- Navigate to
<User_HOME>/wrap-win/EMM-GA-x.x/scripts. Run the following commands to provide u+x permissions and to convert .sh files and make them compatible with linux using dos2unix tool.Chmod u+x scriptsInitiation.sh
dos2unix scriptsInitiation.sh
./scriptsInitiation.sh
To Run DB scripts
- Copy dbscript.zip file from the location you have downloaded the files.
- Navigate to a folder and unzip the folder.
- Execute .sql files as instructions provided in readme.txt file.
Note: You must execute these .sql files on the schema that was created at the time of previous installation.
Important: If you are upgrading with several releases in between, execute all the .sql files in the order of the releases. For example, if you are upgrading from 2.0 to 2.5.5, then, execute 2.1.1, 2.5, 2.5.1, 2.5.2, 2.5.3, 2.5.4 and 2.5.5.
Note: If your existing installation version is prior to 3.5 release, do not start services from installer, do the following:
In the catalina.sh and catalina.bat files, add -D parameter -DMAX_ACTIVE_DBC=100 and -Dfile.encoding=UTF-8 parameters.
In the catalina.properties file, add java.security.egd=file:/dev/./urandom
Important: If you are upgrading to 3.5 and DB is MSSQL, replace the entry below in the catalina.properties file.
Old: HIBERNATE.DIALECT=org.hibernate.dialect.SQLServer2008Dialect
New: HIBERNATE.DIALECT=com.kony.persistence.hibernate.core.EMMSQLServerDialect
Update Proxyname
After updating artifacts, you must update proxy name in server.xml and catalina.properties files.
To update proxyname, do the following:
- Navigate to <tomcat>/conf/ and open server.xml file.
- Before the proxyPort key, add proxyName="${TOMCAT_PROXY_NAME}".
- Save server.xml and close it.
- Open catalina.properties file.
- Add the key TOMCAT_PROXY_NAME =<DOCROOT.URL>.
Important: Remove /<webContext>/download from you docroot.url before you provide it to TOMCAT_PROXY_NAME. For example, if your docroot.url is https://yourcompany.net/emm/download. Provide https://yourcompany.net.
To Restart all servers
Once you have completed all the steps as described above, restart all the services that you have stopped. The preferred sequence is Memcached first, then Tomcat and then Apache service/server.
To Upgrade Launchpad
Once all other steps are done, you must upgrade Launchpad to ensure smooth functioning on the device.
Unzip the apps.zip folder that you downloaded. It contains binaries of Launchpad in all platforms. Upgrade Launchpad in the Enterprise Store across all platforms. For more information, see EMM user guide. The request to upgrade Launchpad shall be sent to all enrolled devices.
| Copyright © 2018 Kony, Inc. All rights reserved. |