
EMM Installation – Enabling High Availability
The EMM application is already installed on a single node Windows Server. All the pre-requisites are met and the system is tested and certified to be completely functional. The EMM application must be highly available and a single node is not sufficient. The following steps define how to enable high availability of EMM using multi node setup.
Database
There are no changes to the SQL Server DB.
Android
The following procedure explains how to download Android SDK.
Windows
To download Android SDK for Windows, follow these steps:
- Click the link Androd SDK for Windows.
The Android Studio page appears.
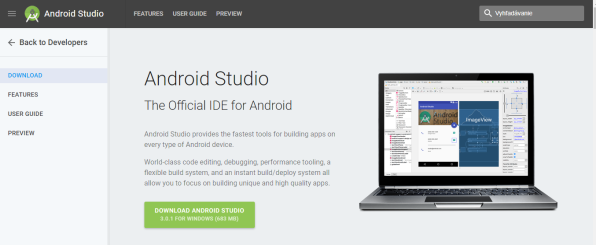
- Navigate down on the page to the header Get just the command line tools.
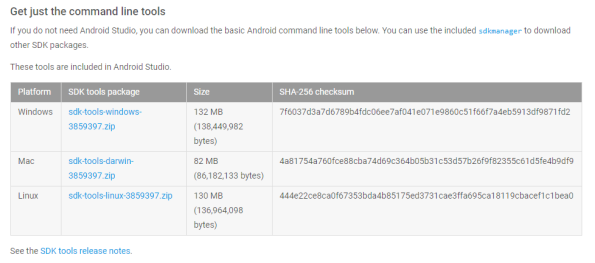
The Download the Command Line Tools window appears.
- Select the checkbox I have read and agree with the above Terms and Conditions.
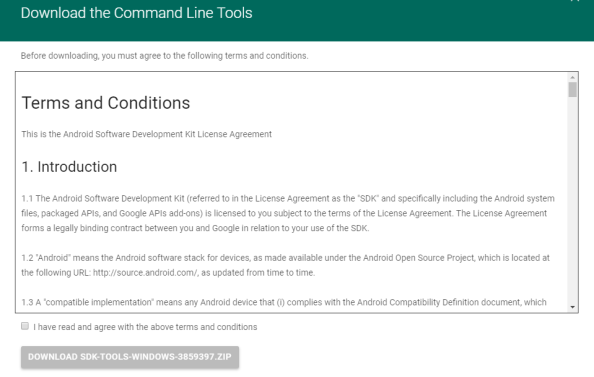
The Download SDK- Tools Windows button becomes active.
- Click the Download the SDK ADT Bundle for Windows button.
The Now downloading window appears.

- Download the SDK to your server, for example, D:\android. Unzip the bundle.
- Next, traverse to:
D:\android\adt-bundle-windows-x86_64-20140321\adt-bundle-windows-x86_64-20140321 - Click
SDK Manager.exein the folder to download the entire Android SDK from Google.The folder that contains Android SDK folder is your Kony EMM Home folder. You need to move the Android SDK folder accordingly.
Manual Steps to configure multi node setup
The Installer is required to run on all nodes only if you wish to setup new EMM with multi node setup through manual steps. If already EMM with a single node is running and you want to enable more nodes or setup multi node for the high availability installer, then installer should run only on new nodes. Thus, for the existing single node setup to enable with multi node requires some configuration changes in the primary node and new nodes.
If you already run EMM on multi- node setup and have uploaded any images or certificates, take a backup of the docroot folder. Create an empty docroot folder with the same name. The following steps explains how to setup manually a multi-node setup.
- Ensure that the pre-requisites for installation are met accordingly.
- Run the Single Node installer.
- Provide Docroot with UNC path.
- Ensure that the UNC paths are updated.
- Check that the following details are in place:
D:\<InstallFolder>\Apache24\cgi-bin\appserver- The appserver file must be modified on line number 32
- My $fileRoot = //10.10.4.1/emm_fs/emm/
- Provide the UNC path of the emm folder.
- In Tomcat conf folder update the
catalina.properties fileparam :DOCROOT.DIR=//10.10.4.1/emm_fs/emm - Navigate to path
D:\<InstallFolder>\Apache24\conf\httpd.conf and check the httpd.conf, lines 1074-1079, and verify the following details:- Alias ${KONYEMM_WEBCONTEXT} download “//10.10.4.1/emm_fs/emm”
- <Directory “//10.10.4.1/emm_fs/emm”>
- Options – Index
- AllowOverride None
- Require all granted
- </Directory>
The emm folder path is provided in UNC path as above.
- Edit the
httpd.conffile.ProxyPassMatch ^${KONYEMM_WEBCONTEXT}(.*)$ balancer://emmcluster${KONYEMM_WEBCONTEXT}$1ProxyPassReverse ^${KONYEMM_WEBCONTEXT_ONE} balancer://emmcluster/<Proxy balancer://emmcluster>##Load Balancer listBalancerMember http://10.11.11.53:8080 route=emm1 retry=1 max=25 timeout=600BalancerMember http://10.11.11.55:8080 route=emm2 retry=1 max=25 timeout=600ProxySet stickysession=SESSIONID|sessionid</Proxy>Note: The BalancerMember sequence is also important. Ensure that the URLs are provided in the same order.
- Install Memcached.
- If the system is Windows, admin needs to update the system environment variable named with
MEMCACHE_CLUSTERas well with same details ofIP1:Port1 IP2:Port2Note: Do not use any quotes
- To reflect the new changes, all services need to be restarted. To start the memcache service follow the step no. iii.
- Open the Start Menu and run
service.msc. Right Click on Memcached Service and start.<IMAGE HeRE>
- If the system is Windows, admin needs to update the system environment variable named with
- In the Tomcat conf directory, edit
server.xml,<Engine name =”Catalina” defaultHost=”localhost” jvmRoute=”emm1”>The
jvmRoutemust be changed to the node name provided in theApache httpd.conffile. - Ensure Pre-requisites are met in the new node to be installed.
- Run the Installer on the second node. Provide the same details as the first node.
- Let the installer create a dummy database (DB) and EMM home as well for new node.
- Next the admin needs to point to the first node DB details for the new node.It can be done updating the details in catlina.properties file of the second node.
- Copy the
httpd.conffile from the initial installation.Note: The BalancerMember sequence is also important. Ensure that the URLs are provided in the same order.
- Let the installer create a dummy database (DB) and EMM home as well, but the system uses the DB of the first node. Thus, next you need to point to the first node DB details and updating the catlina.properties file in the second node.
- Follow the same steps for setting up Memecached and starting services. (i.e. Do step 2 for this node).
- In the Tomcat conf directory, edit the
server.xml,<Engine name =”Catalina” defaultHost=localhost” jvmRoute=emm2>The
jvmRoutemust be changed to the node name provided in Apache httpd.conf file. - To add more nodes, repeat steps 8-12 again for each node.
- Restart Tomcat and Apache in all nodes installed.
| Copyright © 2018 Kony, Inc. All rights reserved. |