
InstallationI Fabric along with Azure Artifacts (Deprecated/ not recommend)
Follow these steps to Install Quantum Fabric on MS Azure
- Create an Ubuntu VM or use an existing VM. For more information, refer to VM Setup.
- Extract the downloaded installation zip on the VM that you created. For more information, refer to Pre-Installation Tasks.

- Enter or modify the required properties in the following files:
<Installation Directory>/conf/enterprise.properties. For more information, refer to Configuration. - Run the installation using the following bash command:
install-fabric.sh. - Select a Production or a Non-Production installation mode. In the following screenshot, the Non-Production mode is selected. You can select Production mode and follow a similar flow to complete the installation.

- Specify a label for the Non-Production installation environment. A label is a string such as
dev,qa,uat, the label is also appended to the Azure resources that are created for this environment to identify them easily.
NOTE: This step is specific to Non-Production mode.
- After specifying the label, the installation begins. Towards the end of the installation the following prompt is displayed.
Map the domain names with the IP/CNAME records as displayed in the prompt.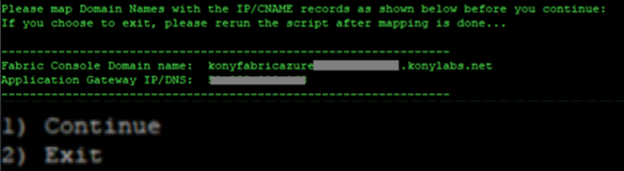
- After the domains are mapped to the IPs/CNAME, validate the mappings and continue the installation by re-running the
install-fabric.shcommand.
The CDN configuration is completed and the following prompt is displayed to complete the manual steps of CDN configuration.
NOTE: Ensure that the domain mapping reflects the correct mapping from the script client box by using
nslookup. - When prompted, follow the steps in Set up Azure Content Delivery Network (CDN) to perform a custom domain HTTPS configuration.
- Re-run the installation by running the
install-fabric.shcommand to complete the post-installation tasks. - At the end of the installation, the following message is displayed, which contains the Fabric Console URL.
