
Using Components
You can simplify and speed up development of digital applications by using a variety of existing components as building blocks, allowing you to create sophisticated digital applications without having to write all the code yourself. You can download a variety of components from Kony Marketplace and import them into your projects, or import reusable components that you create yourself.
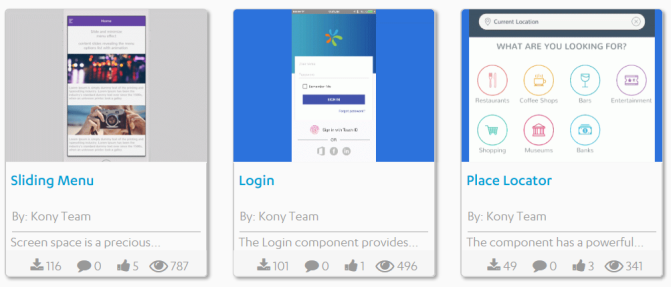
For example, you can download the following free components developed by the Kony Marketplace Assets team, and drag and drop them into your applications:
- Sliding Menu: Lets you hide the navigation beyond the edge of the screen, and reveal it only after a user’s action.
- Login: Provides a standard log-in interface with the ability to enforce a minimum password and minimum user ID length, and local password encryption.
- Place Locator: Provides a powerful map interface that allows you to search for points of interest near a specified location.
- Floating Action: Represents and promotes the primary action in an application.
- Employee Directory: Provides standard features associated with an employee directory.
- Amadeus: Provides a data adapter that helps you rapidly build travel applications.
You can also import masters created in an earlier version of Kony Visualizer into a Free Form JavaScript project. You can continue to use the masters in your applications, or make them available as reusable components that can be published to Kony Marketplace by converting them to components. A master is similar to a component without a contract, except that a component includes a controller module.
For information about creating components, see Creating a Component. For information on the types of projects, you can create, see Types of Projects.
The following topics provide additional information about using components:
- Download a Component from Kony Marketplace
- Import a Component into Your Project
- Add a Component to a Collection
- Add Dependent Assets to a Component
- View Details and Documentation for a Component
- Add a Component to a Form
- Import a Master into Your Project
- Export a Component
- Publish a Component to Kony Marketplace
- Work With a Private Section of Kony Marketplace
- Moderator Capabilities for the Private Section of Kony Marketplace
- Configure Snap Mode for Components
- Flatten a Component
Download a Component from Kony Marketplace
Kony Marketplace gives you access to a rich assortment of components. You can download a component, and then import it into your project.
Check the Video to learn more about Kony Marketplace and how to download one to use it in your application.
To download a component from Kony Marketplace:
- Select Browse from the Marketplace menu, or navigate to the Kony Marketplace website in your web browser. If you are not already logged into Kony Cloud from the Visualizer, a login window appears. Enter the Kony Cloud account credentials.
- Select the component you want to download to open a web page that describes the component.
- Click the Login to Download button to log in to your Kony account and download the component.
- From Select Destination list, select one of the options
• Select Collection Library to add the component to your library in Visualizer
• Select Local Drive to download the component to your local drive. You can import this component later in your Visualizer project.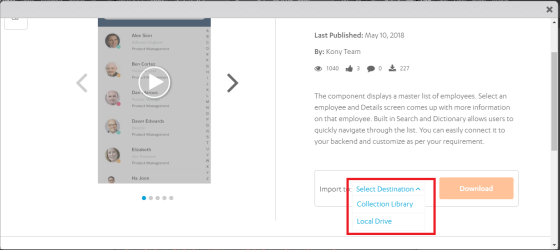

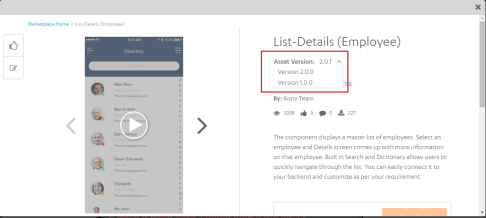
From Asset Version, select the version of the component to download.
Once you are done selecting the asset version, scroll down.
Import a Component into Your Project
You can import components to your Kony Visualizer project and reuse them at necessary places in the application. Components can be imported from the following sources:
- Components that you download from Kony Marketplace.
- Components that you create and export to your computer, network, or the cloud.
- Components that others create and export to your computer, network, or the cloud.
To import a component to your project, follow these steps:
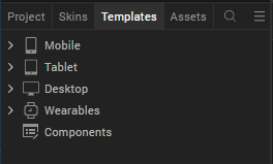
- In the Project Explorer, click the Templates tab.
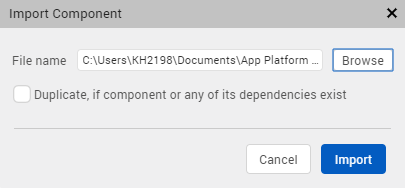
- Right-click Components, and then select Import Component. The Import Component dialog box appears.
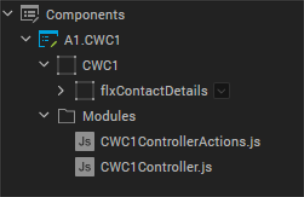
- Click Browse to navigate to the location of the component, select the component, and then click Import. The component and its associated widgets and modules are imported in the Components section on the Templates tab of your project.
Once you have imported a component to your project, you can easily add the component to a form. For more information, refer Add a Component to a Form.
You can also save the component to a collection. For more information, refer Add a Component to a Collection.
Add a Component to a Collection
To help you organize your components, you can group them in a collection within the Library Explorer. You can organize related components, or organize them however you like, in multiple collections within a library. You can then easily drag and drop the component from the Collections pane of Library Explorer onto a form in any of your digital application projects.
To add a component to a collection, follow these steps:
- Click the Templates tab in either the Project Explorer or the Library Explorer.
- If it is not expanded already, expand the Components node.
- Click the context menu arrow of the component you want to add to a collection, and hover over Add to Collection. Then hover over the library that contains the collection, and click the collection where you want to save the component. If the library or collection does not exist, you can create the library or collection.
If the component uses any Kony Fabric services, Kony Visualizer Classic prompts you to select the services that you want to include with the component. Kony Visualizer creates a trial Kony Fabric account and includes any required services.
You can also add a master created in earlier versions of Kony Visualizer to a collection.
Add Dependent Assets to a Component
Starting with Kony Visualizer V 8.1, you can add skins, media assets, and images to components. In previous releases, when you create a component and export the component to the marketplace, associated dynamic skins, and media assets were not added to the collection automatically. These skins and media assets used to be accessed through the code that you customized within the component.
Important: When you are importing a component into a project, ensure that the component assets do not have the same name as any of the assets in the project you are importing the component. Visualizer does not warn you of any duplication, and you may lose some functionality.
Add Skins to a Component
To add skins to a component, do the following:
- In Project Explorer, click Skins.
- Right-click on the skin you want to add to a component. A list of options appears.
- Click Add to Component. The Add to Component dialog appears.
- Select the component to which you want to add the skin. The skin is added to the selected component.
When you add a skin to a component, a live two-way dependency map is maintained to track skins associated to a component. If you delete a skin from a project, the skin is removed from associated components.
Add Media Assets to a Component
To add media assets to a component, do the following:
- In Project Explorer, click Assets. The assets tab appears.
- Browse to the asset you want to add to a component.
- Right-click on the asset. A list of options appears.
- Click Add to Component. The Add to Component dialog appears.
- Select the component you to which you want to add the media asset. The asset is added to the selected component.
If you delete an asset from a project, the asset is removed from associated components.
Directly Import Images into a Component
From Kony Visualizer V8 SP4 Fixpack 28 onwards, you can directly import an image from your local computer and add it to the widget in a component. Previously, to change the asscoiated image of a Login component, you had to first import the image to the Assets tab and only then you could add it to the component.
To directly import an image and add it to a component, follow these steps:
- Drag and drop a component to your form. For instance, the ACME Login component from the Default Library.
- You can perform any of the following actions:
- On the Project Canvas, double-click the success image
 .
. - In the Project Explorer, go to your form > ACMELogin, right-click imgLogo, and then click Edit Image Source.
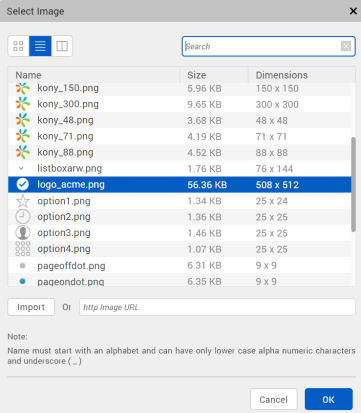
The Select Image dialog box appears, containing the list of available imported images.
- On the Project Canvas, double-click the success image
- Click Import. The File Explorer of your local computer appears.
- Select the required image, and then click Open. The Import Images dialog box appears, indicating that the image has been imported successfully. If required, Kony Visualizer automatically modifies the file name of the imported image according to the Kony resource name specification.
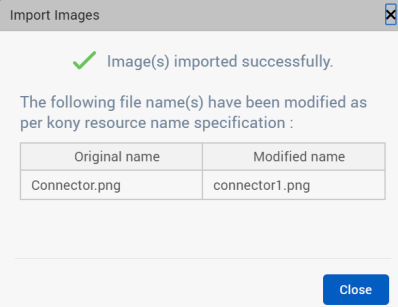
- The imported image appears in the list of images of the Select Image dialog box. Select the image, and then click OK. The image is added to the ACMELogin component.
View Details and Documentation of a Component
Components downloaded from Kony Marketplace often include documentation supplied by the component creator. For example, the Rating Prompt component developed by the Kony team includes a summary of key details about the component, along with a more complete description of the component and how to use it.
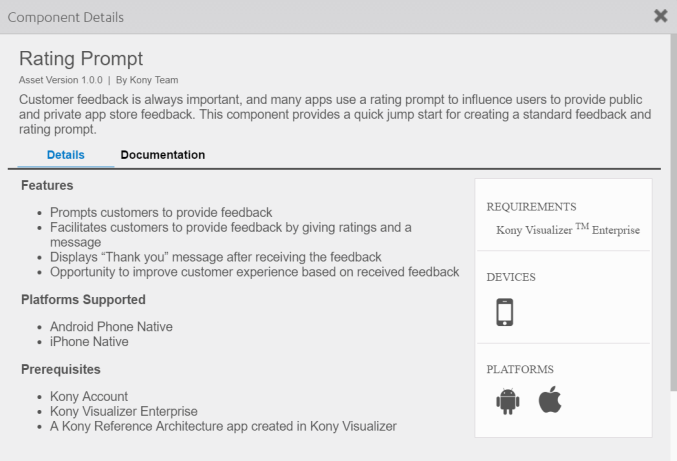

You can view this documentation, if it exists, from within Library Explorer in the collection where you saved the component.
To view details and documentation about a component:
- In Library Explorer, go to the Default Library and Collection where you saved the component.
- Right-click the component name and select Details. Kony Visualizer opens a viewing pane and displays the documentation.
To switch between details and documentation view, click Details or Documentation.
Add a Component to a Form
You can add a component to a form in a project in virtually any form scenario, including using components within another component. You can then drag and drop the component into your application to create sophisticated, full-featured digital applications without writing all of the code.
For example, rather than creating a log-in form from scratch for each of your digital applications, you can download the Login component from Kony Marketplace. You can add the Login component to a collection of components, and then add it to a form.
To add a component to a form:
- On the Project tab of the Project Explorer, locate and open the form where you want to add the component. The form displays on the Visualizer Canvas and has the focus.
- If you have added the component to a collection, open the library and collection that contains the component in Library Explorer. Then drag and drop the component onto the form.
Note: From Kony Visualizer V8 SP4 Fixpack 28 onwards, the Default Library filter has been enhanced to segregate components according to their respective channels. As a result, mobile-only components are displayed in the Default Library when a Mobile form or a Tablet form is open at that time on the Project Canvas. Similarly, web-only components are displayed Default Library when a Web form is open on the Project Canvas. However, when there is no form open on the Project Canvas, all the available components are displayed in the Default Library.
If the component is added to the project and appears on the Templates tab, you can also do one of the following:
- Click the context menu arrow of the component you want to use, and then click Insert Into. An instance of the component is placed on the form you originally selected.
- Drag the component from the Templates tab to the Visualizer Canvas, and drop the component onto the form.
The instance appears in the Project Explorer as blue text with a different icon, making it easy to identify as a component instance.
Import a Master into Your Project
You can also use a master created in an earlier version of Kony Visualizer in your digital application by importing the master into a Free Form JavaScript project. For information on the types of projects you can create, see Types of Projects.
To import a master:
- On the File menu, hover over Import. Then select Masters.
- Click Browse to navigate to the location of the master, select the master, and then click Open. Kony Visualizer adds the master to the Masters node on the Templates tab in Project Explorer. If a Masters node does not exist, Kony Visualizer creates one.
You can then drag and drop the master onto a form just as you would drag and drop a component.
Export a Component
Just as you can import a component into your project, you can export a component to your computer, network, or the cloud. You can then import the component into another project or share it with others.
To prevent your component from being modified by users, you may want to lock the component. This prevents users from viewing or modifying the component's source code. For more information about locking a component, see Creating a Component.
Note: Locales are not exported with a component. For more information about locales, see Appendix A • Internationalizing (i18n) Application Content.
To export a component, follow these steps:
- If you have added the component to a collection, open the library and collection that contains the component in Library Explorer. Then select the component.
- Right-click the component, and then select Export. Kony Visualizer displays the Save As dialog box.
- Navigate to the location where you want to export the component, and then click Save. Kony Visualizer exports the component to that location.
If the component has been added to the project and appears on the Templates tab, select the component there.
Note: While exporting a component, if any project-level properties have been enabled, these properties are automatically applied to the exported component. To avoid this issue, you must first disable the required NFIs for either iOS or Android from Edit > Manage Native Function APIs > iOS/Android and then export the component.
If the component uses any Kony Fabric dependencies, including .jar files, service definitions, connectors, or node.js files, a pop-up is displayed with the list services used in the component.
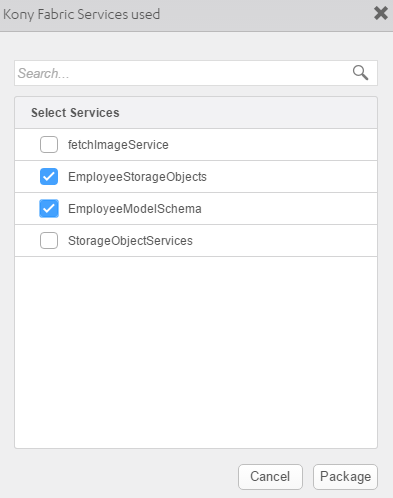
Select the required services by clicking the checkbox and click Package to export (or) to add it to the library.
If you create a component that requires configuration of Kony Fabric service parameters, follow these steps:
- Extract the exported component package file to your local file system.
- Go to Components folder and extract the services.zip package.
- Create a Parameters.json file with all the configurable parameters.
The JSON file includes the information about all the configurable parameters for the services included in the component.
- Place the Parameters.json file in the Services folder of the services package.
Here is a sample JSON file with the default parameters.
[{ "name": database_url, "displayName": < Display name of the parameter to show in Properties Window > , "defaultValue": < Mandatory if property is readOnly, Optional otherwise > , "type": < Type of the parameter.Can be one of String / Integer / Double > , "serviceName": < Name of the MF service > , "serviceType": < Type of the MF service.Can be one of identity / integration / object / orchestration > , "readOnly": true / false }, { < configurable param 2 > }] - Update the corresponding file located in component_package/component/services/services/services/service_type/meta.json with the placeholders. Example, endpoint file for service RDBMS123 is updated as:
<? xml version = "1.0" encoding = "UTF-8" standalone = "yes" ?> < endpoint dataAdapterId = "1" encryptSecureInfo = "false" name = "default" type = "CustomDataAdapter" > < apiThrottling / > < config > < entry > < entry > < key > jdbcUrl < /key> <value>${database_url }</value > < /entry> <key>jdbcClass</key > < value > com.mysql.jdbc.Driver < /value> </entry > < /config> </endpoint > - Zip the services folder and the component folder and import the package to Visualizer. For more information on configuring the parameters in Visualizer, refer Configuring Kony Fabric service parameters in Visualizer.
Publish a Component to Kony Marketplace
To publish a component to Kony Marketplace, first add it to a collection in your project. For more information on adding a component to a collection, see Add a Component to a Collection.
Click the video to learn about how to submit Kony Visualizer components to Kony public Marketplace or to your private Marketplace.
Note: You can only publish a component with a contract to Kony Marketplace. For more information about components with a contract, see Components Overview and Creating a Component.
To publish a component to Kony Marketplace:
- Open the collection that contains the component that you want you publish.
- Right-click the component that you want to publish, and then select Publish.
- Supply log-in information to your Kony account, if necessary, and provide the necessary information to Kony Marketplace.
- Supply log-in information to your Kony account, if necessary, and provide the following information to Kony Marketplace
- The name of the component
- The asset version
- Description of the asset
- The new feature added in the component in this version(optional)
- Details such as code snippets(optional)
- Asset Display view(optional)
- Detail View Images/Video(optional)
- Developer guide documentation (optional)
- Kony documentation link (optional)
- External links(optional)
- Asset requirements (optional)
- Related tags (optional)
- Domain (optional)
- Additional information (optional).
- Click 'Submit for Review' to upload the component to the Marketplace.
Note: While uploading a component again, you must change the asset version.
Work With a Private Section of Kony Marketplace
If you are an enterprise customer whose organization uses a private section of Kony Marketplace, you can download a component from that private section or upload a component to that private section using your organization's cloud account. First, configure Kony Visualizer or Kony Visualizer Classic to use the cloud account.
Click the video to learn about the various features of Private section of Kony Marketplace..
To work with a private section of Kony Marketplace in Kony Visualizer:
- Close Kony Visualizer.
- Open the default.js file in the config directory of your Kony Visualizer installation.
- Add the following to the default.js file.
- Save and close the default.js file, and then reopen Kony Visualizer.
mp:{privateMPAccountId: <MyAccountId>}
<MyAccountId> is the account identifier of your cloud account. The account identifyer is displayed in the top-right corner of your cloud console on manage.kony.com.
To work with a private section of Kony Marketplace in Kony Visualizer Classic:
- Click Project Settings on the Quick Launch Bar or in Project Explorer to open the Project Settings dialog box, and then click the Kony Fabric tab.
- In the Cloud Account box, select your cloud account.
To download a component, see Download a Component from Kony Marketplace. To upload a component, see Publish a Component to Kony Marketplace.
Moderator Capabilities for the Private Section of Kony Marketplace
Kony Marketplace offers a private section where you can upload your own components, distribute them among your teams, download them, and use them.
Moderators manage the private section. As a moderator, you can review a component, approves them, or delete them.
If you want to be a moderator, you must have a Kony cloud account, and your cloud administrator must provide access to the private marketplace as a moderator.
To Manage components as a moderator, follow these steps.
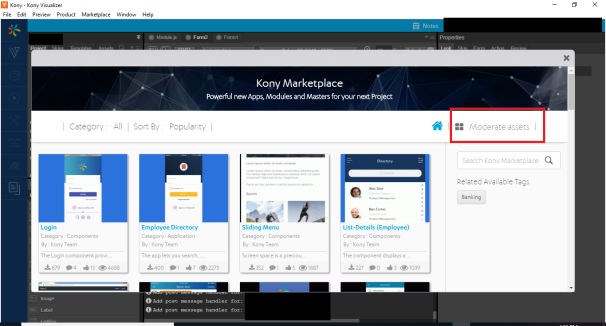
- In Visualizer, navigate to Marketplace > Browse. Or Navigate to your private marketplace website using a web browser. In case you are not logged in to Kony Cloud, Visualizer displays a login window. Enter your Kony Cloud account credentials. Once you are logged in, the list of available assets appears.
- Click Moderate Assets.
The list of components appears.
The components are sorted under two tabs: Awaiting Approval and Disabled. - To modify a component, in the Awaiting Approval tab, click the ellipsis.

- From the list, select an action. Options are:
· Live Preview- Shows the moderator how the component will look when approved
· Disable- Disables the component and move it to the Disabled tab
· Approve- Approves the component for publishing it
· Reject- Rejects the component. It will not be visible even in the Disabled tab
· Edit- Gives option to edit the whole component details such as Description, title, version, etc. - In the Disabled tab, click on the ellipsis of the component.
- From the list, select an option. Options are:
• Enable- Enables the component and moves it to the Awaiting Approval tab
• Delete- Deletes the component from the list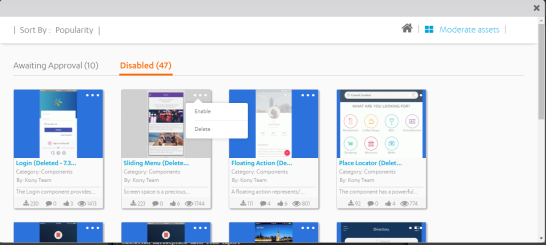
Configure Snap Mode for Components
When a user wants to create a component, if the user wants to select an option to switch between the default value for Drag and drop experience for a component, he can do that by the snap to drag position or snap to the layout.
In Kony Visualizer V8 SP1, Kony introduced Snap Mode feature which enables a user to snap all components and collections to the layout. A user can configure this in the preferences section of Kony Visualizer.
If Snap is OFF, all components and collections are placed where the user drags them. When a user selects Alt + Drag, the function will work opposite to what is configured.
To turn on the Snap Mode, do the following:
- In your Kony Visualizer project, from the file menu, navigate to Window > Preferences. The Preferences window appears.
- Navigate to Kony Visualizer. The Kony Visualizer section appears.
- Select Snap Mode.
- Click OK. The Preferences window closes. The Snap mode is turned on.
Customizing a Component
With V8 SP3 GA, a new feature is provided to help you to get the UI elements of a component on to a form without affecting the parent component and reuse the component’s UI elements. You can use Component Flattening to:
- Use UI elements without the pre-bundled logic
- Modify Skin or the UI
- Modify Widget properties
You can further bundle your modified form to a new component.
The feature, Flatten Component is applicable for components with contracts and components without contracts. It is also applicable to pre-built components.
To flatten a component, perform these steps:
- In Kony Visualizer, open your project in which you have a component that you want to flatten.
If you do not have a component already in the project, see Import a Component into Your Project. - In the project explorer, navigate to the form on which you have the component added.
- Right-click on the component and select Flatten Component.
A confirmation message appears. - Click OK.
All widgets that are in the component are unpacked and are available on a new flexContainer and you can edit those widgets. Actions associated with widgets in the component are carried forward to the widgets.Important: All associated controllers and module files in component are lost after flattening. This might result in loss of functionality of your component.
Any actions associated with the source model widgets present in the form are copied to the newly created flexContainer. All actions also are moved to a channel specific directory.
Limitations:
- During the flattening process, nested instances are not further unpacked.
- You cannot flatten locked components.
- During the flattening of the UserWidgetInstance, exposed properties for children inside a target container will not be retained.
| Rev | Author | Edits |
| V8 SP1 | PG | PG |
| V8 | SHS | SHS |
| Copyright © 2013 Kony, Inc. All rights reserved. |