Android Device Initiated Enrollment
The entire enrollment is driven on the device, so a user need not leave the enterprise store. If
Prerequisites: A device user uses an Android device and the device policy is defined. Your device user credentials must be present in the Active Directory.
To enroll a device, follow these steps:
Authentication
- To download the enterprise store from Kony Enterprise App Store, a user must provide the following credentials:
- Company name
- Active Directory username
- Password (Active Directory Password)
You need to enable cookies while downloading Kony EMM enterprise store.
You can download an Enterprise store through two ways of authentication:
- Using Kony Management suite user login credentials
- Using Kony Fabric Identity Service OAuth 2.0 user login credentials.
Important: Ensure that pop-ups are enabled in your web browsers. If pop-ups are not enabled, you may not see the log in page.
Server Side Authentication and Verification
- The details provided by the user are authenticated.
- EMM Server ensures that the device is not enrolled or associated with another user, and is allowed to enroll. Once these checks are complete, the server signals the EMM enterprise store to proceed with the
Acceptance of Terms
- Once the authentication and verification process is successful, the user views the terms and conditions.
- The user must accept the terms specified. If the user does not accept the terms, the
Activating the Enterprise Store
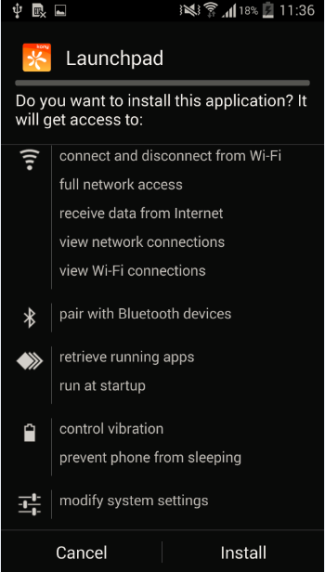
- The user must authorize the application to have adminstrator privileges over the device. The device throws a message with the details of control.
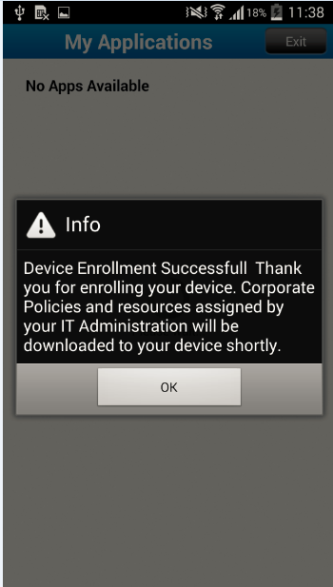
- The user can either choose Accept to activate the device or Cancel.
- If the user chooses accept, the system displays a confirmation message that the device is successfully enrolled with Kony EMM.
To perform Android Device-Initiated
Prerequisite: A device user uses the device that should be
- Enter the application's URL in the device's browser.
A log-in page appears.
- Enter your log-in credentials. These details are sent to the server along with the device information
Important: Based on the existence of users in multiple active directories and sources, users need to provide domain and source details for authentication. For more details, refer to Login > Authentication Scenarios.
- Click the Install button. The installation starts.
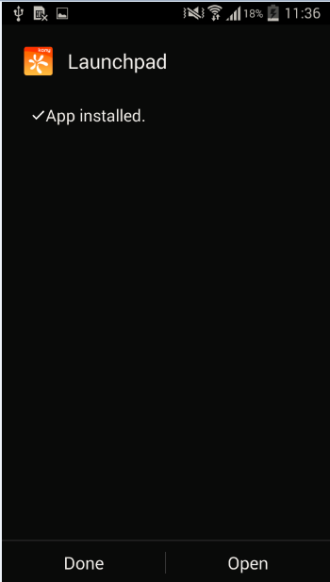
- Click the Open button.
Kony EMM Login page appears. - Enter your credentials in Username and Password fields.
Note: The device users is required to authenticate themselves through usernames and passwords. These details are sent to the server along with the device information. The details provided by a user are authenticated. EMM Server ensures that the device is not
- The system verifies the credentials. Once the authentication and verification process is successful, the system displays the terms and conditions.
- A user needs to read and accept the terms specified. Click the I Agree button.
If you do not accept the terms, the
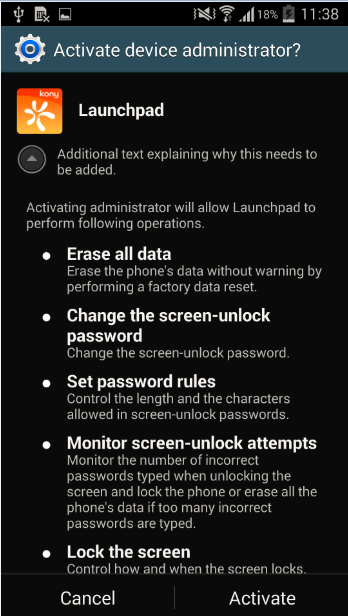
- The Active Device Administrator page appears. Click the Activate button.
- Installing MDM Profile: The profile advises a user to download and install an application to complete the process. Choosing to progress automatically triggers the download and installation of the MDM Profile.
- A success message appears when the installation is complete. When a user wants to get support through the enterprise store, the communication is sent through email option only.
SAFE Enrollment
To activate SAFE on supported devices, the SAFE license must be configured at SAFE Settings. The enterprise store app need not be signed by Samsung.
Once SAFE is license configured, all SAFE-supported enrolled devices will receive a push notification shown below.
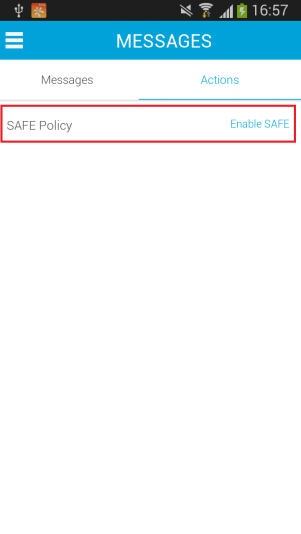
- Click Enable SAFE. The Privacy Policy screen appears.
.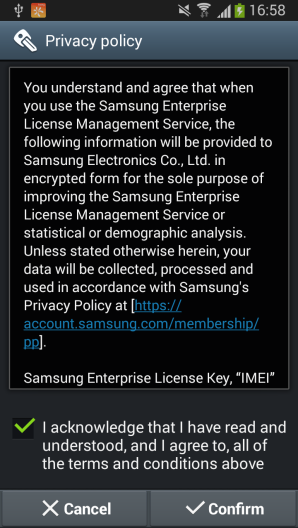
- Click Confirm. The system displays License Activated message on the device.
Android For Work Settings
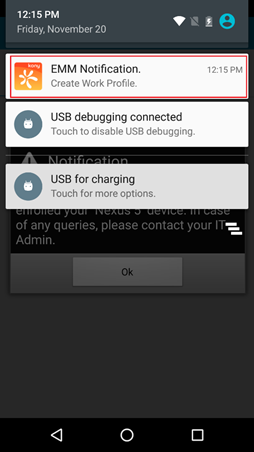
When you have a device that supports Android For Work, when you log into the enterprise store, you will receive a notification to create work profile. For more information on Setting Android For Work , see Android For Work Email.
To create a work profile, do the following:
- Touch the notification to create work profile. The enterprise store opens.
- Navigate to Messages > Actions.
- In the Actions page, touch Create. Follow the instructions on the device to create your work profile. When asked for, provide your work username and password.
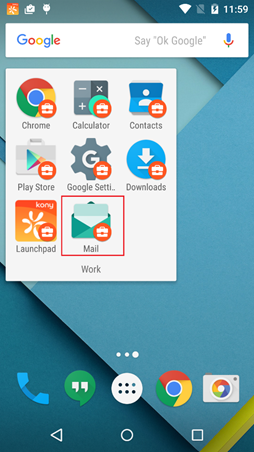
Once you have the work profile configured, all work profile apps will have an Android For Work icon to them.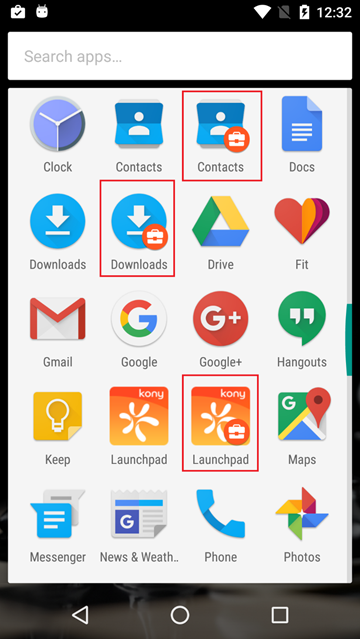
Once you create the work profile, if your Email policy for Android For Work Email is configured, you will receive a notification to download and install the Divide Productivity app.
Navigate to your Messages section and Actions in the enterprise store. Click on Download and Install Divide Productivity.
Google Play for Work store opens.
- Touch Store Home.
- Search for the Divide Productivity app.
- Touch the app to select it, and then touch Install.
- Review the requested access permissions and touch Accept.
- After the app has installed, touch Open.
- When asked if you want to configure Divide for your work domain, touch Yes
- Enter your password for your work domain and touch OK
- Once the Divide Productivity app is installed, you will get a notification to create Work email.
- Follow the instructions on the screen. Work email is configured.
| Copyright © 2018 Kony, Inc. All rights reserved. |