
Authentication Scenarios
There are four pages where users are required to authenticate themselves:
- Management Console
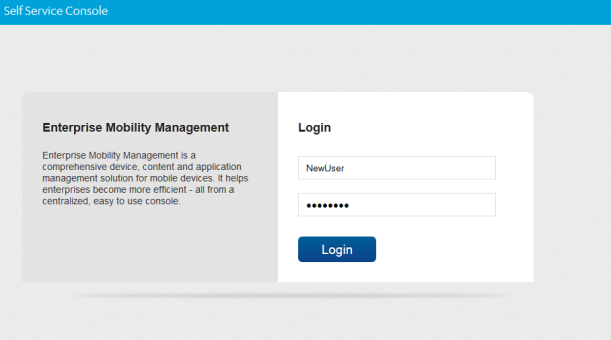
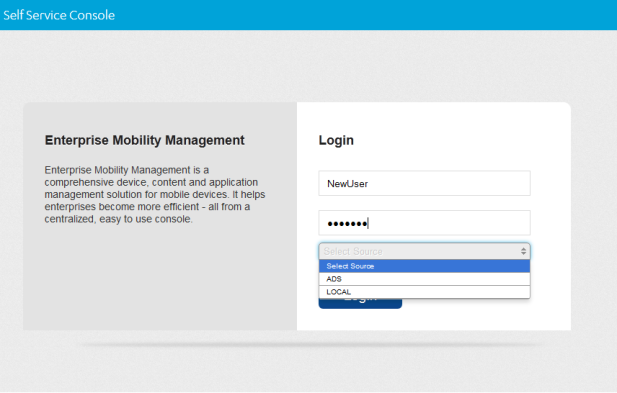
- Self Service Console Login
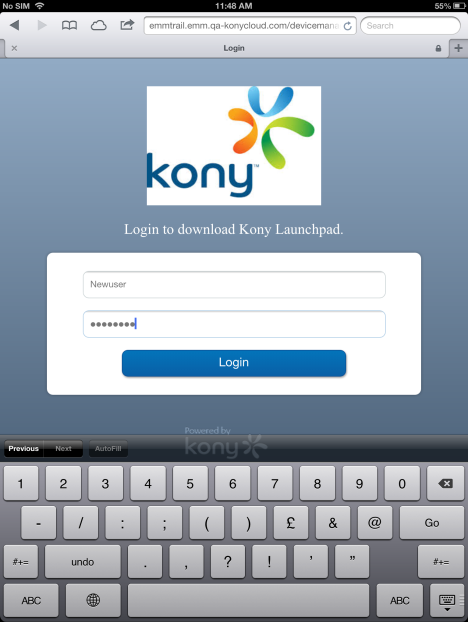
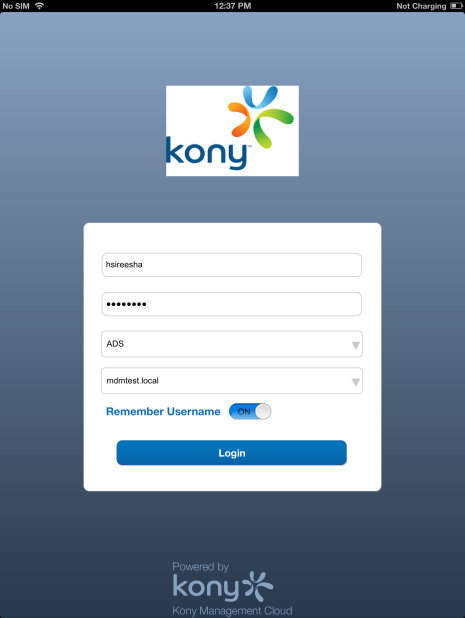
- Download Page (during the
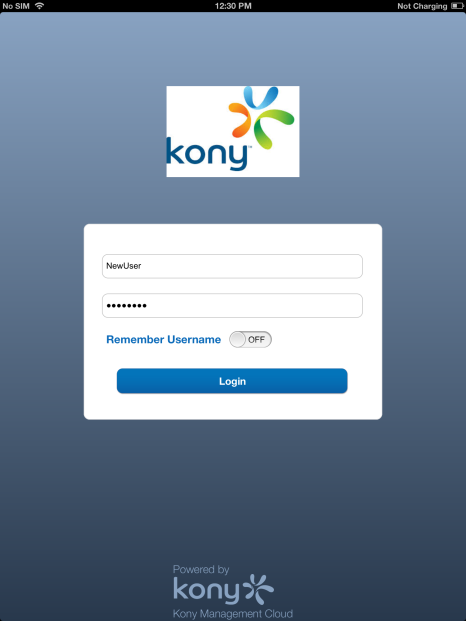
- Enterprise Store login (device side)
Important: During the enrolment procedure, the device displays the pop-up dialog box, asking the permission to send notifications. If you do not enable the notification, the Enterprise Store loads repeatedly. To overcome this situation, you need to manually enable or disable the Notification under Settings > Notifications > Enterprise Store to receive notifications from the Enterprise Store if declined during enrolment.
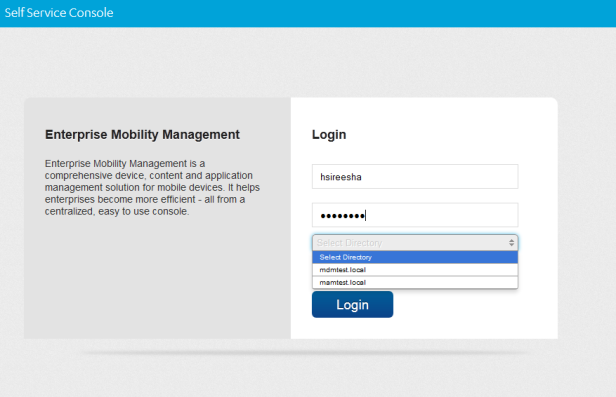
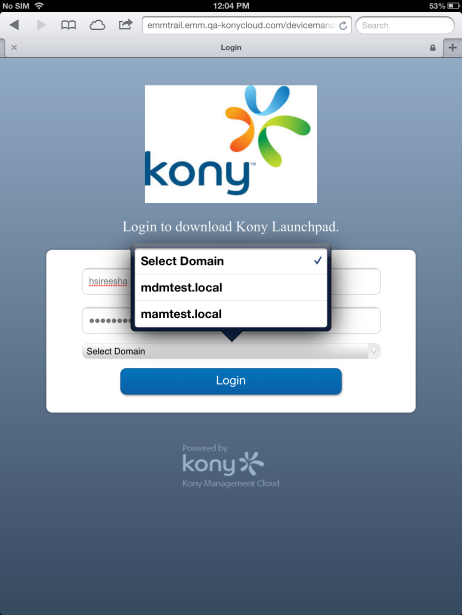
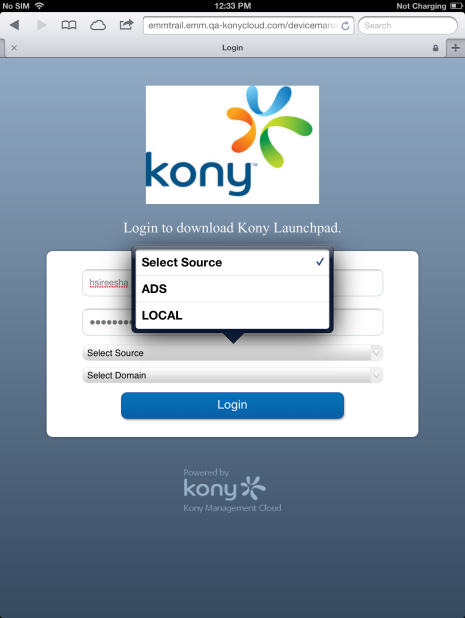
Based on users’ existence in multiple Active Directories (ADs) and sources, users need to provide domain and source details for authentication.
| Scenario | If | User need to provide authentication details as follows: | ||
|---|---|---|---|---|
| AD 1 | AD 2 | Local Directory |
||
| 1 | YES | NO | NO | Username and password: Authentication should directly happen. |
| 2 | YES | YES | NO | Username, password, domain: Because there are users from different domains, this resolution is necessary. Only after this is provided shall authentication take place. |
| 3 | YES | YES | YES | Username, password, source, domain: Because there are users from multiple sources, both the Source and Domain should be differentiated. A user must provide both the Source and Domain before authentication occurs. |
| 4 | YES | NO | YES | Username, password, source: Because there are users from different sources but not domains, only the Source must be verified for authentication to occur. |
Scenario 1
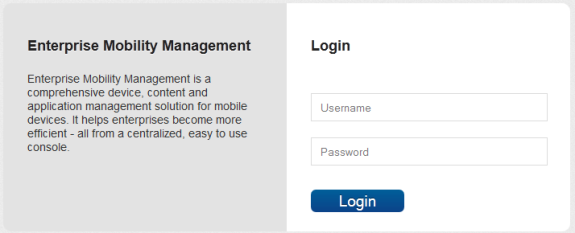
When a username is unique across domains and sources, a user is asked to provide a username and password. The system validates the user details and authenticates normally.
Management Console
Device download (device side)
Device log in (device side)
Scenario 2
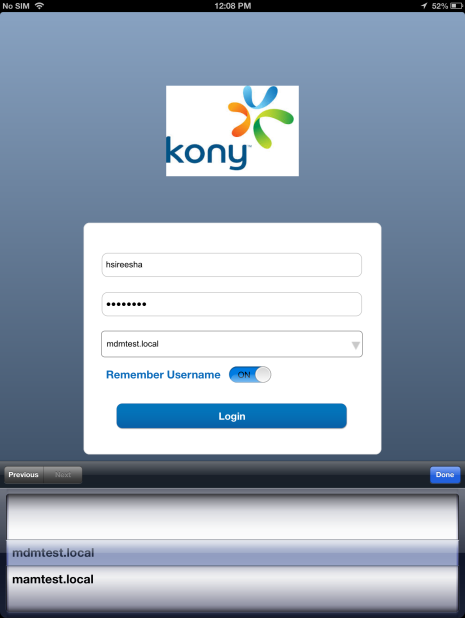
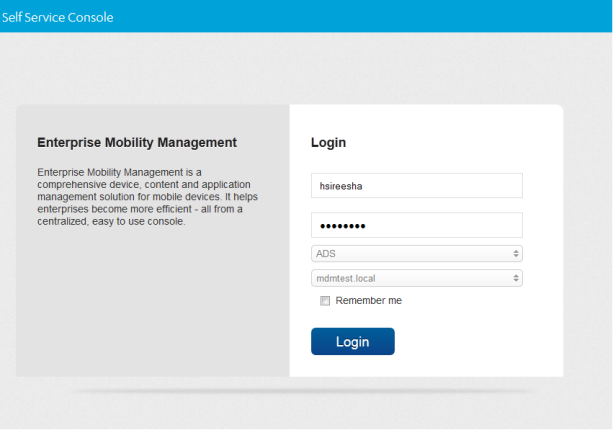
When a username is common across domains and sources, a user is asked to provide the domain name that belongs to the user to complete authentication.
Self Service Console
A user can choose the remember me option – the browser saves the username, password and domain details. The next time the same page is accessed through the same browser, these details are already filled in. The user can modify any of the details.
If a user does not choose the remember me option, these fields will be blank the next time the page is loaded in the browser. Only the username and password fields will be displayed.
Device download (device side)
Device log in (device side)
Scenario 3
When a username is common across multiple sources and multiple domains in Active Directory, a user is asked to provide source and domain details for authentication.
Device download (device side)
Device log in (device side)
Scenario 4
When a user is common across multiple sources but not across Active Directory, a user is asked to provide source details.
Device download (device side)
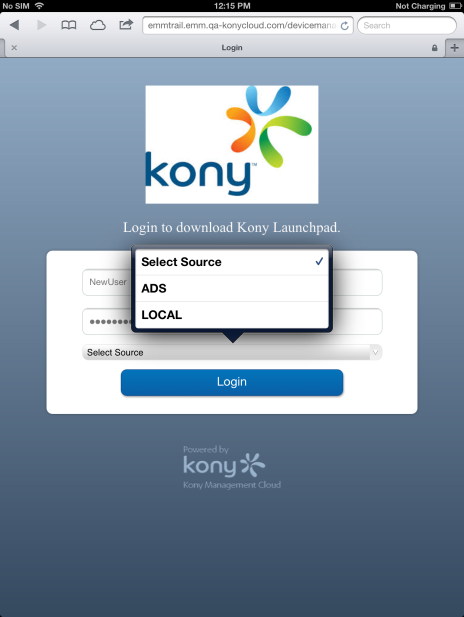
Device log in (device side)

On-premises - Login
The Kony EMM Console authentication window allows its users to log in to the system. The users with appropriate privileges can log in to EMM Console and perform various operations.
To log in to EMM Console, perform the following steps:
- Open an Internet browser.
- Enter the EMM URL in the Address field of the browser. The EMM Console Login screen appears.
- User Name: Enter the user name in the User name text field.
- Password: Enter the password in the Password text field.
-
Click the Login button. After successful authentication, Dashboard screen appears.
If the same user is logged into both the Admin and the Self Service Consoles and the user logs out from any of the Consoles, this results in closing both the active sessions. It may require the User to login into either Console again if they wish to access it.
Note: It is recommended that the same User should not log in from multiple browsers or computers. Modifying the same page simultaneously may result into an unexpected behavior.
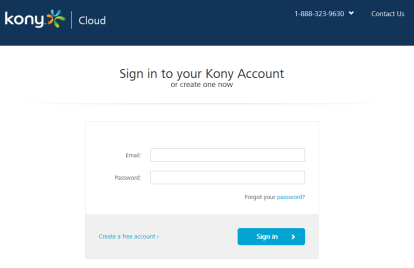
Management Cloud - Login
The Admin must log in to set up the EMM for the organization. The admin receives credentials from Kony for the trial version and/or post EMM license procurement. If you have not received Admin credentials, contact the sales representative or Support Team from Kony.
The application URL is provided by the Kony Team post EMM license procurement.
To log in to Management Cloud, perform the following steps:
- Open an Internet browser.
- Enter the EMM URL in the Address field of the browser. The EMM Console Login screen appears.
- User Name: Enter the user name in the User name text field.
- Password: Enter the password in the Password text field.
-
Click the Login button. After successful authentication, Dashboard screen appears.
How to Configure Custom Authentication
EMM provides a mechanism to build a custom authentications or source. Custom Authentication feature provides additional flexibility to you to have all authentication to happen against a source other than the directory configured. This authentication mechanism will be used for all authentication situations. When you configure custom authentication, the authentication source is modified but user interface and user experience will not be modified.
Important: You should be an expert at Java to perform the following steps. Do not follow these steps if you are not looking to implement custom authentication. Using the steps below without correct knowledge might result in abnormal behavior of the EMM console login.
This feature is available for on premises installation.EMM provides a mechanism to configure a custom authentication mechanism or source. This enables clients to create
To configure custom authentication,
-
Create a java project with CustomAuthProvider.java class in it.
- Implement WebServiceAuthProvider interface (located at KonyUserMgmt-<version>.jar ) in the CustomAuthProvider.java file. You can provide multiple custom authentication provider classes.
Note: Custom provider class can also extend the AbstractWebServiceAuthenticationProvider (located at KonyUserMgmt-<version>.jar ) abstract class and implement required methods. To implement custom authentication provider, you can refer the AbstractWebServiceAuthenticationProvider class.
-
Create a jar file from the java project.
-
Export the jar file to <EMM_WAR_HOME>/WEB-INF/lib/
-
Navigate to <EMM_WAR_HOME>/WEB-INF/classes/
-
Open the config.properties and enter your CustomAuthProvider fully qualified class names in the following format. For example,
-
authprovider.1=com.company.providers.CustomAuthProvider1 -
authprovider.2=com.company.providers.CustomAuthProvider2 -
authprovider.3=com.company.providers.CustomAuthProvider3
-
-
Add any custom properties as required to the config.properties.
Note: You can access these values in custom implementation class using the
UserMgmtConfiguration.getVal(String key)method.
Implementation class will take care of handling exceptions and resource clean up.
-
Configuring Post Login Processor
When you authenticate by logging in, if you want certain activities to happen automatically, you can use the Post Login Processor feature. Post Login Processor feature enables you to build automated activities you want post login.
Important: You should be an expert at Java to perform the following steps. Do not follow these steps if you are not looking to configure post login processor. Using the steps below without correct knowledge might result in abnormal behavior of the EMM console login.
This feature is available for on premises installation.
To configure Post Login Processor,
-
Create a java project with PostLoginProcessor.java class in it. For example,
public interface PostLoginProcessor {
public void postAuthenticate(User user);
} -
Implement the PostLoginProcessor interface in the CustomGroupSyncHandler.java file. For example,
Note: After login, if you want to perform any specific tasks, for example, synching user groups from external source, you can implement PostLoginProcessor.
package com.company;
public class CustomGroupSyncHandler implements PostLoginProcessor {
private static final Logger LOG = LoggerFactory.getLogger(CustomGroupSyncHandler.class);
private UserService userService = UsermgmtManagedBeans.getInstance().getUserService();
private GroupService groupService = UsermgmtManagedBeans.getInstance().getGroupService();
public void postAuthenticate(WebServiceAuthConfig config, User user) throws WebServiceAuthException {
// Get proxy-aware HTTP client
Client client = config.getHTTPClient();
// or, get non-proxy aware HTTP client
// Client client = config.getNonProxyAwareRestClient();
/ Do a form post to the groups URL
WebResource usersresource = client.resource(UserMgmtConfiguration.getVal("groupSyncUrl"));
Builder builder = usersresource.getRequestBuilder();
MultivaluedMap<String, String> formData = new MultivaluedMapImpl();
formData.add("userName", user.getUserId());
ClientResponse response = builder.type(MediaType.APPLICATION_FORM_URLENCODED_TYPE).post(ClientResponse.class, formData);
// Get group names from response - parse the response content and get the groups.
// for example, if response will contain comma separated group names for this user, split the response by comma (,)String groups = response.getEntity(String.class);
Set<Group> userGroups = new HashSet<Group>();
Group group = null;
for(String groupId : groups.split(",")) {
// use GroupService.findGroupBySourceAndDomain(String groupId, String source, String domain) to check if this group is already present in EMM or not
group = groupService.findGroupBySourceAndDomain(groupId, "LOCAL", user.getDomain()); // source can be one of UserSource enum types (LOCAL, ADS, SAPHCM, OAUTH)
if(group == null) {
// this group is not present in EMM - first, save this group
group = new Group(groupId);
group.setDomain(user.getDomain());
groupService.saveOrUpdate(group);
}
// add group to the groups list
userGroups.add(group);
}
// associate all these groups to the user
user.setGroups(userGroups);
// update the user
userService.saveOrUpdate(user);
}
}Note: If you want to have the option to modify the users and groups data in your database, use the following services and APIs in methods in the CustomGroupSyncHandler.java class. For example,
UsermgmtManagedBeans.getInstance().getUserService()
andUsermgmtManagedBeans.getInstance().getGroupService() -
Create a jar file from the java project.
-
Export the jar file to <EMM_WAR_HOME>/WEB-INF/lib/
-
Navigate to <EMM_WAR_HOME>/WEB-INF/classes/
-
Open the config.properties and enter your PostLoginProcessor class in it. For example,
auth.login.processor.post=com.company.PostLoginProcessor -
Add any custom properties as required to the config.properties file.
Note: You can access these values in custom implementation class using the
UserMgmtConfiguration.getVal(String key)method.
| Copyright © 2018 Kony, Inc. All rights reserved. |