
Customize the App
In the previous section, you installed the Visualizer tool, imported the Employee Directory App, and experienced the app on your device with sample data. We will now guide you through customizing the existing data set to add your own data. At the same time, we will also provide a set of instructions to extend the functionality of this sample application.
Customize the Data
If you want the app to show employee names, designations, departments, contacts, and employee profile pictures of your employees, you can do it by following three simple steps:
- Download the existing sample set from Kony Fabric
- Modify the Data
- Upload the modified sample set to Kony Fabric
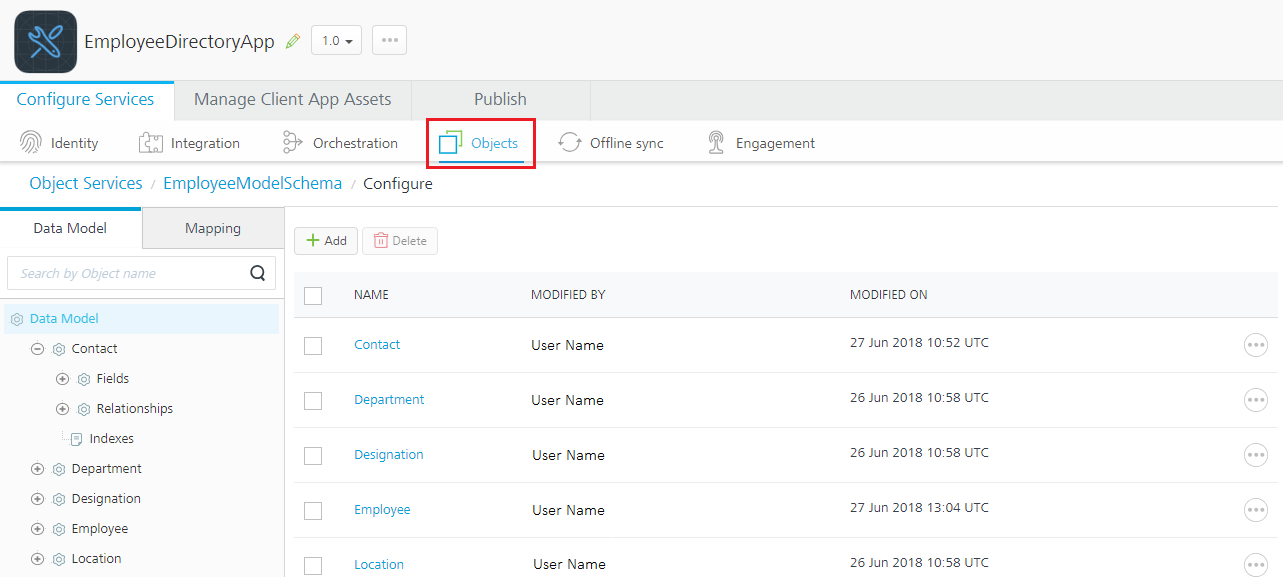
Before doing so, you should have a high-level understanding of the existing back-end schema: EmployeeDataModel.
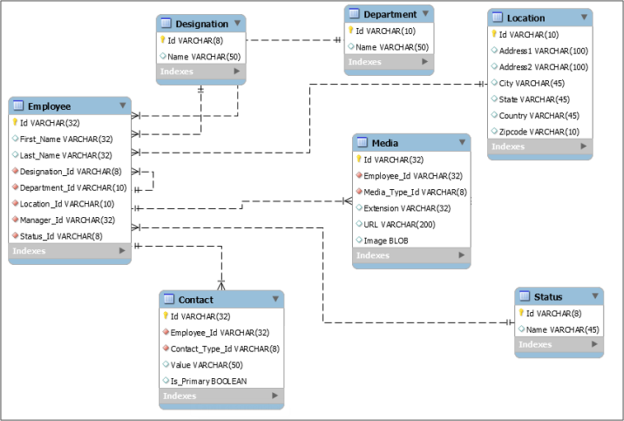
As you can observe, there are a few primary key– foreign key mappings in the model. The primary keys for the Designation, Department, Location, and Status tables are the foreign keys for the Employee table. Similarly, the primary key of the Employee table acts as foreign keys for the Media and Contact tables.
Now, let us go through the steps to modify the existing data set.
Download the Existing Data Set
- Sign in to Kony Fabric by using your login credentials.
- On the Kony Fabric account screen, select the Apps tab to see all the applications.
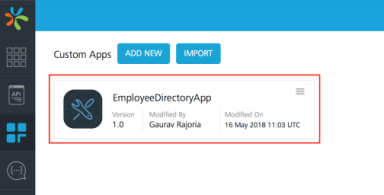
- Search for the EmployeeDirectory app, which was created as part of importing the application, and click on the same to navigate to the next screen.
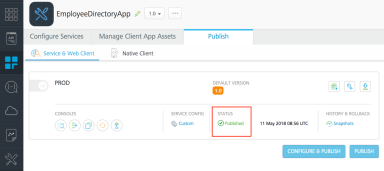
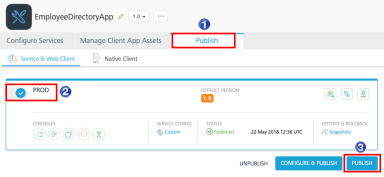
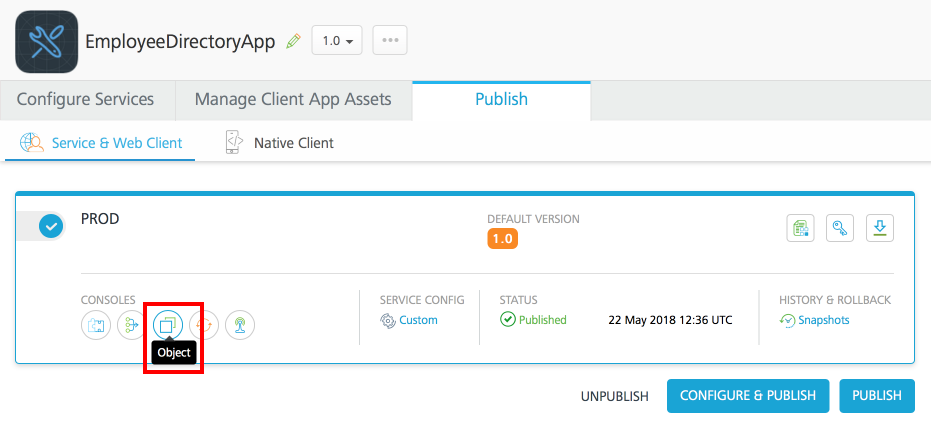
- On the EmployeeDirectoryApp Console screen, select the Publish tab.
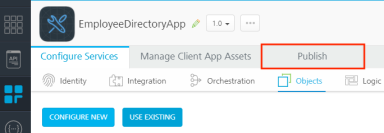
- Since you have already published the Kony Fabric application during the previous section, it will be in Published state as shown here.
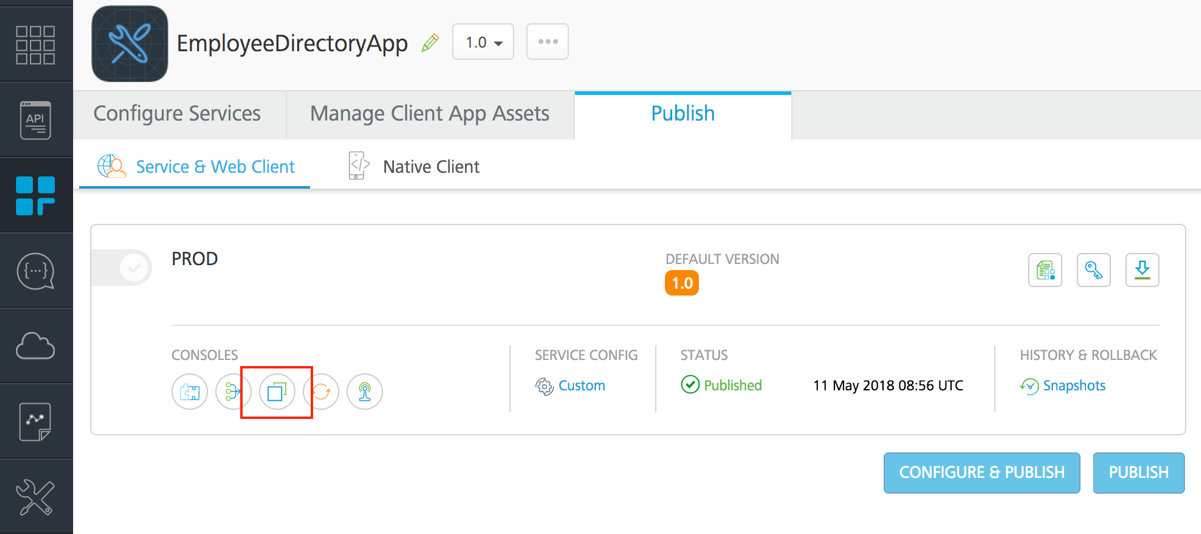
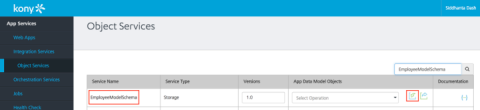
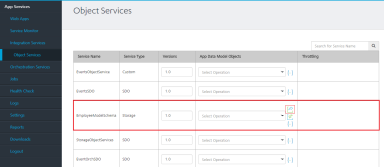
- Click the Object console as shown in the following image.

- On the Object Services screen that appears, search and locate EmployeeModelSchema. Click Export.
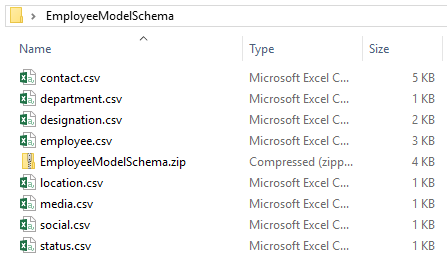
The existing data set for the Employee Directory application is downloaded to your system.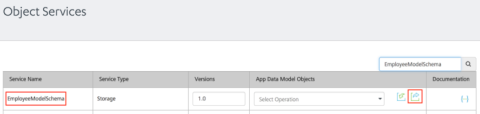


Now that the data set files are available, you can edit them to reflect your data.
Edit Data Set Files
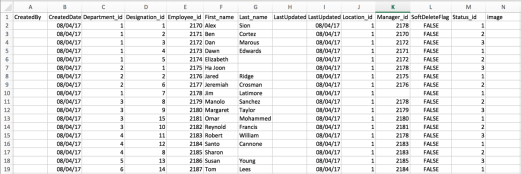
Navigate to the file location and extract it. The extracted folder contains 7 CSV files: Contact, Department, Designation, Employee, Location, Media, and Status. Each file represents a table in the EmployeeModelSchema.
You can now start editing the data set to suit your requirements.
Note: While adding your custom data, do not delete the default data from the tables. You can hide any sample data from being visible in the application by marking the SoftDeleteFlag as True, against that record.
Edit Employee Table
The Employee table contains First Names, Last Names, and Employee IDs, along with IDs for Department, Designation, Location, and Status tables. Make necessary changes to this table to add employee details.
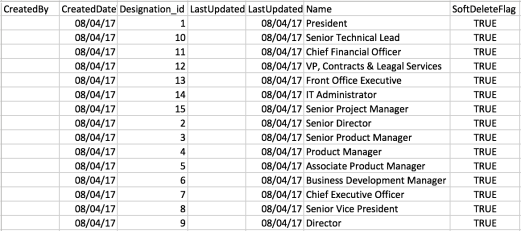
Designation Table
The Designation table contains designations and IDs. You can edit the Name column in the CSV file to reflect your preferred designations in the table.
To set the designation of an employee, you should edit the Designation_id value for a particular employee in the Employee table, with the appropriate designation ID from the current table.
Department Table
The Department table contains department names and IDs. You can edit the Name column in the CSV file to reflect your preferred departments in the table.
To map an employee to a particular department, you should edit the Department_id value for a particular employee in the Employee table, with the appropriate department ID from the current table.

Contact Table
The Contact table contains contact information (contact type and contact values) against employee IDs.

As you can see in the provided table, the contact type (reflected in the Contact_type_id column) can be of three types:
- 1 – Personal Phone
- 2 – Work Phone
- 3 – Email ID
You can specify the contact information in the current table against the employee IDs from the Employee table.
Media Table (Optional)
The Media table contains profile and cover picture information (media ID, media name, and media type id) against employee IDs.

As you can see in the above table, Media_name can be of two types:
- Profile (for profile picture in the employee list)
- Cover (for a cover picture on the Employee Detail screen)
You can host the image on the Web and provide the preview URL in the last column of the table.
Upload the Modified Data Set
When you have made the required changes, upload the data set back to Kony Fabric Console.
Follow these steps to accomplish the same:
- Go to the folder where the seven CSV files are located. Select the files and compress them into a single zip file.
- Navigate back to the browser window where you had the Kony Fabric Object Services screen open.
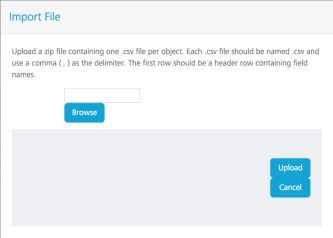
- Select the Import button against EmployeeModelSchema.

- On the Import File dialog that appears, click Browse and select the zip file that you just created.
Verify the Modifications (Optional)
As the app has already been published, you can directly verify the uploaded data by fetching a test response on Kony Fabric Console by using the following steps:
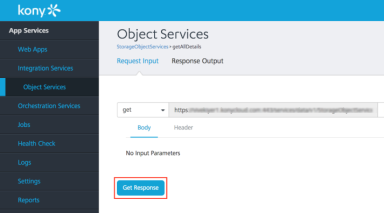
- Search for StorageObjectServices on the Object Services screen. Once it appears, click the App Data Model Objects column and select getAllDetails from the drop-down list.
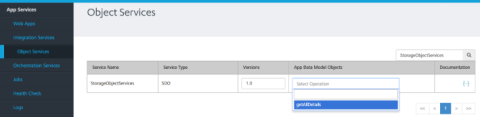
- The GetAllDetails screen appears. Click Get Response.
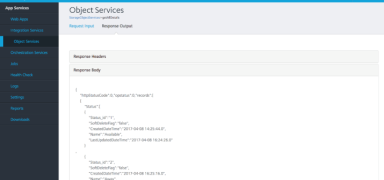
- The EmployeeModelSchema data is populated on the screen. You can search for your modifications to ensure that the changes have been updated.


Data modification is now complete. If you wish, you can directly jump to Build and Preview section to view these changes.
Extend the Application
In the previous section, you customized the data set and experienced the app with the customized data. We will now guide you through customizing the existing app to add additional fields and do the corresponding mapping of the data. You can then build the app and view it in App Viewer.
To achieve the above, let us customize the Employee Details page of the app and add a field that displays the LinkedIn profile URL. We will perform the following steps:
Modify the Fabric App
In this section, we create a column in the Contact table in the EmployeeModelSchema. This column will hold the values for the LinkedIn profile URL.
Follow these steps to add a column:
- Sign in to Kony Fabric by using your login credentials.
- On the Kony Fabric account screen, select the Apps tab to see all the applications.
- Search for the EmployeeDirectory app, and click on the same to navigate to the next screen.
- On the EmployeeDirectoryApp Console screen, select the Objects tab.

- In the page that appears, select EmployeeModelSchema.
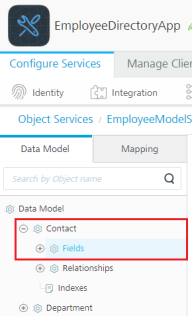
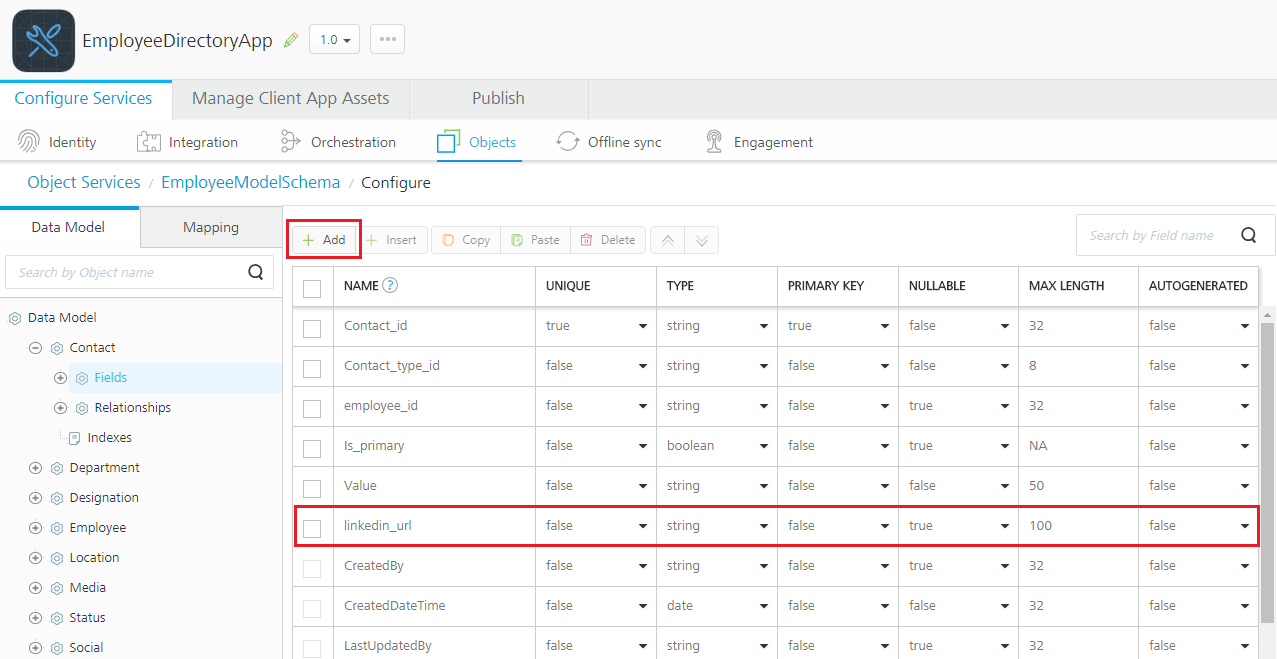
- In the Data Model tab, expand Contact and select Fields.
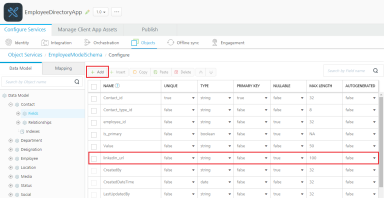
- Click Add to add a new field. Name it as linkedin_url. Configure the properties as shown in the image below and click Save.
- Publish the Kony Fabric app. To do this, go to Publish tab, select the environment and click Publish.


Add the Data
Now that we published the app, let us add the data to the new field that we added to the schema in the previous section.
Follow these steps to add the data:
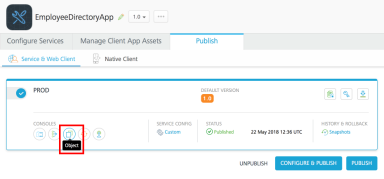
- Navigate to Object Services Console by selecting the Object button in the Publish page.
- Locate the EmployeeModelSchema, and click Export. A zip file is downloaded to your system. This file contains seven data model files in CSV format.
- Extract the downloaded zip file. Open the contact.csv file and provide the LinkedIn URL for the respective employee_id under the linkedin_url column.
- Save the CSV file and zip it again in the same structure as it was earlier.

- Navigate back to the browser window where you had the Kony Fabric Object Services screen open. Upload this updated zip file to EmployeeModelSchema.

Modify the Visualizer App
Let us now add a widget in the Visualizer app to display the URL that we added to the Contacts table.
Follow these steps to modify the app:
- In the EmployeeDirectory app, select the Templates tab.
- Expand Components and expand the com.konymp.listdetail component.
- Perform the steps in the order mentioned below:
- Select listdetail.
- Select BVR. Beyond Visual Range extends the visual area beyond the bounds of the mobile template available in the canvas.
- Select flxScrollDetails. This highlights the flxScrollDetails area on the canvas.
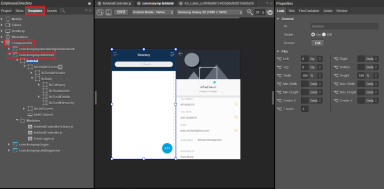
- Drag a FlexScrollContainer widget from the Default Library and drop it on to flxScrollDetails, as shown in the image below. Rename the newly added widget as linkedinFlex.
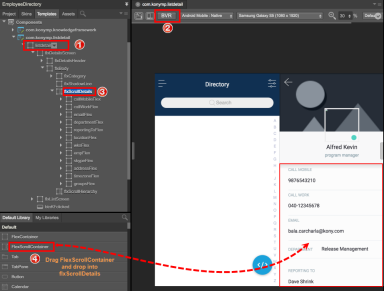
- Move the linkedinFlex widget up, such that it is just below the reportingToFlex widget. To do this, right-click on the linkedinFlex widget and select Move Up, until the widget is positioned below reportingToFlex.
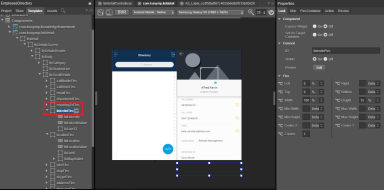
- Set the Look properties for linkedinFlex, as mentioned in the image below. Here we are setting the alignment and positioning of the widget.
- Add a label inside the linkedinFlex. This label will act as a field name for LinkedIn URL.
- Select linkedInFlex in the Project Navigator. It will highlight the linkedinFlex on the canvas.
- Drag a Label widget from the Default Library and drop it on to linkedInFlex. Rename the newly added widget as lblLinkedIn.
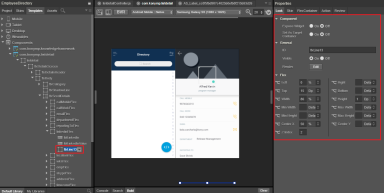
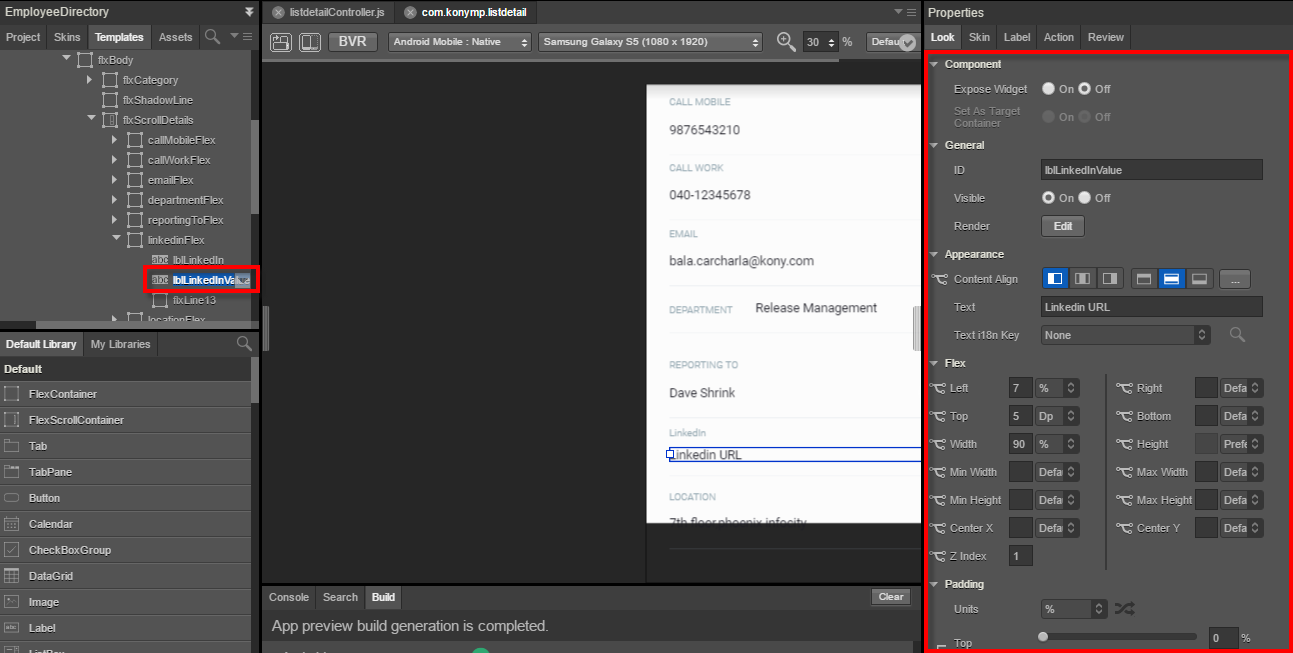
- Set the Look properties for lblLinkedIn, as mentioned in the image below.

- Under the Skin tab, search for the skin konympmajortitle1 and apply it to this label.
- Add another Label widget inside the linkedinFlex. It will hold the LinkedIn URL.
- Select linkedInFlex in the Project Navigator. It will highlight the linkedinFlex on the canvas.
- Drag a Label widget from the Default Library and drop it on to linkedInFlex. Rename the newly added widget as lblLinkedInValue.
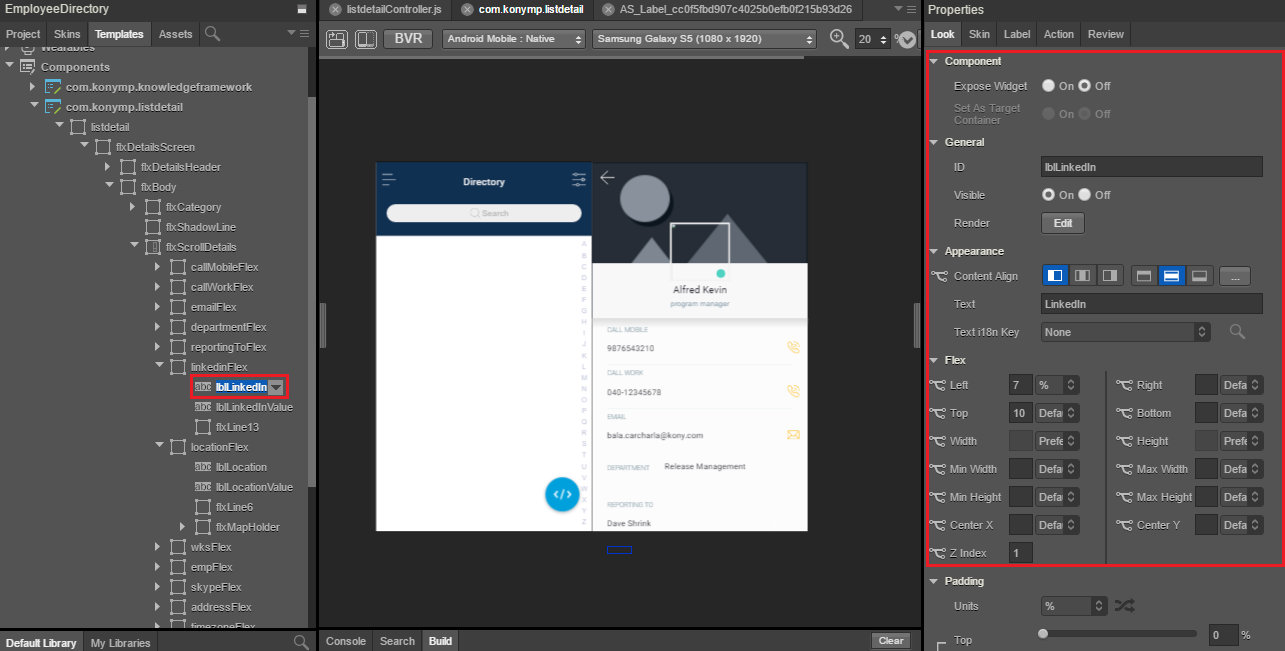
- Set the Look properties for lblLinkedInValue, as mentioned in the image below.

- Under the Skin tab, select the Font Color and provide the hex-color code as 000ee.
- Adding a line after these two labels would act as a separator. To achieve this, we will use a Flex Container.
- Select linkedInFlex in the Project Navigator. It will highlight the linkedinFlex on the canvas.
- Drag a FlexContainer widget from the Default Library and drop it on to linkedInFlex. Rename the newly added widget as flxLine13.
- Set the Look properties for flxLine13, as mentioned in the image below.
- Under the Skin tab, search for the skin konympsknFlxA2 and apply it to this Flex Container.
- We will now set an on-click event for the label lblLinkedInValue. When you click the URL in this field, it takes you to the LinkedIn page in a browser.
- Select the label lblLinkedInValue and click on the Action tab in the Properties pane.
- Click Edit against onTouchEnd. It opens up the Action Editor on the Canvas.
- Navigate to the Functions section and select Add Snippet. It adds an action item to the associated label and opens up a text editor at the bottom.
- Add the following code snippet in the text editor.
if(this.view.lblLinkedInValue.text!=="NA")
kony.application.openURL(this.view.lblLinkedInValue.text);


Map the Data
We will now modify the code to set the URL in the lblLinkedInValue widget.
- Expand the Modules folder of the com.konymp.listdetails component and open the listdetailcontroller.js file.
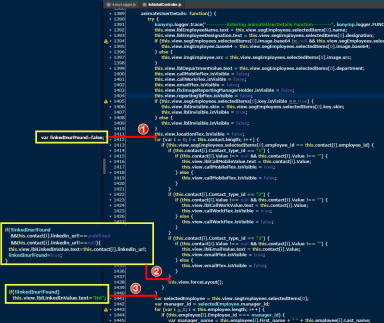
- Search for the function animateUserDetails and make the changes at the locations showed in the image below.
- Make these changes in the code:
- Add the following code at location 1 of the above image. Using this code, we are setting a flag to track the discovery of the URL of the particular employee.
var linkedInurlFound=false; - Add the following code at location 2 of the above image. This code is executed while parsing the contact table. If the URL is available for the particular employee, it assigns the URL to lblLinkedInValue.
if(!linkedInurlFound && this.contact[i].linkedin_url!==undefined && this.contact[i].linkedin_url!==null)
{
	this.view.lblLinkedInValue.text=this.contact[i].linkedin_url;

	linkedInurlFound=true;

} - Add the following code at location 3 of the above image. At the end of parsing, if the URL of the employee is not found, this code displays NA in the lblLinkedInValue label.
if(!linkedInurlFound)
this.view.lblLinkedInValue.text="NA";
- Add the following code at location 1 of the above image. Using this code, we are setting a flag to track the discovery of the URL of the particular employee.
- Save the changes.

Publish and Build the App
Now that you have modified the associated data, the next step is to make it ready for preview on the mobile application.
Follow these steps to publish the app to Kony Cloud:
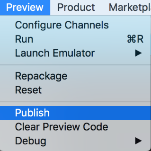
- Select Publish from the Preview menu.
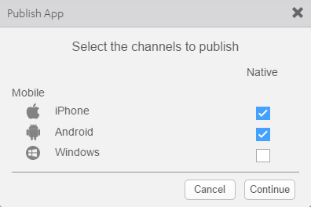
- In the Publish App dialog that appears, select the appropriate channels and click Continue.
- In the pane that appears, add the application name and description. If you need the application to be password protected, select Protected and provide the password for the app. Click Apply.
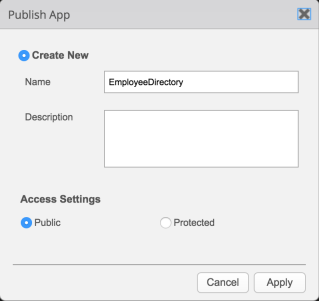
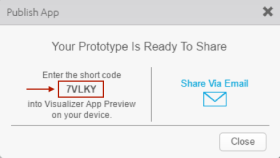
- Make a note of the five-digit preview code.
Preview Employee Directory on Visualizer App Viewer
Apart from viewing the app, you can also use App Viewer to provide comments on the design and functionality of the app.
Follow the steps to preview your app:
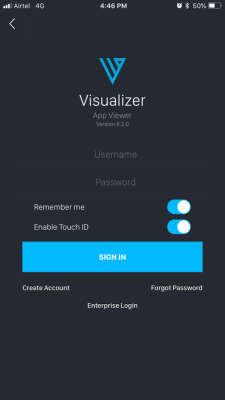
- Launch the Visualizer App Viewer app on your mobile device.
- Sign in by using your Kony account credentials.
- On the landing screen of the app, enter the five-digit preview code, which you received earlier, in the App Viewer ID field.
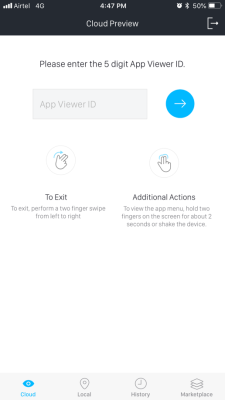
- Tap the right-arrow to preview the Employee Directory app on your mobile.
Up Next: Build the App from Scratch