
Build the App from Scratch
Now that you have had the experience of working with the Employee Directory sample app and modifying the sample data, we can now move to an advanced section that helps you build the application from scratch.
You can create the Employee Directory app by using several components that are readily available on Kony Marketplace and requires minimal coding.
Follow these steps to create the Employee Directory app:
- Create New Project and Forms
- Download Components from Kony Marketplace
- Configure Login Form
- Configure Home Form
Create a New Project and Forms
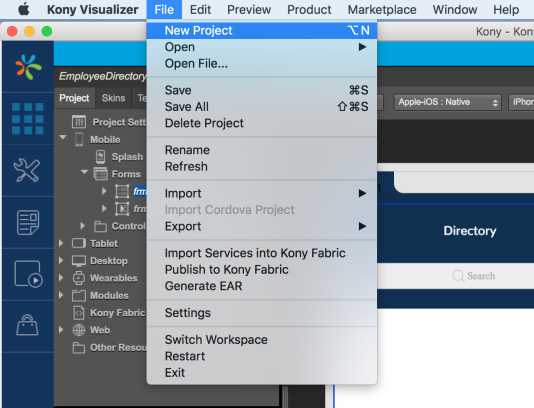
- Launch and sign in to Visualizer.
- Select File -> New Project.
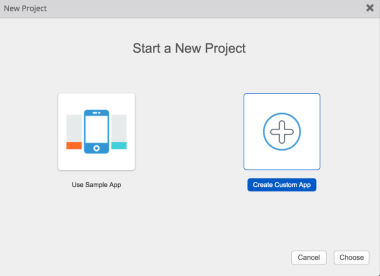
- In the New Project wizard, select Create Custom App and click Choose.
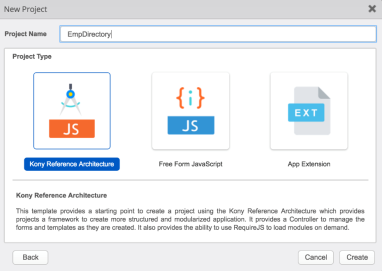
- In the pane that appears, provide the project name as EmpDirectory, select Kony Reference Architecture as Project Type (selected by default), and click Create.
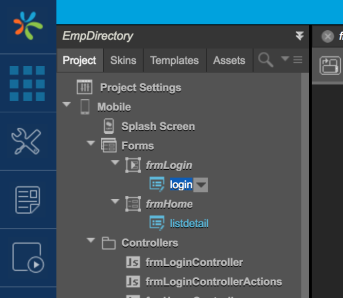
- Once you have created the project, expand the Mobile section in the project explorer. Right-click on Forms and select New Form.
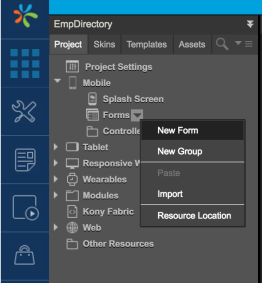
- Right-click on the newly created form and select Rename to rename the form as frmLogin.
- Similarly, create another form and name it as frmHome.
Download Components from Kony Marketplace
Once you have created the forms, download the necessary components from Kony Marketplace. You can access Kony Marketplace from the Visualizer menu as shown here.
- Select Browse from the Marketplace menu.

The Kony Marketplace screen appears as shown.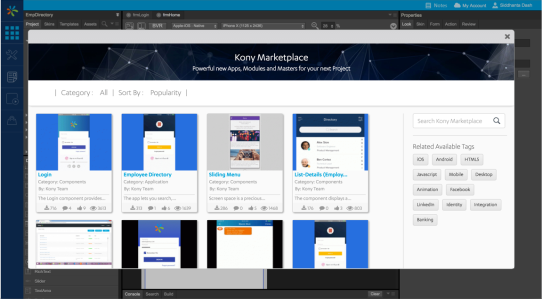
- Search for the Login component, and navigate to its detail page.
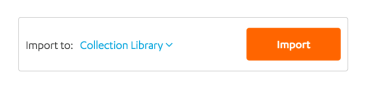
- Select Collection Library from the Import To drop-down list, and click Import.
- In the Import Marketplace item dialog, provide the relevant information for Library Name and Collection Name. The Component name field is auto-populated.
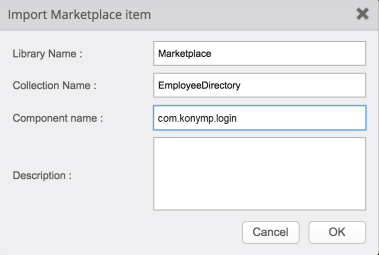
- Follow the steps 1-4 to import the List-Detail component.
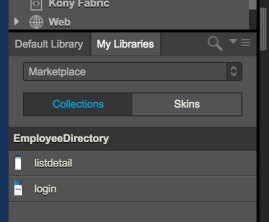
- Both these components are now available under My Libraries -> Collection.
Configure the Login Form
- Open the frmLogin form and drag the Login component from the collection library onto the form.
- Once the Login component is placed on the form, you can choose to edit its properties from the Properties tab.
Configure the Home Form
- Open the frmHome form and drag the List-Detail component from the collection library onto the form.
- Once the List-Detail component is placed on the form, you can choose to edit its properties from the Properties tab.
Bind the Components
Placing the components onto the respective forms takes care of both the user interface and back-end processes. We now need to bind both the components together. This binding helps you navigate to the application landing page after a successful login.
Follow these steps to achieve the same:
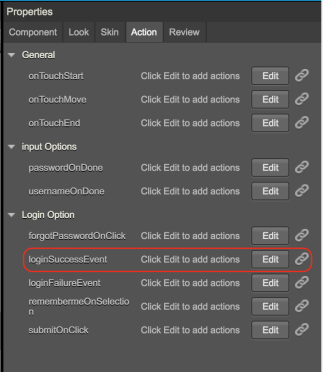
- Open frmLogin from the project explorer and select the Login component that has been added to the form.
- Select the Action tab from the Properties pane. In the Login Option section, click Edit against loginSuccessEvent.
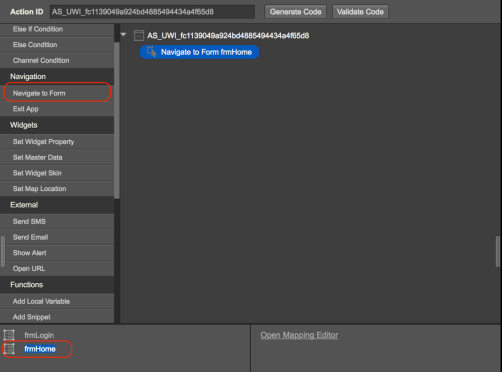
- In the action editor that appears, select the Navigate to Form action. This action populates all the available forms at the lower left corner. Select frmHome as the destination form.
You can now build and publish the app to see the Employee Directory App working against the sample data set.