Installing Kony Quantum Visualizer
To install Kony Quantum Visualizer, follow these steps:
- Navigate to the location where you downloaded the installer file
KonyQuantum-Visualizer-8.x.exe, and double-click it.The installer extracts the required files. The Kony Quantum Visualizer window appears.
Note: Although, Visualizer is a safe product to install, your anti virus or firewall may flag the product. Ensure that you give permission for installing Visualizer. Also, to avoid getting such warning messages in future (while updating Visualizer) add visualizer.exe to your antivirus or firewall safe list.
- Click Next.

The Select Installation Folder pane appears.
- To select a folder on the drive where you want to install Kony Quantum Visualizer, click Choose. To reset the default installation folder, click Restore Default Folder.
- Click Next. The Select Workspace Folder pane appears.
- To select a folder on the drive to be used as Kony Quantum Visualizer workspace, click Choose. To reset the default Kony Quantum Visualizer workspace, click Restore Default Folder.
Note: The Workspace folder holds all your Kony Quantum Visualizer projects.
-
Click Next. The License Agreement pane appears.
- Read the License Agreement carefully. If you accept the terms of the agreement, click the I Accept the terms of the License Agreement option, and then click Install.
The Installing Kony Quantum Visualizer page appears, and the installation begins.
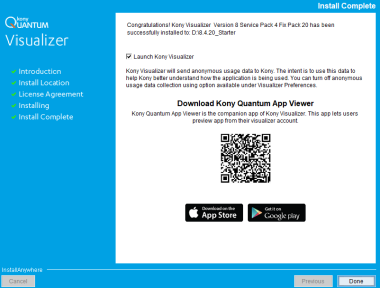
After completing the installation, the Install Complete pane appears.
- The pane provides a QR code to download the Kony Quantum App Viewer application. Scan the QR code to download the app.
- You can choose to select Launch Kony Visualizer and click Done. Kony Quantum Visualizer sends anonymous usage data to Kony. The intent is to use this data to help Kony better understand how the application is being used. To turn off anonymous usage data collection in Kony Quantum Visualizer, deselect the necessary check box under Edit>Preferences>General.

Note: The QR code is developed using a third party library, QRCode.js (version 0.0.1 & license). This is not bundled with the app. This library is bundled with Kony Quantum Visualizer Installer.

Configuring Kony Quantum Visualizer to Use a Proxy Server
Note: If your computer is not behind a proxy server, you can skip this section and move to the next section: Launching Kony Quantum Visualizer.
When your system is a part of an internal network and connects to the Internet using a proxy server, you need to modify the Visualizer configuration settings to bypass the proxy server and access the Internet.
You can use one of the following methods to configure Visualizer to use a proxy server:
- Basic Proxy: Provides steps to configure your basic proxy settings to allow Kony Quantum Visualizer access the Internet.
- NTLM Proxy: Provides steps to configure your NTLM proxy settings to allow Kony Quantum Visualizer access the Internet.
- Custom NTLM Proxy: Provides steps to customize and configure your NTLM proxy settings to allow Kony Quantum Visualizer access the Internet.
Basic Proxy
To configure Visualizer to use a Basic proxy, follow these steps:
- Navigate to the Kony Quantum Visualizer installation folder > Config folder (ex. C:\Program Files\KonyVisualizer\config).
- Open the proxy_config.js file.
-
Edit the following details. between the comments : "USER EDITIABLE SECTION START" and "USER EDITIABLE SECTION END":
//To enable proxy, change the following value to true.
var ENABLE_PROXY = false;

//Type Proxy IP address.
var PROXY_IP = 'XXX.XXX.XXX.XXX';

//Provide null value.
var NTLM_DOMAIN = 'abc.com';

//Provide Basic server port number.
var PROXY_PORT = 8080;

//Provide your Username.
var PROXY_USER = 'username';

//Provide your password.
var PROXY_PWD = 'password';

var PROXY_TYPE = PTYPE.NTLM_PROXY;
Note: For proxy related information, check with your network administrator.
- Save the proxy_config.js file.
NTLM Proxy
To configure Visualizer to use an NTLM proxy, follow these steps:
-
Navigate to the Kony Quantum Visualizer installation folder > Config folder (ex.C:\Program Files\KonyVisualizer\config).
- Open the proxy_config.js file.
-
Edit the following details between the USER EDITABLE SECTION START and USER EDITABLE SECTION END.
//USER EDITABLE SECTION START
 /*
In case of NTLM custom config only PROXY_TYPE and CNTLM_PORT
ProxyConfig paramaters are required. Rest can be left undefined.
Custom CNTLM config can also be generated by using cntlmconf.sh
on mac  e.g.
./cntlmconf.sh -u NTLMUSER -d DOMAIN -s PROXY-IP:PROXY-PORT

 */
//To enable proxy, change the following value to true.
var ENABLE_PROXY = false;

//Type Proxy IP address.
var PROXY_IP = 'XXX.XXX.XXX.XXX';

//Type NTLM Domain name.
var NTLM_DOMAIN = 'XXXXXXX.com';

//Type NTLM server port number.
var PROXY_PORT = 8080;

//Type your Username. Note: If your user name is user@domain.com,
then enter the username as useronly. Domain name is not required.
var PROXY_USER = 'XXXXXX';

//Type your password.
var PROXY_PWD = 'XXXXXX';

var PROXY_TYPE = PTYPE.NTLM_PROXY;

//USER EDITABLE SECTION END - Save the proxy_config.js file.
Custom NTLM Proxy
To configure Visualizer to use a custom NTLM proxy, follow these steps:
-
Navigate to the Kony Quantum Visualizer installation folder > Config folder (ex. C:\Program Files\KonyVisualizer\config).
- Open the proxy_config.js file.
- Edit the following details between the USER EDITABLE SECTION START and USER EDITABLE SECTION END.
//USER EDITABLE SECTION START
 /*
In case of NTLM custom config only PROXY_TYPE and CNTLM_PORT ProxyConfig
paramaters are required. Rest can be left undefined.
Custom CNTLM config can also be generated by using cntlmconf.sh on
mac
 e.g.
./cntlmconf.sh -u NTLMUSER -d DOMAIN -s PROXY-IP:PROXY-PORT

 */
//To enable proxy, change the following value to true.
var ENABLE_PROXY = false;

//Type Proxy IP address.
var PROXY_IP = 'XXX.XXX.XXX.XXX';

//Type NTLM Domain name.
var NTLM_DOMAIN = 'XXXXXXX.com';

//Type NTLM server port number.
var PROXY_PORT = 8080;

//Type your Username. Note: If your user name is user@domain.com,
then enter the username as useronly. Domain name is not required.
var PROXY_USER = 'XXXXXX';

//Type your password.
var PROXY_PWD = 'XXXXXX';

//If the type of proxy used is basic, replace NTLM_PROXY with BASIC_PROXY.
var PROXY_TYPE = PTYPE.NTLM_PROXY;
//Change the value to false
var GENERATE_NTLM_CONF = false;
//USER EDITABLE SECTION END - Save and close the proxy_config.js file.
- Navigate to the Kony Quantum Visualizer installation folder > nw folder> nw-win folder (ex. C:\Program Files\KonyVisualizer\nw\nw_win).
Note: For some NTLM v1 and v2 configurations, the default generated cntlm.ini file may not work. In such cases, you need to customize your proxy settings.
- Open the cntlm.ini file.
- Modify the following parameters:
//Type user name
Username    my_proxy_user;
//Type Domain name
Domain my_proxy_domain.com;
//Type the Proxy address:portnumber
Proxy my_proxy_server:8080; - Save and close the cntlm.ini file.
- To generate the profile, follow these steps:
- Open a Command Prompt window in the current folder.
- Execute cntlm.exe -c cntlm.ini -I -M http://xxxx.com.
- Type your NTLM password, if requested, to generate a profile.
- Copy the generated profile.
- Reopen the cntlm.ini file.
- Append the profile details (copied from step 9). A portion of the cntlm.ini file after appending the parameters is shown:
Username    my_proxy_user
Domain      my_proxy_domain.com
Proxy       my_proxy_server:8080
NoProxy     localhost, 127.0.0.*, 10.*, 192.168.*
Gateway     no
Listen      3128
Auth            NTLMv2
PassNTLMv2 XXXXXXXXXXXXXXXXXXXXXXXXXXXXXXXX - Save the cntlm.inifile.
- Move the cntlm.ini file to User Profile folder\user name\Kony Visualizer\vizdata (for example, C:\Users\<user name>\Kony Visualizer\vizdata).
White-list Essential Domains
Ensure that you contact your system administrator and white-list the following domain URLs:
- https://manage.kony.com
- https://api.kony.com
- https://visualization.kony.com
- https://prototypetransit.kony.com.s3.amazonaws.com
- https://accounts.auth.konycloud.com