Kony Visualizer Enterprise V8 SP4 Mac Install Guide
Kony Platform provides an integrated approach in the design, development and management of omni-channel applications. The Platform facilitates the design and development of applications in a device independent manner and delivers them in different formats that run on all the major device platforms.
This document explains how to install Kony Visualizer and additionally required software on your Mac computer, using an installer program.
Prerequisites
Read this section to understand the required software and hardware requirements before installing the Kony Visualizer.
System Requirements
This section helps you to understand the system requirements and necessary software before installing Kony Visualizer.
Software Requirements
| Operating System | Software Requirement |
|---|---|
| Mac OS X version 10.7 and above |
|
Note: You can only install Kony Visualizer Classic (formerly Enterprise) on Mac OS versions 10.7 (Lion) to 10.14 (Mojave). However, you can continue using Visualizer if you installed it before upgrading the Mac OS to version 10.15, or later.
- Kony Visualizer Enterprise installs JDK 1.8.0_112, by default. The default installation folder for JDK is
/Applications/KonyVisualizerEnterprise8.x.x/jdk.jdk. - Xcode 6.1 does not support IPA file generation with Kony Visualizer.
Hardware Requirements
| Component | Requirement |
|---|---|
| Processor | x86-64 CPU (64-bit Mac, with an Intel Core 2 Duo, Intel Core i3, Intel Core i5, Intel Core i7, or Xeon processor.) |
| RAM | 8 GB |
| Internal Storage | 24 GB |
| Network | Ethernet Port |
General Prerequisites
- Administrative rights on your computer to install Kony Visualizer.
- Select Anywhere option in Security & Privacy > General settings.
- The default installation folder for Kony Visualizer is
/Applications/KonyVisualizerEnterprise8.x.x. During the installation, you can choose a different location if you wish. Ensure that there is at least 4 GB of space available in the system drive where you install Kony Visualizer. - HTTP (direct or proxy) access during the installation process.
Android Build Prerequisites:
Following are the prerequisites to build an Android N app:
- JDK version must be 1.8.0_112
- JDK install location must be
/Applications/KonyVisualizerEnterprise8.x.x/jdk.jdk
For more information, refer Android N Support.
Install SDKs and Configuring Emulators
In Kony Visualizer to build and test applications, you must install platform specific SDKs. The platform specific SDKs which are supported in Kony are Android SDK, iOS SDK, and Windows SDK. You must also install the emulators for each platform.
Installation of SDKs is mandatory for building your applications, you may install them even before you install Kony Visualizer.
When you are installing Kony Visualizer, the installation wizard checks for the availability of the Android SDK. In the Prerequisites window that appears during the installation of Kony Visualizer, provide the path where the Android SDK is installed.
Click a platform for instructions on how to install and configure it.
Note: You can install SDKs and Emulators after Kony Visualizer is installed. However, you must install the corresponding SDK before you build and test an application.
Important: If you installed Kony Visualizer before installing Android SDK, add Android SDK environment variables manually. If Android SDK was installed before installing Kony Visualizer, Visualizer detects the presence of the Android SDK and adds the necessary environment variables automatically.
For more information, see Install and Configure Platform SDKs and Their Emulators in the Kony Visualizer User Guide.
Install and Configure Kony Visualizer
This section of the document provides you with the instructions for installing and configuring Kony Visualizer. Please make sure that you have the required hardware and access to the supporting software mentioned in the Prerequisites section.
Kony Visualizer Installation Tasks
You need to perform the following tasks to install Kony Visualizer successfully.
Kony Visualizer Installation Procedure
To install Kony Visualizer using the installer, follow these steps:
- Download the Kony Visualizer installer file from the community site. The installer is downloaded as a zip file to your computer.
Extract the contents of the zip file.
- Double-click the installer. The Kony Visualizer installer dialog appears.
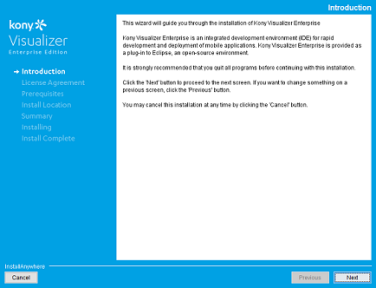
- Click Next. The License Agreement page appears.
- Scroll down to the bottom of the screen, this will enable I accept the terms of the License Agreement button. Select I accept the terms of the License Agreement to accept the license agreement.
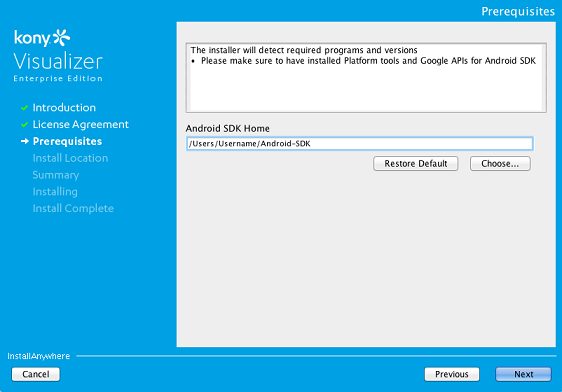
- The Prerequisites pane displays the prerequisites needed to install and use Kony Visualizer.
It also checks the availability of the required software.Android SDK Home:
- Choose - Click Choose... to select the folder on the drive where Android SDK is installed.
The path, where you can find your pre-installed Android SDK folder is/Users/[user-name]/Library/Android/sdk - Restore Default Folder - After you chose a folder, if you want to revert to default folder provided by the installer, click this button.
- Click Next.
Ensure the information in Prerequisites page is correct and click Next. The installer checks availability of the required programs and their versions in this stage of installation.
- Type or choose the Android SDK location in Android SDK Home box.
- If SDK is not present in the provided path, an Invalid SDK Path dialog appears.
- Choose - Click Choose... to select the folder on the drive where Android SDK is installed.
- Click Proceed to continue without installing Android SDK. The Download Sources screen appears.
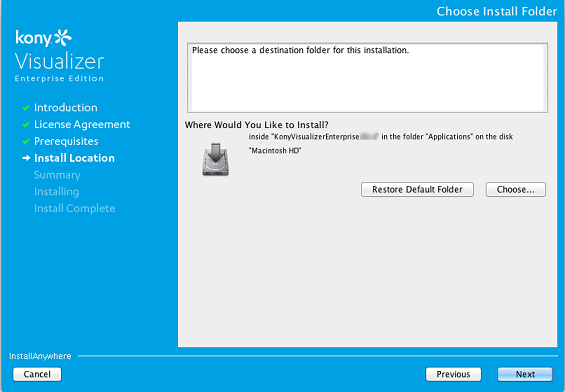
- Download the Android SDK from the hyperlink or click Next to proceed with the installation. The Choose Install Folder screen appears. By default, the location is set to Application/Kony folder.
- Click Choose and select a destination folder to install Kony Visualizer. You can also restore the installation folder to the default location using Restore Default Folder option.
- Click Next. The Pre-Installation Summary appears.
- Review the information in Pre-Installation Summary page and click Install.
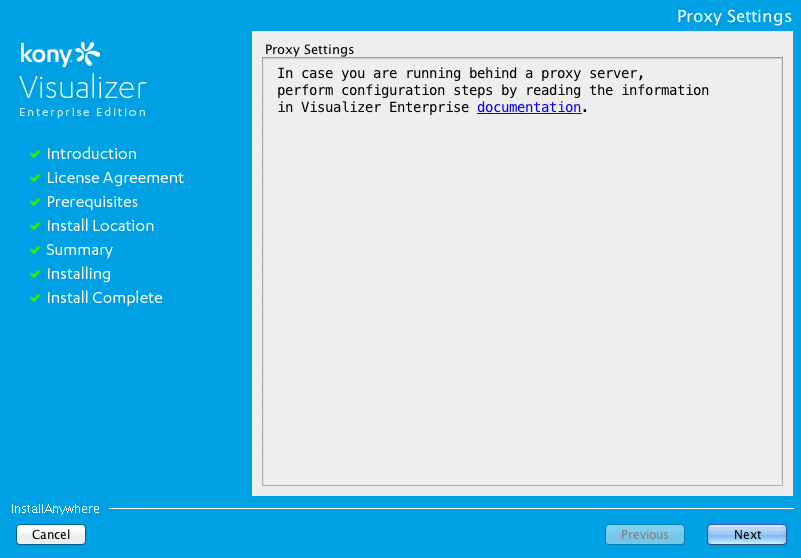
- After the installation is complete, the Proxy Settings page appears. In case you are running behind a proxy server, perform configuration steps by reading the information in Configure Proxy hyperlink.

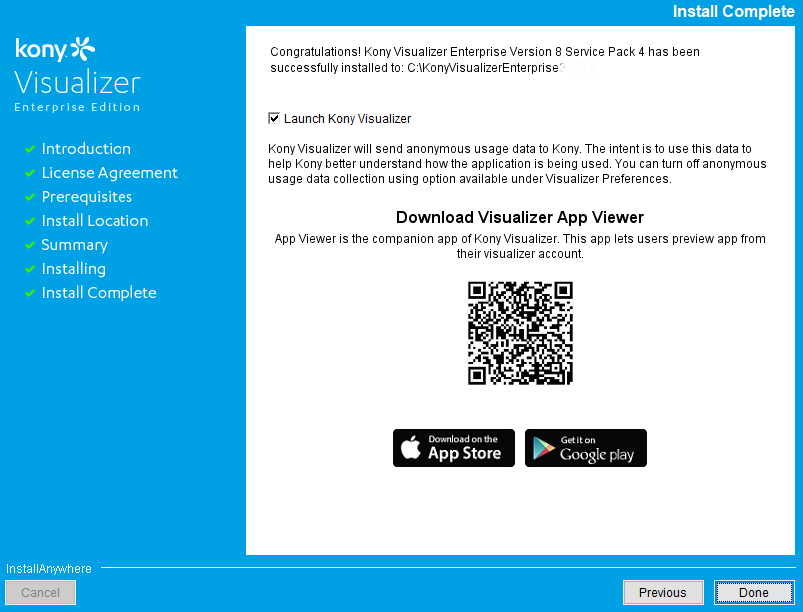
- Click Next. The Install Complete page appears.
- Click Next. The Install Complete page appears.
The pane provides a QR code to download the Kony Quantum App Viewer application. Scan the QR code to download the app.
- You can choose to select Launch Kony Visualizer and click Done.
Kony Visualizer sends anonymous usage data to Kony. The intent is to use this data to help Kony better understand how the application is being used. To turn off anonymous usage data collection in Kony Visualizer, deselect the necessary check box under Kony Visualizer>Preferences> Kony Visualizer>
- The Kony Visualizer application launches and a shortcut icon will be placed on desktop.

Note: The QR code is developed using a third party library, QRCode.js (version 0.0.1& license). This is not bundled with the app. This library is bundled with Kony Visualizer Installer.
You can view the Preface and Revision History.