Install Kony Visualizer Classic (formerly Enterprise) on Mac OS versions from 10.14.5 onwards
This section of the document provides you with the instructions for installing and configuring Kony Visualizer Classic (formerly Enterprise). Ensure that you have the required hardware and access to the supporting software mentioned in the Prerequisites section.
Kony Visualizer Classic (formerly Enterprise) Installation Tasks
You must perform the following tasks to install Kony Visualizer Classic (formerly Enterprise) successfully.
Kony Visualizer Classic (formerly Enterprise) Installation Procedure
To install Kony Visualizer Classic (formerly Enterprise) using the installer, follow these steps:
- Download the Kony Visualizer Classic (formerly Enterprise) installer file from the community site. The installer is downloaded as a zip file to your computer.
-
Extract the contents of the zip file.
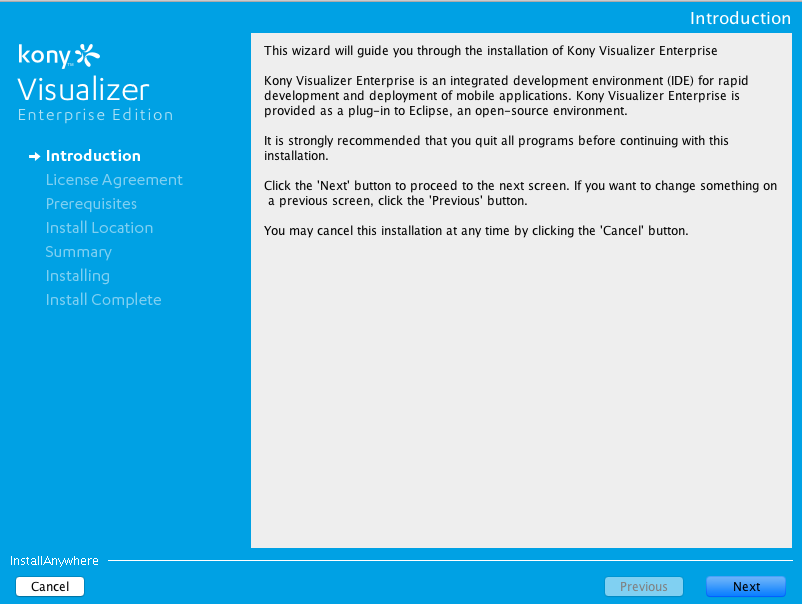
- Double-click the installer. The Kony Visualizer Classic (formerly Enterprise) installer dialog appears.

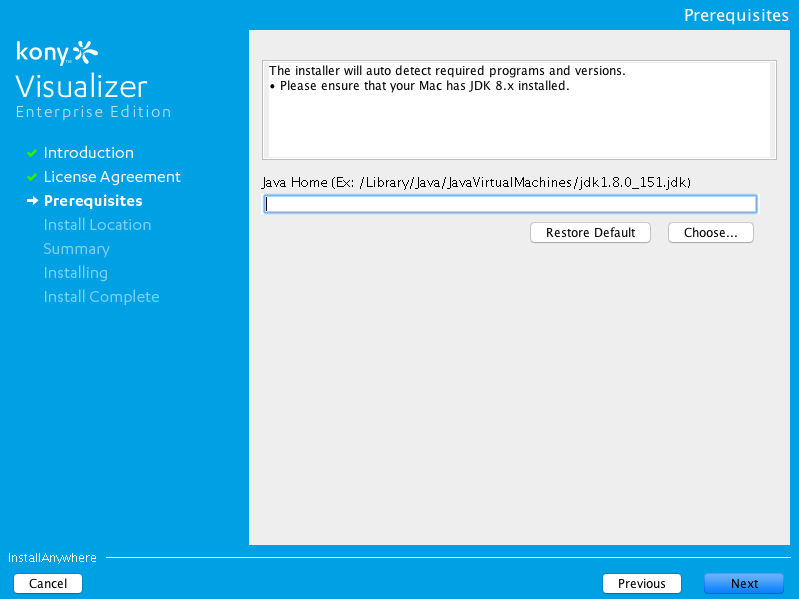
- The Prerequisites pane displays the softwares that are needed to install and use Kony Visualizer Classic (formerly Enterprise).
It also checks the availability of the required softwares.Java Home:
- Choose - Click Choose... to select the folder on the drive where JDK is installed.
The path, where you can find your pre-installed JDK folder is/Users/[user-name]/Library/Java/JavaVirtualMachines/ - Restore Default Folder - After you chose a folder, if you want to revert to default folder provided by the installer, click this button.
- Click Next.

- Type or choose the path of the JDK folder in the Java Home box.
- If JDK is not present in the provided path, an Invalid JDK Path dialog appears.
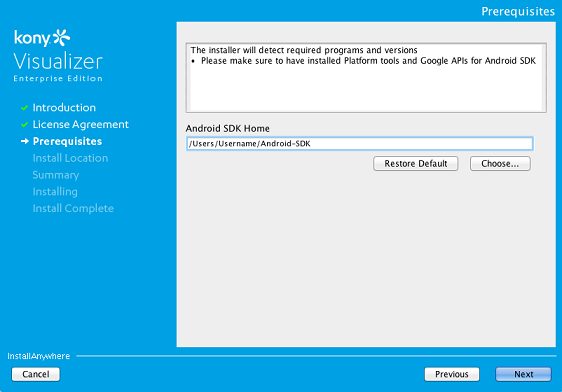
- Choose - Click Choose... to select the folder on the drive where Android SDK is installed.
The path, where you can find your pre-installed Android SDK folder is/Users/[user-name]/Library/Android/sdk - Restore Default Folder - After you chose a folder, if you want to revert to default folder provided by the installer, click this button.
- Click Next.

- Type or choose the Android SDK location in Android SDK Home box.
- If SDK is not present in the provided path, an Invalid SDK Path dialog appears.
Ensure the information in Prerequisites page is correct and click Next. The installer checks the availability of the required programs and their versions in this stage of installation.
- Choose - Click Choose... to select the folder on the drive where JDK is installed.
- Click Proceed to continue without installing Android SDK. The Download Sources screen appears.
- Download the Android SDK from the hyperlink or click Next to proceed with the installation.
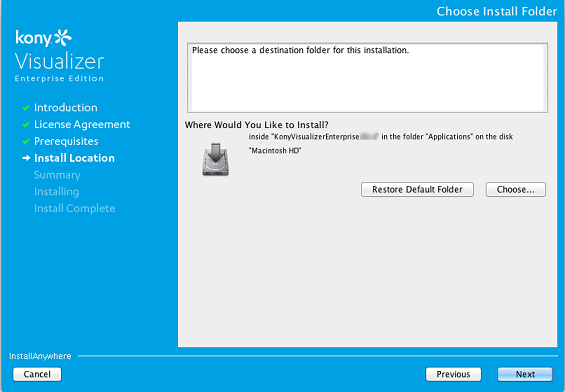
The Choose Install Folder screen appears. By default, the location is set to Application/Kony folder. - Click Choose and select a destination folder to install Kony Visualizer. You can also restore the installation folder to the default location using Restore Default Folder option.
- Click Next. The Pre-Installation Summary appears.
- Review the information in the Pre-Installation Summary page and click Install.
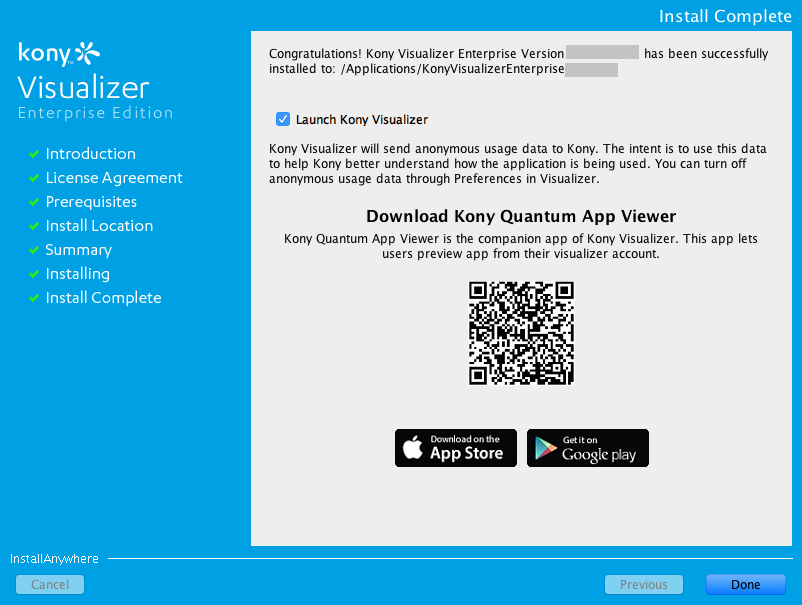
- After the installation is complete, the Install Complete page appears.
The pane provides a QR code to download the Kony Quantum App Viewer application. Scan the QR code to download the app.
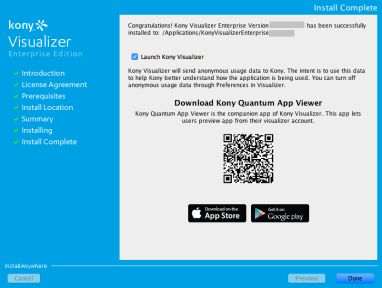
- Select Launch Kony Visualizer, and then click Done.
- The application launches and the Workspace Launcher window appears.
- Click OK. The Upgrade dialog box appears.

- Select the Please Select to download Visualizer Classic V8 SP4 plugins check box to download the latest Visualizer Classic plugins.
If you want to download a specific version of the plugins, provide the URL of the download site specific to the release version in the Update Site URL textbox. - Click OK. The Install dialog box appears.
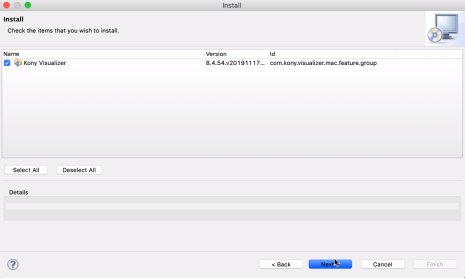
- Click Next.
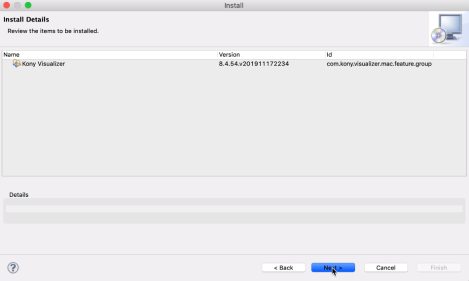
Ensure that the check box for the version-specific plugins is selected. - Review the information in the Install Details page, and then click Next.
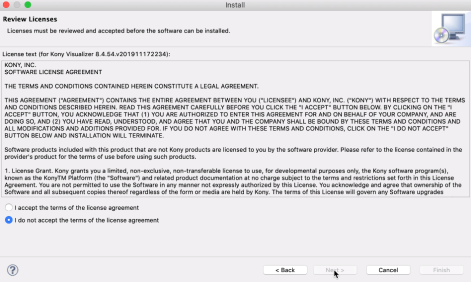
The Review License dialog box appears. - Select the I accept the terms of the License Agreement button, and then click Finish.
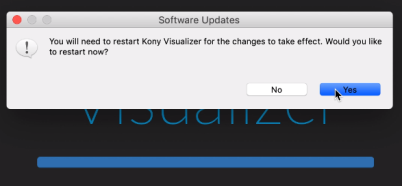
- Once the software is installed, the Software Updates dialog box appears. Click Yes to restart Kony Visualizer.
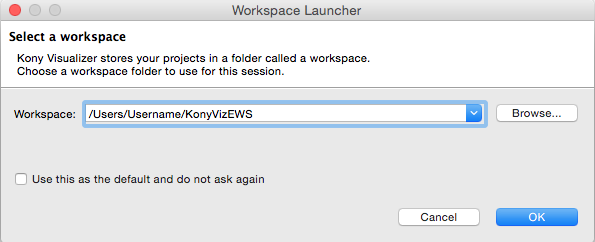
A workspace is a folder on the hard drive, which is a central repository of all the application files. The applications you create in the IDE are saved in the workspace. A workspace can have any number of applications. The default workspace has some sample applications.
The default workspace is /users/<username>/KonyVizEWS.
It is a good idea to choose this workspace as this contains the sample applications to start with. The workspace is created only once, even if you install multiple instances of Kony Visualizer and is not deleted when you uninstall Kony Visualizer (allowing you to use the applications created in the workspace in another instance of Kony Visualizer).
If you are an advanced user, you can create your own workspace.
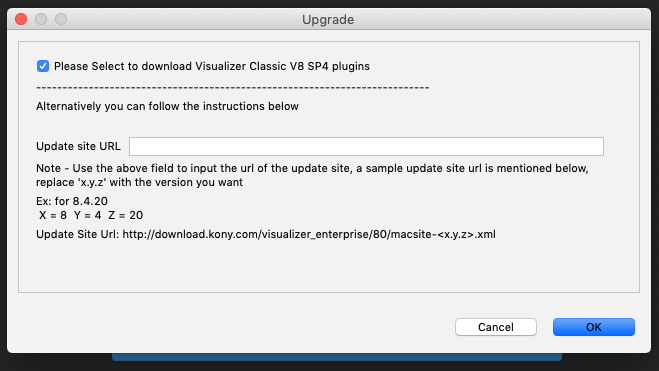
Note: The Please Select to download Visualizer Classic V8 SP4 plugins check box is selected by default.
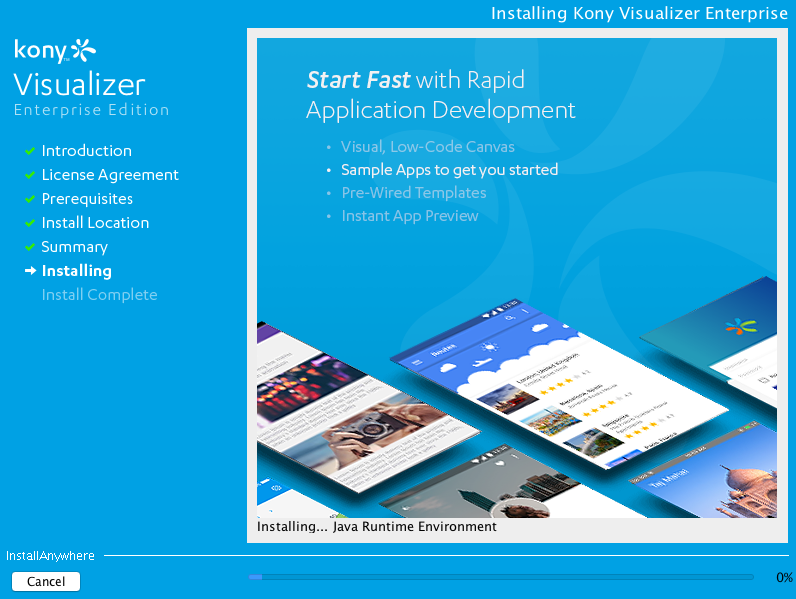
The version-specific plugins download, and Kony Visualizer will install. The progress of the installation appears in the Installing Software dialog box.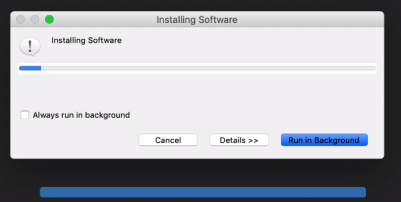
Select the Always run in background check box if you want the installation to run as a background process.
You have successfully installed Kony Visualizer Classic (formerly Enterprise). For information on launching the app, refer Post Installation Tasks.