
Add Actions
Once you have added widgets to a form, you make them functional by adding actions to them. In Kony Visualizer, there are eight categories of actions that you can add to a widget. Click a category for instructions on how to add its actions to an action sequence.
Conditions Actions: For running an action based on certain conditions.
Navigation Actions: For navigating from one form to another, displaying, anchoring, or dismissing a pop-up, or closing an app.
Widgets Actions: For setting widget properties, updating master data, replacing a widget skin, or setting a map location.
External Actions: For sending an SMS message, an email message, displaying an alert, or opening a webpage.
Functions Actions: For writing code snippets or reusing an existing action.
Animation Actions: For moving, scaling, rotating, or transforming a widget, or changing its background color.
Network APIs Actions: For invoking synchronous or asynchronous services.
Mapping Actions: For mapping (i.e. associating) the properties of one widget with another.
For the above actions, when you right-click on them in an action sequence, the following options are available:
- Copy: For copying an action.
- Paste: For pasting a copied action. Available when you copy an action
- Delete: For deleting an action.
- Move Down: For moving down an action in the sequence. Available when more than one action is defined.
- Move Up: For moving up an action in the sequence. Available when more than one action is defined.
- Indent In: For moving an action inside a condition action. Available when an action is below a condition action.
- Indent Out: For moving an action outside a condition action. Available when an action is below a condition action.
This topic also contains information related to the following subjects:
Validate the Code of an Action
List All Action Sequences in the Actions Node
Important Considerations
The following are limitations you should be aware of relative to actions:
- Animation actions are available only for flex widgets.
-
The Action Editor does not check whether you have assigned a valid action or not. If you assign an invalid action, the app might not function as expected during functional preview.
- You cannot run the actions on the Visualizer Canvas.
-
The Properties Editor always displays the properties of the most recently selected widget. If you switch to an action sequence or code, regardless of what widget it is associated with, the Properties Editor will continue to display the properties of the most recently selected widget, and those properties will not be currently editable.
Important: If your project was originally created using Kony Visualizer 2.5 that was then imported into Kony Studio 6.5, and you import it into the latest version of Kony Visualizer, the action sequences are not imported.
Add Watch Actions
In Kony Visualizer, you add action sequences for Apple Watch as functions written in the Swift programming language; watchOS does not support JavaScript. For more information, see Swift on the Apple Developer site.
You can access all the Swift code snippets in your project from the Watch folder, located under Modules on the Project pane of the Project Explorer.
Important: For projects with Watch action sequences written in JavaScript, created in Kony Visualizer 7.0, to continue working on such a project in Kony Visualizer 7.0.3 or later, those Watch action sequences will have to be rewritten in Swift. When you attempt to open such a project in Kony Visualizer 7.0.3, a dialog box appears stating that continuing will cause all Watch action sequences with JavaScript to be dropped, and they will need to be rewritten. You can choose to continue, which opens the project and drops those Watch action sequences with JavaScript, or cancel, which doesn't open the project and leaves it unchanged.
To add a Swift code snippet, do the following:
- From the Project tab of the Project Explorer, navigate to the Watch channel, locate the form or widget you want to apply the action to, click its context menu arrow, and then select one of the action sequences, such as onTouchStart. Doing so opens the Action Editor and creates an action sequence for you to configure.
- Click Add Swift Snippet from the Functions section. The action is added to the action sequence and is the current action of focus.
- In the bottom pane of the Action Editor, in the code editor, enter the Swift code that you want to add, or paste it in from another source by pressing Ctrl+V.
- Save the action by pressing Ctrl+S.
Validate the Code of an Action
Once you have configured an action, you can check to ensure that the code of the action sequence is valid.
To validate the code of an action sequence, do the following:
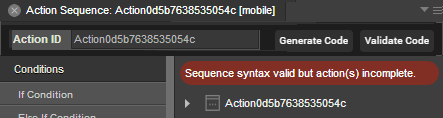
- Open the action sequence that you want to validate. To do so, select the widget with the action sequence, click the Action tab on the Properties pane, and then click the Edit button of the action you want. The action sequence opens on the Visualizer Canvas.
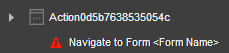
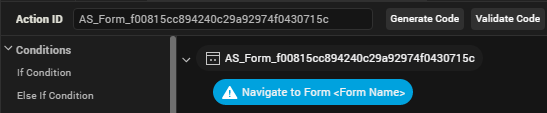
- Kony Visualizer points out statements in the action sequence that are in error or are incomplete with a red information icon. Correct these statements.
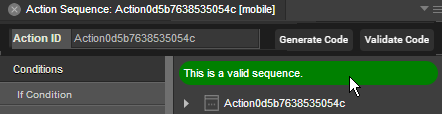
- When you're ready to validate the action sequence, on the Visualizer Canvas, to the right of the Action ID, click Validate Code.
- Kony Visualizer evaluates the action sequence. If the code is not valid, follow the feedback of the validator and correct the sequence.
- If you revised the sequence, click Validate Code again. Kony Visualizer verifies the validity of the action sequence with a message.

Generate Code from an Action
Once you have configured an action, you can generate a code snippet that you can reuse in a JavaScript module.
To generate code from an action, do the following:
- Open the action sequence that you want to generate code from. To do so, select the widget with the action sequence, click the Action tab on the Properties pane, and then click the Edit button of the action you want. The action sequence opens on the Visualizer Canvas.
- On the Visualizer Canvas, just to the right of the Action ID, click Generate Code.
- In the Code window that appears, select the tab for the platform and channel that you want.
- Click in the pane to set the focus, and then select the code snippet by pressing Ctrl+A.
- Copy the snippet by pressing Ctrl+C.
Note: The Properties Editor always displays the properties of the most recently selected widget. If you switch to an action sequence or code, regardless of what widget it is associated with, the Properties Editor will continue to display the properties of the most recently selected widget, and those properties will not be currently editable.
Copy an Action Sequence
You can copy an entire action sequence and apply it to another widget.
To copy an action sequence, do the following:
- Open the action sequence you want to copy.
- Right-click the top node name of the action sequence, and then click Copy.
- Navigate to the widget you want to paste the action sequence to, right-click it, and then select the action that you want to paste to.
- Right-click the top node name of the action sequence, and then click Paste.
Disable an Action
You can disable an action to help you isolate trouble areas in your testing of action sequences.
To disable an action in an action sequence, do the following:
- Open the action sequence that has the action or actions you want to disable.
- Right-click the action you want to disable, and click Disable. The name of the action fades, indicating that it is disabled.
List All Action Sequences in the Actions Node
By default, the only action sequences that display in the Actions node of the Project tab in the Project Explorer are those actions that you create from within the Action node. In contrast, action sequences that you add to widgets do not appear in the Actions node. If you want, you can have all action sequences display in the Actions node.
To list all action sequences in the Actions node, do the following:
- Do one of the following, depending on the edition of Kony Visualizer you are using:
- Kony Visualizer. On the Edit menu, click Preferences. Click General in the left pane, select Show All Actions, and then click Apply.
- Kony Visualizer Classic. On the Window menu, click Preferences. Click General in the left pane, select Show All Actions, click Apply, and then click OK.
Important: You must click Apply before clicking OK. If you click OK without clicking Apply, your selection is not saved, and so your changes are not applied.
| Rev | Author | Edits |
| 7.0 | NMK | NMK |
| 7.1 | NMK | NMK |
| Copyright © 2013 Kony, Inc. All rights reserved. |