
Generate IPA for a Native iOS Application
In addition to creating iPhone and iPad applications directly from source code, you can use Quantum Visualizer to build an iPhone or iPad application and deploy it to a Mac automatically. You need a dedicated Mac to enable creation of iPhone and iPad application binaries.
IMPORTANT: Currently, Quantum Visualizer supports Xcode 9.0 and later.
Prerequisites
Before you begin, ensure that the following conditions are met:
- Xcode and command line tools are installed on the Mac.
-
Xcode path is set to
/Applications/Xcode.app/Contents/Developer/.To check the Xcode path or modify the path:
- Open the Terminal.
xcode-select --print-pathOutput must be:
/Applications/Xcode.app/Contents/Developer/ - If the path is not set, enter the following command:
sudo xcode-select --switch /Applications/Xcode.app/Contents/Developer/
- Open the Terminal.
- You must have a valid Apple developer account, and you must be signed in to the Accounts section of XCode Preferences.
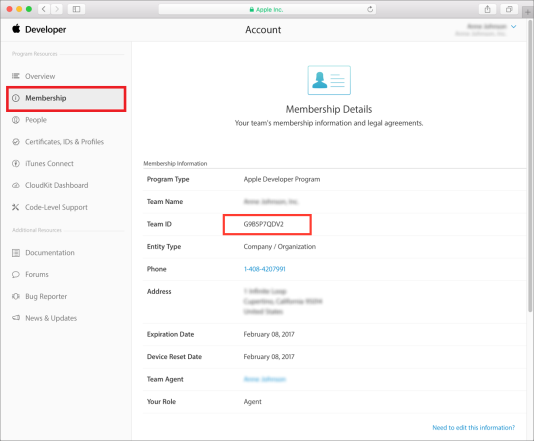
- You must have obtained a 10-digit development team identifier from Apple. The Team ID can be found in the Membership Details of your Apple Developer account.
IPA Generation
Building an iPhone or iPad application and deploying it to a Mac involves generating an archive file, and then exporting the archive file to an IPA file based on the specified distribution method.
To configure Quantum Visualizer to build an iOS native application on a local machine, follow these steps:
- From the Project menu of Quantum Visualizer, click Settings.
The Project Settings window appears. - From the navigation pane on the left, expand Native, and click iPhone/iPad.
- Under the Certificates section, in the Build Local settings, specify values for the following fields:
- Development Method: The application's distribution method. The method can be one of the following:
- development: Signs and packages the application for development distribution outside the iOS App Store.
- app-store: Signs and packages the application for distribution in the iOS App Store.
- ad-hoc: Signs and packages the application for ad-hoc distribution outside the iOS App Store.
- enterprise: Signs and packages the application for enterprise distribution outside the iOS App Store.
An archive file is always generated initially using development code signing. Xcode then automatically generates the required development provisioning profiles. For development code signing, you must have a valid development certificate installed in your keychain.
When exporting the archive to an IPA using the development option, Xcode reuses the development certificate and provisioning profile that are used for archive code signing. It is unnecessary to create profiles from the development center and install them on your system.
For app-store, ad-hoc, and enterprise options, make sure that you have a valid developer certificate, distribution certificate, and distribution profile installed on your system. Xcode will not automatically generate these distribution profiles.
- Development Team: Your 10-digit development team identifier obtained from Apple. The Team ID can be found in the Membership Details of your Apple Developer account.
- Keychain Password: The Keychain password for your application. On the iPhone, Keychain rights depend on the provisioning profile used to sign your application. Ensure that you consistently use the same provisioning profile across different versions of your application.
- Development Method: The application's distribution method. The method can be one of the following:
- Once you have configured all the required details, click Done.
You can now build your application for iPhone or iPad which generates the IPA file.
NOTE: All errors, warnings, and confirmations can be seen on the Console.
Create a remote connection to a Mac device
While making use of the Build Native Locally option to create an iOS native application, if you are using a Windows machine, you can configure Quantum Visualizer to make a remote connection to a Mac machine.
Before you configure the Mac Details, ensure that you have followed the steps mentioned at IPA Generation.
To configure Quantum Visualizer to make a remote connection to a Mac machine, follow these steps:
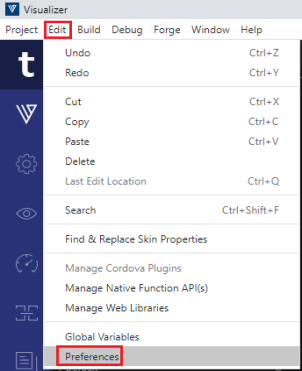
- In Quantum Visualizer, click Edit > Preferences. The Visualizer Preferences window appears.
- Click the Mac Details tab.
- Under the Mac Details section, enter the following details:
- IP Address: The IP address or domain name of the Mac system in which you want to remotely build and view your application.
- Username: The user name of the Mac system you want to remotely access to build your application.
- Password: The password of the Mac system you want to remotely access to build your application.
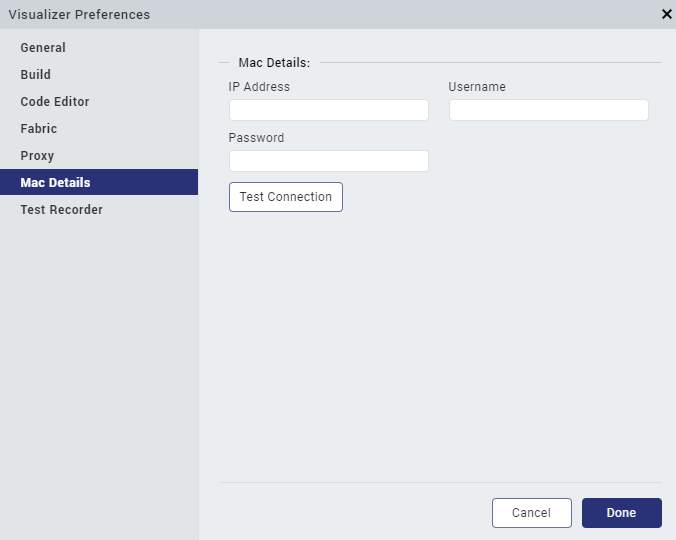
- Click Test Connection to validate the connection to the Mac device.
- Click Done.
Enable Data Protection for an iOS App
Data protection is an iOS feature that prevents unauthorized access to the files of an app by encrypting user data. While creating an app, you must specify the level of data protection that you want to apply to the app. There are four levels of data protection (Complete, Complete unless open, Complete until first user authentication, and No protection) that determine when you may access files of the app. If you do not specify a protection level when you create a file, Quantum Visualizer User Guide applies the default protection level automatically.
To enable data protection entitlement for an app in Quantum Visualizer, follow these steps:
IMPORTANT: Before you start using data protection entitlement for an app, ensure that you have added (or enabled) the data protection capabilities in the provision profile that you have associated with the app.
- From the Workspace folder of the app, navigate to the
resources/commondirectory. - Open the quantum_nitro_configuration.json file.
- Add the Data Protection key, and provide any of the following values to the key, based on the level of data protection that you want to provide for the app:
- NSFileProtectionComplete: The file is stored in an encrypted format on the disk, and cannot be read from or written to while the device is locked or is booting. For more information, ,refer NSFileProtectionComplete.
- NSFileProtectionCompleteUnlessOpen: The file is stored in an encrypted format on the disk, after it is closed. For more information, ,refer NSFileProtectionCompleteUnlessOpen.
- NSFileProtectionCompleteUntilFirstUserAuthentication: The file is stored in an encrypted format on the disk, and cannot be accessed until after the device has competed booting. For more information, ,refer NSFileProtectionCompleteUntilFirstUserAuthentication.
- Null: The file has no special protections associated with it.
NOTE: The default value for the Data Protection key is Null.
Here is a sample quantum_nitro_configuration.json file entry that enables complete data protection for the app:
"Capabilites": {
    "Data Protection": "NSFileProtectionComplete"
},
Enable App Privacy for an iOS App
Based on the third-party SDK requirements mandated by Apple from May 2024, if an app uses third-party SDKs, you must include a privacy manifest file in the app before submitting it to the App Store.
The Privacy Manifest file contains information about the Required Reasons APIs and the type of data collected by the third-party SDK.
The iOS plugin of Quantum Visualizer has been updated to support the inclusion of Privacy Manifest Files and the Required Reason APIs in the app build to enhance user privacy and security.
To include Privacy Manifest files in the app build, follow these steps:
- From the Workspace folder of the app, navigate to the
resources\directory. - Based on the channel for which you want to build the app, navigate to one of the following folders:
- For the iPhone channel -
resources\mobile\native\iphone\folder. - For the iPad channel -
resources\tablet\native\ipad\folder. - For the watch channel -
resources\watch\native\watchos\folder. - For app extensions -
resources\folder.
- For the iPhone channel -
- Create a new folder with the name privacyinfo.
- Create (or add) the Privacy Manifest file (or files) with the .xcprivacy file extension.
- Type the code for your Privacy Manifest file in the
<filename>.xcprivacyfile, and save the updates. - In Quantum Visualizer, build the app for the iOS platform on the required channels by using the Build Native Local option.
The privacy manifest files are included in the generated kar file at the <kar>/resources/<channel>/privacyinfo location.
- For apps that use the Micro Apps Architecture, if a linked Micro App contains privacy manifest files, the name of the child app is added as a prefix to the name of the
.xcprivacyfile.
For example, if the Micro AppApp1contains a Privacy Manifest filePM1, the resulting file that will be copied into the privacyinfo folder of the Composite app isApp1_PM1.xcprivacy. - For app extensions, the privacy manifest files are included in the generated kar file at the
<kar>/app-extensions/<extension_app>/resources/privacyinfolocation.