
Sync Configuration
The Sync Configuration section enables you to perform various tasks such as viewing an application and its configuration file, adding, editing and deleting an application.
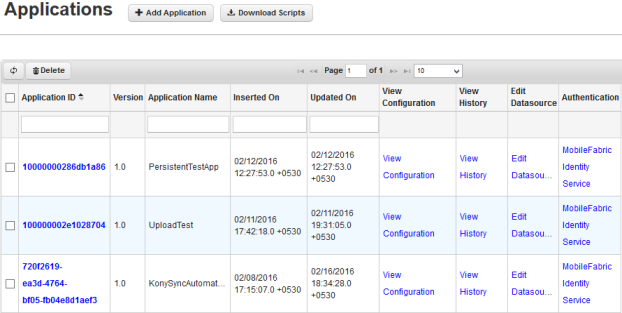
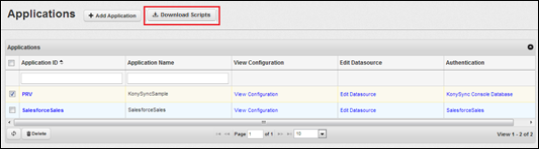
Following actions can be performed in this screen:
- Add Application
- View Configuration
- Change Configuration
- Delete Application
- Edit Datasources
- Assign Authentication Profile to Application
- Generate Upload and Replica DB Scripts
- Pagination
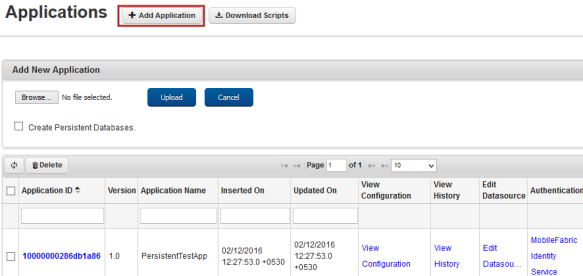
Add Application
Kony Fabric Sync Console enables you to add an application when needed.
To add an application, follow these steps:
- Click Add Application to add a new application in the Applications screen. The Add New Application view appears.

- Click Browse to get the configuration file and then click Upload.
After successfully uploading the configuration file, a confirmation message, Application Configuration uploaded successfully appears. The added application appears under the Applications list.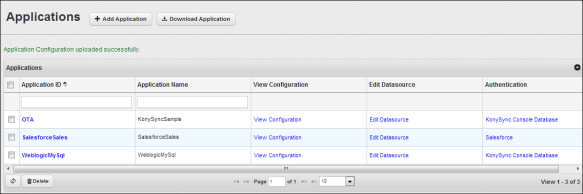
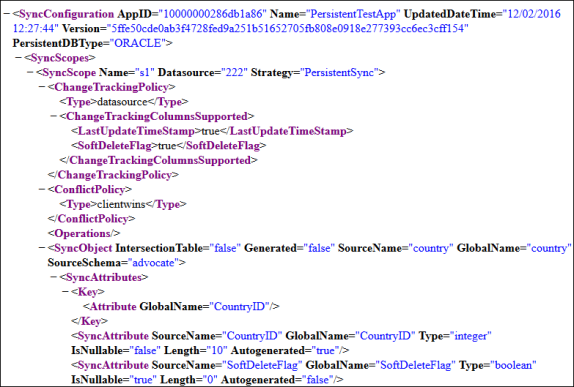
View Configuration
You can view the configuration file to know about the various configurations.
Change Configuration
Kony Fabric Sync Console provides you an option to change the configuration file when needed.
To change the configuration file of an application, follow these steps:
- Click the desired Application ID. The Edit Application view appears with an option to browse for the configuration file.

- Click Browse to browse the required new configuration file and click Upload. After the successful update, a confirmation message, Updated the Application successfully appears.
- Click Cancel to abort the operation.
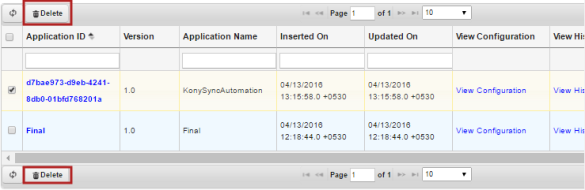
Delete Application
You can either delete a single application or multiple applications.
To delete an application, follow these steps:
- On Kony Fabric Sync Console, under Configurations, click the Sync Configurations tab to view the list of applications available.
- Click an Application ID checkbox to delete and click Delete.
- A confirmation message, Are you sure you want to delete selected Application(s)? appears:
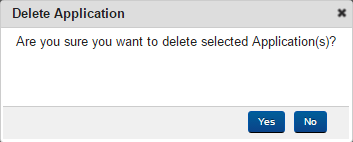
- Click Yes to delete the selected application.
After successful deletion, a confirmation message, Application(s) deleted successfully appears.
Edit DataSources
Kony Fabric Sync Console provides you an option to edit the datasources of a sync console application.
To edit the datasources of an application, follow these steps:
- Click Edit DataSources of the desired application from the list of applications displayed. The Edit DataSource dialog appears with an option to update the connection parameters. You can use the same page to modify all the supported datasources such as Middleware Database or Web service Endpoint.
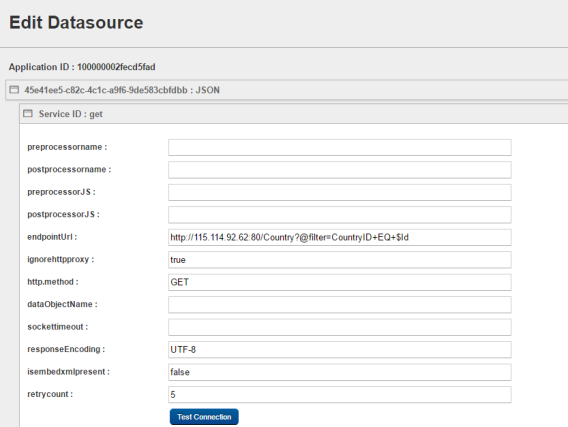
- You can test the latency and connectivity during customer ticket debugging by providing the valid database details and clicking on Test Connection. A message will be displayed as Test Connection Successful.
- Click Update to update the modifications.
- Click Reset to reset the updated changes .
- Click Cancel to abort the operation.
Assign Authentication Profile to Application
Kony Fabric Sync Console provides you an option to assign Authentication profiles (created in User Management > Authentication tab) to an application.
Note: You may refer to Authentication for detail information on authentication.
To assign or change the authentication profile of an application, follow these steps:
- On Kony Fabric Sync Console, under Configurations, click the Sync Configurations tab to see the list of available applications.

- Click the hyperlink under Authentication column of the desired application.
The Assign Authentication dialog appears.
- Select an authentication type from the authentication types drop-down and click Save.
Note: In Kony Sync 5.0, you should assign custom authentication as mentioned in Custom Authentication Manager.
Generate Upload and Replica DB Scripts
Kony Fabric Sync Console provides you an option to generate upload and replica DB scripts while adding the application itself.
To create the DB scripts, while adding the application, follow these steps:
- On Kony Fabric Sync Console, under Configurations, click the Sync Configurations tab to see the list of available applications.

- Click Add Application to add a new application. The Add New Application view appears.
- Click Browse to get the configuration file.
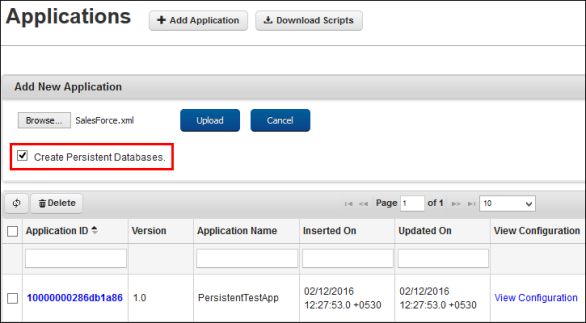
- Select the Create Persistent Databases checkbox and then click Upload.
The next screen shows the configuration details that are captured from the configuration file:
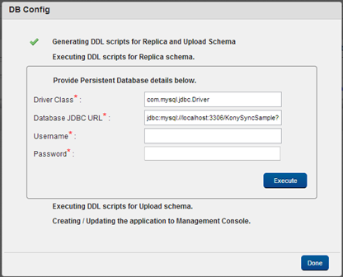
- Enter the username and password of the database and click Execute for both Replica and Upload schema.
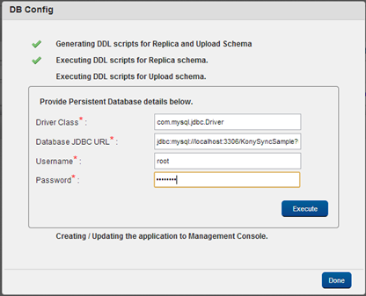
After the successful uploading of DB scripts, a confirmation message, Updated the Application successfully appears.
- Click Done.
The added application appears in the grid.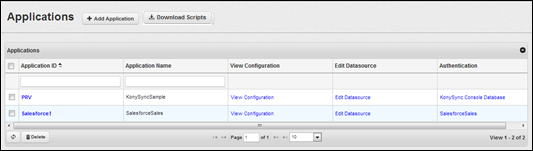
- To download DB scripts, you can select the application and click Download Scripts.
Note: You can download only those applications that are added using the Create Persistent Databases checkbox.
| Rev | Author | Edits |
| 7.1 | GS | GS |
| Copyright © 2012 Kony, Inc. All rights reserved. |