
Kony Management Quick Start Guide: Generating Package Family Name Windows
Generating Package Family Name
To create Package Family name for Windows Phone 8.x devices and Windows 8.1. follow these steps:
- In a browser, navigate to http://dev.windows.com/en-us/ and click on Sign in. The Sign in page appears.
- Enter your windows credentials and click Sign in.
The Windows Developer page appears.
- Click Dashboard. Choose your dashboard page appears.
- Click Windows Phone Store. If you are not registered as an app developer already, you will be prompted to register as an app developer. F
- Click Accept and continue. The Getting Started page appears.
- Click Join Now. The Account Type page appears.
- From the Country/region drop-down list, select your country. Pick account type option appears. Two types of accounts are available. Individual and Corporate.
- Select your account type and click Enroll now. The Account info page appears.
- Provide all required information in the Account info form.
- Click Next. The Approver info page appears.
- Provide all required information in the Approver info form.
- Click Next. The Agreement page appears.
- Accept Terms and Conditions and then click Next. The Payment options page appears.
- Select Pay for the account and then click Next. The Purchase page appears.
- Review your purchase details and click Purchase. The You're done! page appears.
- Click Done. Dashboard details appear.
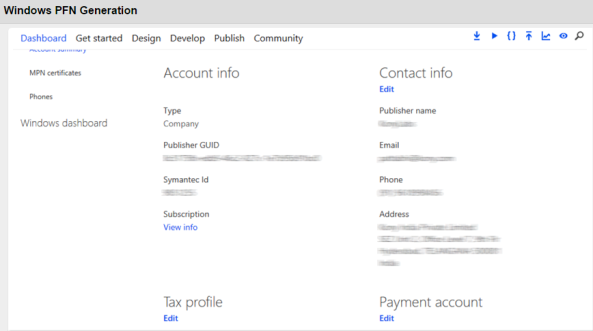
- Make a note of Publisher GUID details.
- In the Dashboard, click Windows Store apps. Windows store apps details appear.
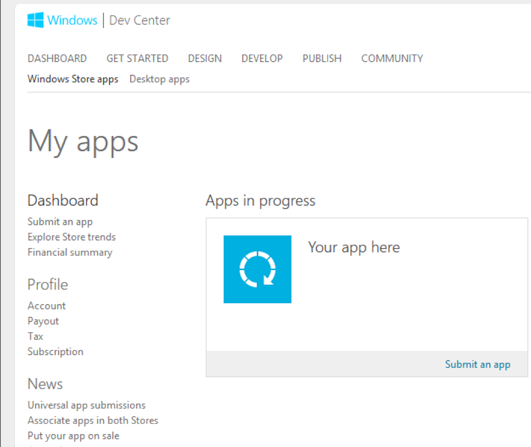
- Click Submit an app. The Submit an app page appears.
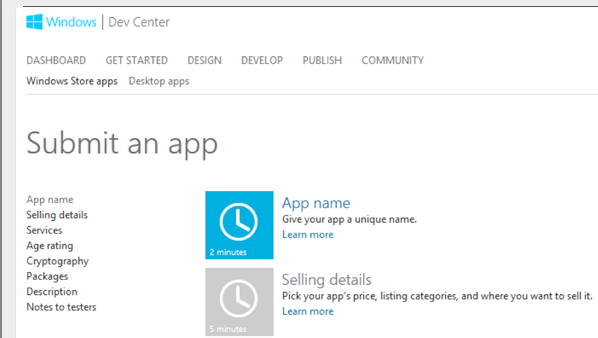
- Click App Name. App name details appear.
- In the App name text box, enter a unique app name and click Reserve app name. App name details appear.
- Click Save. Confirmation message displays and App name details appear in the dashboard.
- Click Services. Services details appear.
- Click Live Services site. Configure WNS details in this page.
- Navigate to Settings > App Settings.
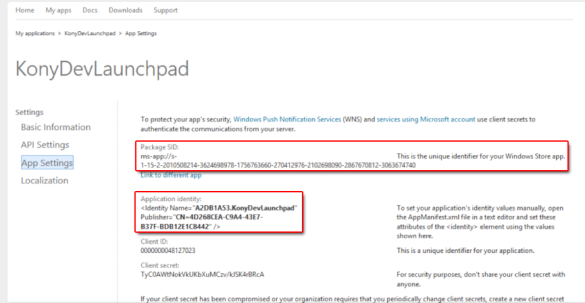
- Make a note of Package SID and Client Secret details. You need these details to enter in the EMM portal.
- Open Microsoft Visual Studio.
- Open a new project. The New project page appears.
- In the left pane, choose Visual C#, then Store Apps, and then Windows Phone Apps.
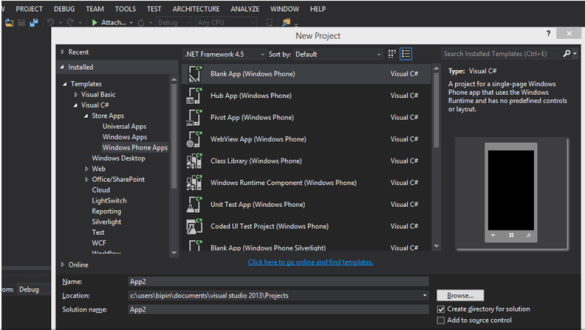
- Choose Blank App (Windows Phone).
- In the Name text box, provide the app name and then click OK.
- In the right pane, right click on the app and select Associate App with the Store. The Associate your app page appears.
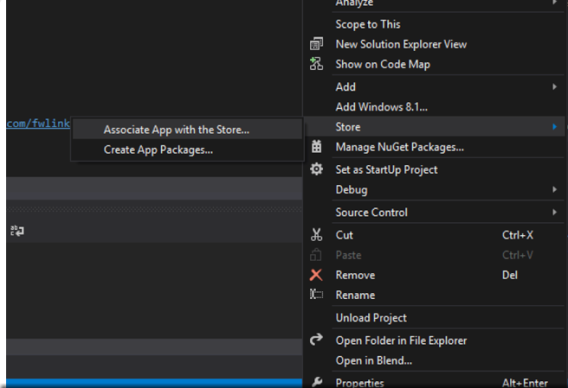
- Click Next. The Sign in to the Windows Phone Store page appears.
- Enter your Microsoft credentials and click Sign in. The Select an app name page appears.
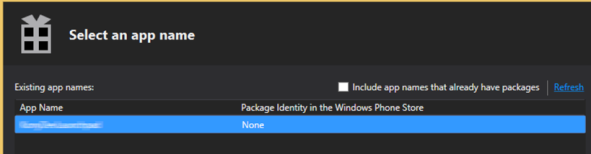
- Select the app name which you reserved and click Next. The Associate you app page appears.
- Review the details and click Associate. A success message appears.
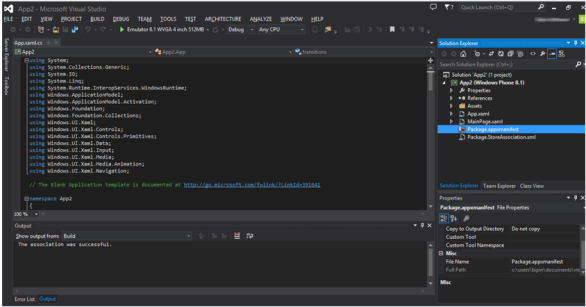
- In the app, open Package.appxmanifest file. Package Family Name is highlighted.
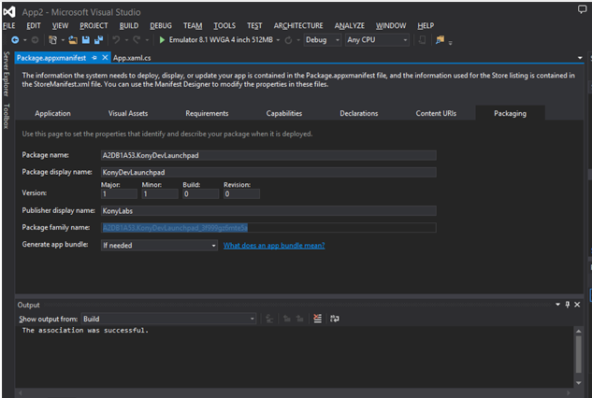
- Copy Package Family Name details. You need them later to enter into the EMM console.
| Copyright © 2017 Kony, Inc. All rights reserved. |