
Publish a Kony Fabric App
Until an app is published, all its services and features are limited to just the Kony Visualizer development environment. To connect the app to live services, you have to publish the application to Kony Fabric. After you have signed in to Kony Fabric, you can select and publish your app to any of your cloud accounts. You can publish your app from the Kony Fabric Console by using the Publish tab.
Prerequisites
Before you can publish an app to Kony Fabric, you must meet the following prerequisites:
- Have a Kony Fabric account.
- Configure Kony Fabric in Kony Visualizer.
- Create a Kony Fabric app corresponding to the Kony Visualizer app that you are publishing.
For more information, refer Connecting to Services and Getting Started with Kony Fabric.
Important: If your app contains deprecated widgets, it is possible that their skins may refer to the Helvetica font. If you are not explicitly using Helvetica in your app, you must verify your app's configuration and manually remove references to Helvetica before submitting it to the store.
This topic contains the following sections:
Directly Publish an App to Kony Fabric
From Kony Visualizer V8 SP4 FP 35 onwards, an option to directly publish your app to Kony Fabric has been provided. This feature is available on both Kony Visualizer and Kony Visualizer Classic.
To directly publish an app to Kony Fabric, follow these steps:
- In Kony Visualizer, sign in to your Kony Cloud account. To do so, from the upper-right corner of the Kony Visualizer window, click Login. The Kony Account sign-in window opens. Type your Kony Cloud email and password credentials, and then click Sign in. Kony Visualizer uses the configured Kony Fabric URL to sign in to Kony Fabric.
Note: In Kony Visualizer Classic, you can configure the Kony Fabric URL by going to: Window > Preferences > Kony Visualizer > Kony Fabric.
Important: If you are not able to get beyond the login page for the Kony Fabric Console, it could be because you set up Kony Fabricby using a self-signed certificate. The self-signed certificate allows you to install Kony Fabric, however, which Windows and Google Chrome do not trust the allow you to sign in. To resolve this issue, locate the certificate (you may need to contact your system administrator to do so), and then import it to the Trusted Root Certification Authorities folder of the Windows Certificate Store. For more information on how to import a certificate into the Windows Store, refer Import or export certificates and private keys on the Microsoft web site.
- Select a default environment for Kony Fabric. To do so, on the File menu, click Settings. Then, click the Kony Fabric Details tab. At the top of this tab, under Kony Fabric Environment, select an environment from the drop-down list. Click Finish. If you do not see any environments listed, you need to create one. For more information, refer Environments in the Kony Fabric Console User Guide.
- To publish to Kony Fabric, your Kony Visualizer client app must be associated with a Kony Fabric app, which means that you need to either create a new Kony Fabric app or use an existing one. To do so, on the Project tab of the Project Explorer, click the context menu arrow for Kony Fabric, and then click either Create New App or Use Existing App. From the Kony Fabric Application dialog box, select the Kony Fabric app to which you want to associate your Kony Visualizer app. For more information on how to create a new Kony Fabric app, refer How to Add Applications in the Kony Fabric Console User Guide.

Note: If you want to associate your Kony Visualizer app with a different Kony Fabric app, on the Project Explorer, click the context menu arrow for Kony Fabric, and then click Unlink App. To link to a different Kony Fabric app, click the context menu arrow for Kony Fabric, and then click either Create New App, or Use Existing App.
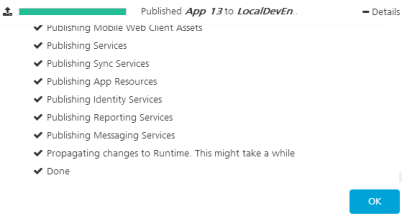
- Right-click Kony Fabric for the linked app, and then click Publish to Kony Fabric. The app is successfully published to Kony Fabric.
Note: If you have not done so earlier, a dialog box appears asking you to select a valid Kony Fabric environment.
Publish the App from Kony Fabric
After you have published your app to Kony Fabric from Kony Visualizer, you can publish the app from Kony Fabric. This feature is applicable only in Kony Visualizer Classic.
To publish your app from Kony Fabric, follow these steps:
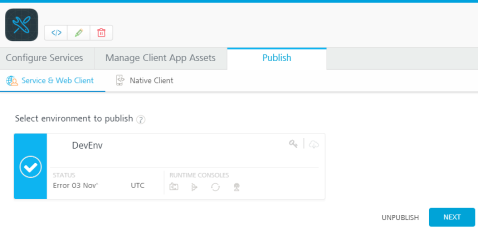
- Once you have selected a Kony Fabric app to which you want to bind your Kony Visualizer app, the Kony Fabric Console opens. On the Kony Fabric console, click the Publish tab.
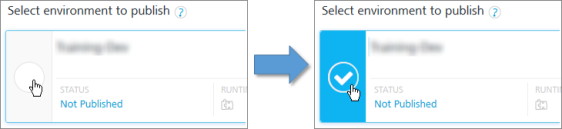
- If the Kony Fabric app to which you have bound the client app has not yet been published, select the app for publish.
- Click Next. The Environments page appears.
- The Configure page displays options to change the configuration of your Services. To make any changes, click + Service Configuration., and then click any of the blue-text fields.
- If available, you can reconfigure the application-level settings and service configuration settings from this page .
- Click Save and Publish. The app and any associated services are published to the selected environment.
- To close the Kony Fabric Console and return to Kony Visualizer, from the Quick Launch Bar along the upper left edge of Kony Visualizer, click the Visualizer icon
 . Since you are still logged in to your Kony account, Kony Visualizer continues to have access to your Kony Fabric apps and services.
 - Launch the app. To do so, on the Product menu, navigate to Run As, and then select an emulator to run the app on.
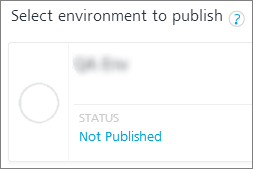
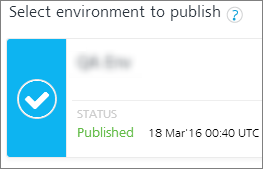
The status of the environment to which you want to publish the client app indicates whether the Kony Fabric app has been published.
| Status when Not Published | Status when Published |
|
|
![]()
Note: If your app is an upload of web app ( such as SPA, Desktop Web/Responsive Web, or Progressive Web App) binary , the Configure page displays a drop-down list of options specific to the web client environment.
Note: If you are building a Kony Visualizer web app ( such as SPA, Desktop Web/Responsive Web, or Progressive Web App), you must first define and publish any required Kony Fabric services. After you build any web application and upload its binaries to Kony Fabric, you cannot publish a service to it.
If you encounter an error while publishing the Kony Fabric, try publishing again.
| Copyright © 2013 Kony, Inc. All rights reserved. |