
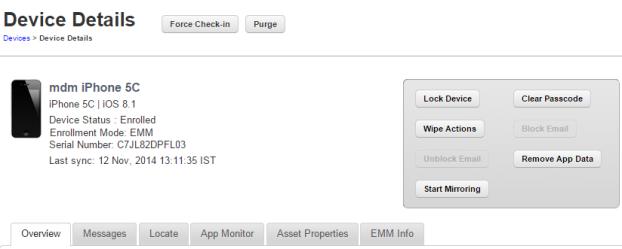
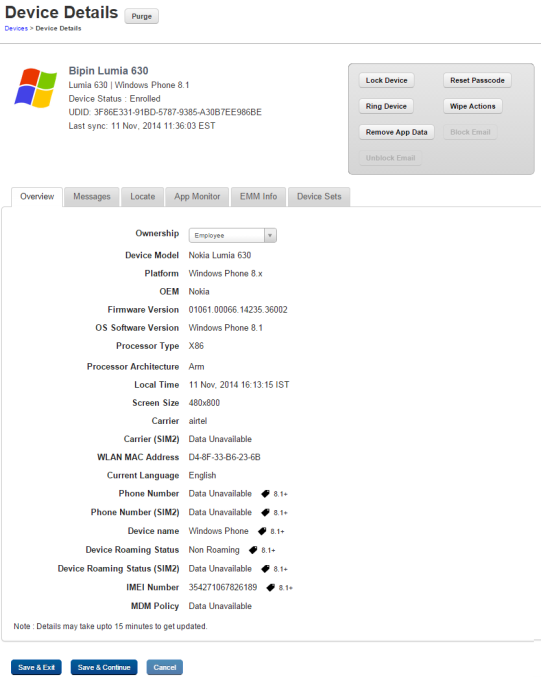
Device Details
The primary purpose of the Device Details page is to display complete information of a device and manage the device through various actions available.
| Screen Element Properties | Description |
|---|---|
| Page Title | This is available on extreme right corner on top of the screen, for example, Device Details. |
| Navigation Link | This link navigates you to main page, for example, click Device List > Device Details link to navigate to Device List main page. |
| Device Name | Displays the unique identification name of the device. |
| Device Status | Displays the current status of the device, for example enrolled. |
| Enrollment Mode | Displays the enrollment mode of the device. |
| Serial Number | Displays the unique serial number of the device. |
| Last Sync | Displays the date and time when the device was last synced with the server. |
Note: For iOS, even after the SIM card is removed from a device, the Home Carrier field and the Current Carrier field in the Device Details page under Overview tab display the existing carrier details.
The Device Details Page content is divided into the following sections.
Device Details Page Tabs
Device details page displays the following tabs:
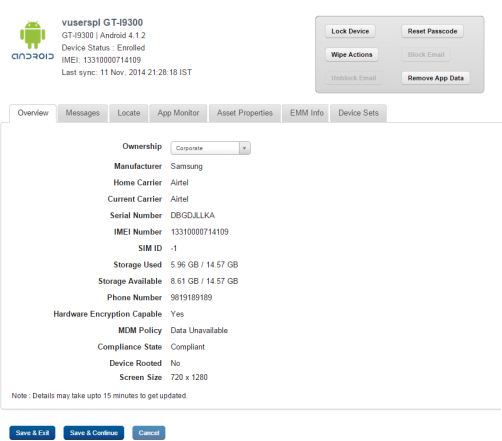
Overview
By default Overview tab is set to active. This tab displays the various attributes of the device. You can update the ownership details only.
Overview for iOS
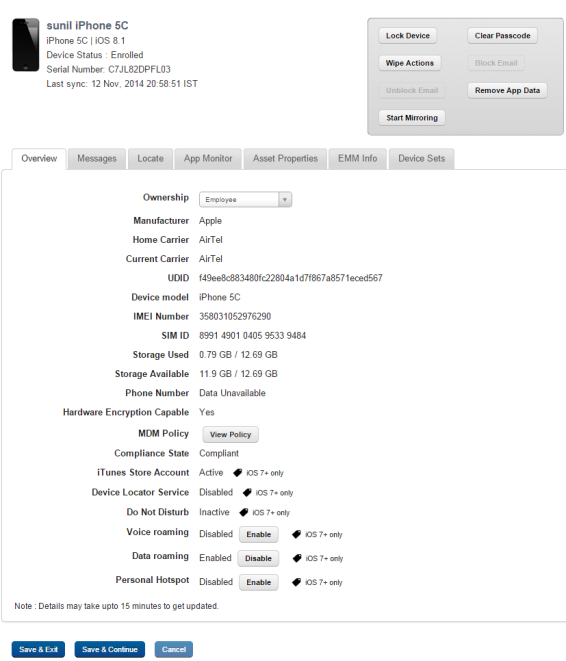
- Compliance State: Displays compliance state of the device.
Note: In case of conditional compliance (or both policy and rule), the system displays the policy name and rule name. For example <policy name:rule name>.
In case of simple compliance, the system displays the compliance status.
For example, <Non Compliant (Min OS Version)> - iTunes Store Account Active: Displays whether an iTunes Store Account is Active.
- Device Locator service: Display whether Device Locator service is enabled.
- Do Not Disturb: Displays whether Do Not Disturb is in effect.
- Voice Roaming: Displays whether Voice Roaming is enabled.
If you enable Data Roaming, the Voice Roaming is enabled automatically.
- Data Roaming: Displays whether Data Roaming is enabled. You can modify it to Disable.
- Personal Hotspot: Displays whether Personal Hotspot Enabled. You can modify it to Disable.
Manufacturer:
- Device Date & Time: Displays date and time of the device.
Date: Displays date of the device.
Time: Displays time in HH/MM/SS format (12 hour or 24 hour set on device)
Timezone: Displays timezone of the device.
The Admin can modify the date and time settings if permissions are granted in the Device Restrictions policy.- Click the Modify button if you wish to change the settings.
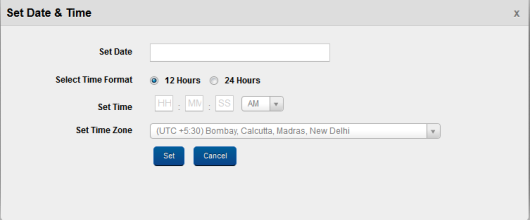
- In the Set Date & Time dialog, enter the details and click Set.
- Click the Modify button if you wish to change the settings.
- Compliance State: Displays compliance state of the device.
Note: In case of conditional compliance (or both policy and rule), the system displays the policy name and rule name. For example <policy name:rule name>.
In case of simple compliance, the system displays the compliance status.
For example, <Non Compliant (Min OS Version)>
- Certificates (Android SAFE): Displays certificates installed on the device.
The administrator can remove all of these certificates if required. When the administrator attempts to delete certificates, the system displays a confirmation message "Do you want to remove all certificates from the credential store? "
Click Yes to confirm to delete certificates.
-
Block MMS with Storage(Android SAFE)
When MMS is blocked, all the MMSes received are stored on the device, but not shown to the User. The administrator can choose to Unblock MMS by clicking the same. Once unblocked, the MMSes are delivered to the User. - Block SMS with Storage (Android SAFE)
When SMS is blocked, all the SMSs received by the device are stored on the device but not shown to the User. The Admin can choose to Unblock SMS by invoking the same. Once unblocked, the stored SMSs are delivered to the device.
The Admin can also choose to clear the stored SMS messages by click on the Clear Stored SMS button. If cleared stored SMSs, the SMSs are never delivered. This may need to be done if a device is non-compliant and the Block Action was taken. But the device then must be deactivated. Then instead of delivering the SMSs, the admin choose to clear them. - Calls and SMS Stats Capture (Android SAFE)
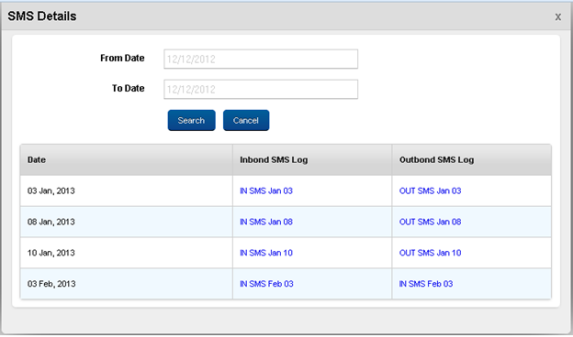
Through Restrictions Policy, both Calls and SMS stats capture can be enabled. This allows the Admin to get logs of all Call and SMS data.
Daily logs are maintained separately for Incoming and Outgoing Calls and SMSes. The Admin can access these from the Device Overview. These logs are stored in .CSV format. They can be downloaded when the User clicks to see Details. The Admin can specify the date range for which to show logs and all the logs are shown.
The max limit of logs allowed per device is 1 MB. If the logs go above that, they are automatically purged in a first in first out manner.
- Reset SMS Count (Android SAFE)
This resets the number of SMS to 0. User can send SMSes again until they reach the limit as specified in the Device Restrictions policy. - Reset Calls Count (Android SAFE)
This resets the number of Calls to 0 (zero). User can send Calls again until they reach the limit as specified in the Device Restrictions policy. - Click the Save and Exit button. In the confirmation message that appears, click OK to return to the device list page.
OR
To remain on the same page to do other changes immediately, click the Save and Continue button.In the confirmation message that appears, click OK to continue.
- Click the MDM Policy button to view the policies applied to the device.For more details, refer Device List
Click the Cancel button to close the window.
Overview - Windows Phone 8.x
Overview:
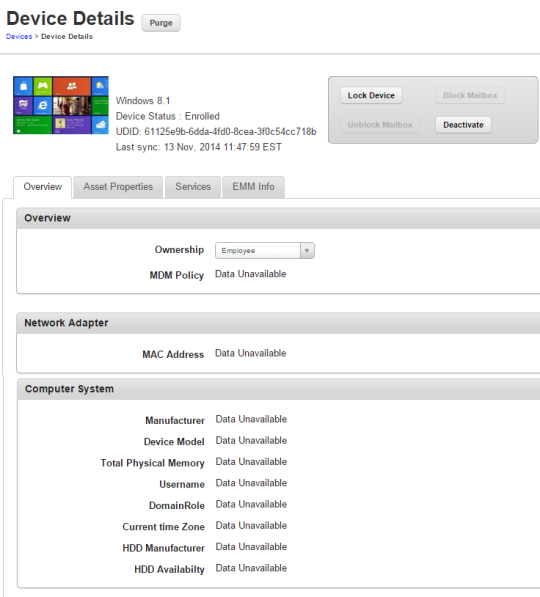
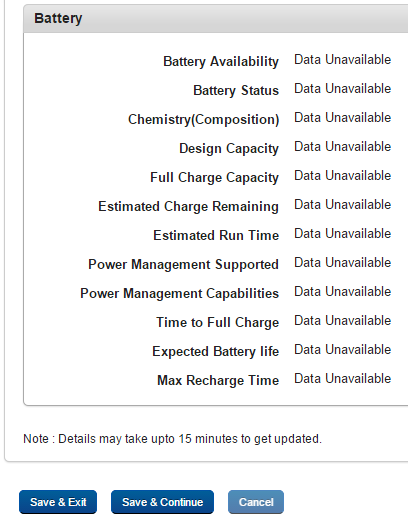
Overview - Windows 8.1
-
Ownership: Displays details of ownership of the device. Options are Corporate, Employee, and Shared.
-
MDM Policy: Displays details of MDM policy applied on the device.
-
MAC Address: Displays the MAC address of the network adapter.
-
Manufacturer: Displays details of the manufacturer of the device.
-
Device Model: Displays device model details.
-
Total Physical Memory: Displays details of total physical memory of the device.
-
Username: Displays username of the device user.
-
DomainRole: Displays details of domain role of the device.
-
Current time Zone: Displays the local time zone details of the device.
-
HDD Manufacturer: Displays details of the HDD manufacturer.
-
HDD Availability: Displays details of HDD availability.
-
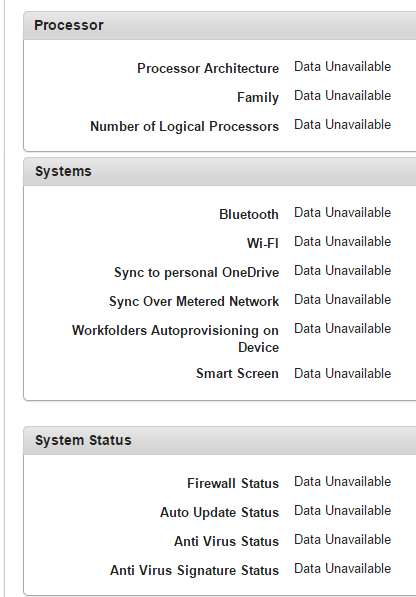
Processor Architecture: Displays details of processor architecture.
-
Family: Displays details of the processor family.
-
Number of Logical Processors: Displays details of logical processors available on the device.
-
Bluetooth enabled: Displays details on whether bluetooth is enabled.
-
Wi-Fi enabled: Displays details on whether Wi-Fi is enabled.
-
Sync to personal OneDrive: Displays details on whether the device is synched with personal OneDrive account.
-
Sync Over Metered Network: Displays details about whether the device can sync over metered network.
-
Workfolders Autoprovisioning on Device: Displays whether the device has auto-provisioning for work folders.
-
Smart Screen: Displays details about smart screen if the device has a smart screen.
-
Firewall Status: Displays details on the status of the firewall.
-
Auto Update Status: Displays details on auto update settings.
-
Anti Virus Status: Displays details on anti virus available on the device.
-
Anti Virus Signature Status: Displays details on the status of anti virus signature.
-
Battery Availability: Displays details on battery availability.
-
Battery Status: Displays details on status of the battery.
-
Chemistry(Composition): Displays details of the chemical composition of the battery.
-
Design Capacity: Displays details about the design capacity of the battery.
-
Full Charge Capacity: Displays details on the full charge capacity of the battery.
-
Estimated Charge Remaining: Displays details of the remaining charge on the battery.
-
Estimated Run Time: Displays details on how long the battery can run.
-
Power Management Supported: Displays details of power management if power management is supported.
-
Power Management Capabilities: Displays details of power management capabilities.
-
Time to Full Charge: Displays the time needed to fully charge of the battery.
-
Expected Battery life: Displays details on the expected battery life of the device.
-
Max Recharge Time: Displays details on the maximum amount of time needed to recharge the battery of the device.
Messages
This option is used to send a message to a device user. The administrator can send a message to a Device User for various reasons, for example,
- Inform the user about a new requirement or development.
- Request the user to take an immediate action, for example, any compliance issue.
- Inform the user about completion of certain tasks.
- The Device Users receive the message in the mode specified and can view the same.
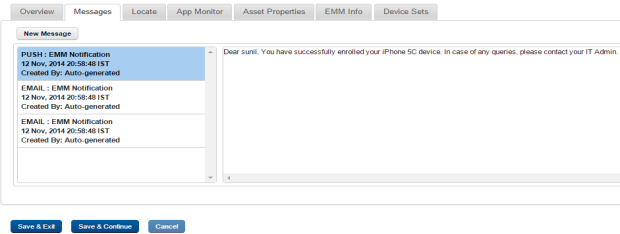
To compose a message, follow these steps:
- Click the New Message button to open the Compose Message window. Enter the following details:
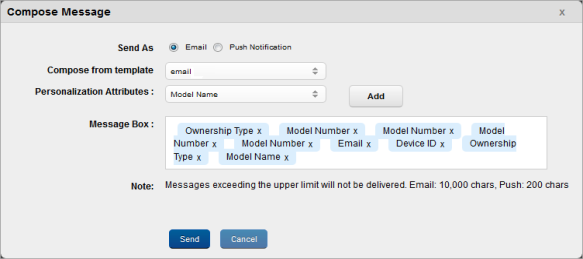
- Send As: By default this option is set to Email. You can modify it to Push Notification.
- Compose from Template: Select the required option from the drop-down menu.
To automate the work-flow process, you create message templates under Device Settings > Message Templates section. You can access these messages in Compose Message window through Compose from Template dropdown list.
- Personalization Attributes: Select the required attribute from the dropdown list. These details are populated through Active Directory.
The Personalized Attributes are predefined and system displays the related details as per the selected attributes. For example, if you select Device OS, Device Name, and the Device Model No from the dropdown list. The respective details are picked up from the device and appended in the sent message.
- Click the Add button. The details appear in the Message Box.
- Click the Send button to submit the message. In the confirmation message (Send Message – Success) that appears, click OK to continue.
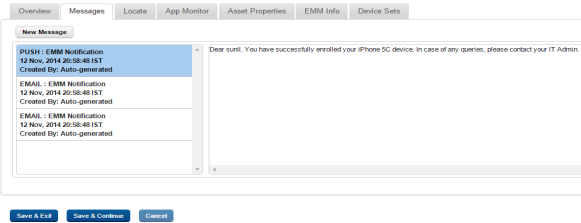
The message appears in the message window
- Personalization Attributes: Select the required attribute from the dropdown list. These details are populated through Active Directory.
The Personalized Attributes are predefined and system displays the related details as per the selected attributes. For example, if you select Device OS, Device Name, and the Device Model No from the dropdown list. The respective details are picked up from the device and appended in the sent message.
- Click the Add button. The details appear in the Message Box.
- Click the Send button to submit the message. In the confirmation message (Send Message – Success) that appears, click OK to continue.
The message appears in the message window.
Locate
The Locate Tab displays the location details. You may wish to know the location of a device under several situations. For example,
- The device is out of compliance and you wish to take some action against the same.
- You receive an alert on the device.
- User is traveling.
- User is absent without notice for a while.
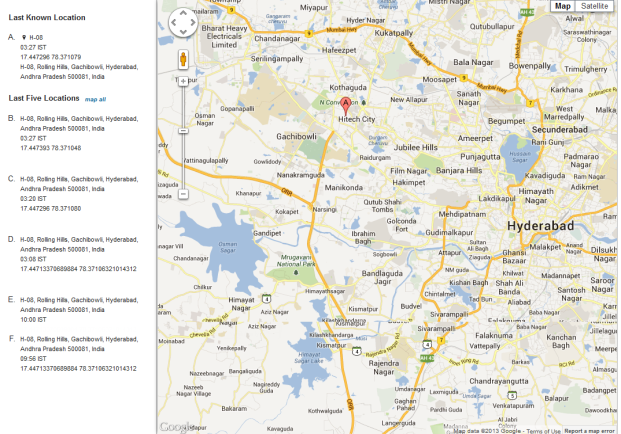
You can view the most recently polled location of the device both in terms of coordinates as well as the address as indicated by the used maps service.
You can also view the last 5 locations of the device as per the location samples collected.The system displays the following location information about the device:
- Current location
- Location Address (as provided by the maps software used)
- Time of Polling (Time specified in UTC)
- Map (with pinned location) with latitude and longitude details
- Past 5 locations
- Location Pin Name
- Location Addresses
- Time of Polling
You can zoom in and zoom out as required.
Important: If location is turned off on device, then portal does not display the map with last five locations.
Note: If you are using a free Google Maps license, when the limit is reached you will see an error - 'Geo coder failed due to:OVER_QUERY_LIMIT'. In such cases it is recommended to move to a business license.
App Monitor
The App Monitor displays the installed apps on a device. It does not display default apps that are installed with OS.
- Installed Apps: Installed Apps section displays all apps that are installed on the device. Details of installed apps and app details vary based on the operating system of the device. You can find more details on it in the sections below specific for each OS.
- Targeted Apps: This section displays all apps targeted to a device but not installed on the device.
There are
- Enterprise Applications: Apps which are published into Enterprise Store are known as Enterprise Apps. These can be deleted by the Administrator, if they are downloaded through the Enterprise Store. They cannot be deleted in iOS devices if they are side-loaded.
- Personal Applications: Apps which are downloaded through Public Apps store like Apple App Store or Google App Store are considered as Personal Apps. If Whitelisted apps are installed by a User from the Apple App Store or Google Play, they are considered as Personal apps as they are not pushed by the EMM Server. These apps cannot be deleted.
- Managed Apps: Public Apps pushed through EMM are considered as Managed Apps. They can be deleted.
For Windows 6.x devices, none of the apps can be removed remotely.
App Monitor for iOS
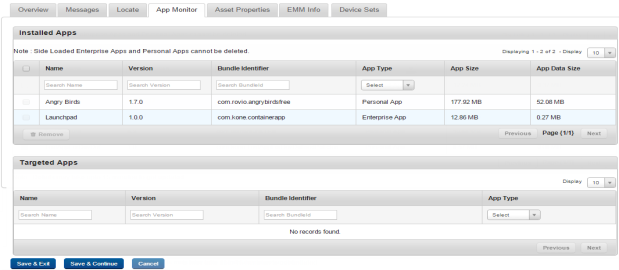
The App Monitor list view for iOS has the following details:
- Name: Displays the Name of the application.
- Version: Displays the Version of the application.
- Bundle Identifier: Displays the bundle ID of the application.
Note: In the App Monitor tab for iOS, Publisher has been replaced with Bundle Identifier.
- App Type: Displays the type of the application.
- App Size: Displays the size of the installed application.
- App Data Size: Displays the size of the data in the application.
App Monitor for Android
You can search a desired app through search filters based on all grid columns. You can apply a single or a combination of search filters to define the search criteria and get the refined outcome.
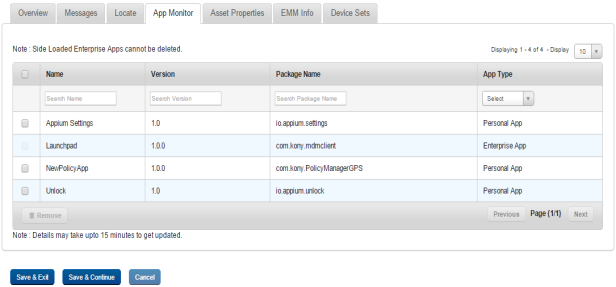
The App Monitor list view for Android SAFE devices has the following details:
To search for an app, follow these steps:
- Name: Displays the Name of the application.
- Version: Displays the Name of the application.
- Package Name: Displays the package name of the application.
Note: In the App Monitor tab for Android, Publisher has been replaced with Package Name.
- App Type: Displays the type of the application.
- App Status:Displays the status of the application.
- App Running: Displays whether the application is running or not running. The administrator can change App Running status remotely.
- App Uninstallation Mode: Displays whether the uninstallation of the application is allowed or not on the device.
- Actions: An administrator can perform additional tasks available in the drop-down list.
Based on several combinations with App Status, App Running, and App Uninstallation Mode, the actions are shown in the Actions drop-down list.- If App Status is Enabled, the system displays available action as Disable App in the Actions. An administrator can disable or enable the app.
- If an app running is running, an administrator can stop the app by selecting the Stop App in the Actions drop-down list. An administrator can start or stop an app based on the running status.
- If an app is Not Allowed for uninstallation, an administrator can allow user to uninstall the app by selecting the Allow Uninstallation in the Actions drop-down list. An administrator can allow or deny user to uninstall an app based on the uninstallation mode status.
The following table shows the list of actions present with different possible conditions.
If Then, the system displays the following actions App Status App Running App Uninstallation Mode Enabled Yes Allowed - Disable App
- Stop App
- Disallow Uninstallation
Enabled No Not Allowed - Disable App
- Start App
- Allow Uninstallation
Disabled No Allowed - Enable App
- Disallow Uninstallation
Disabled No Not Allowed - Enable App
- Allow Uninstallation
- The Admin can get more information of an application. To view more information, hover your mouse on an app under the Name column. The system displays the following information shown below:
App Cache Size (in MB)
App Data Size (in MB)
App CPU Usage (in %)
- According to your search filters criteria, the list view is updated with respective applications details.
App Monitor for Windows Phone 8
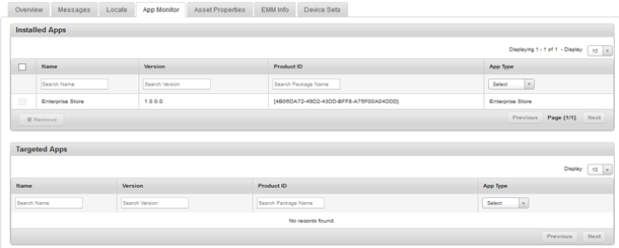
The App Monitor list view for Windows Phone 8 has the following details:
- Name: Displays the name of the application.
- Version: Displays the version of the application.
- Product ID: Displays the product ID of the application.
- App Type: Displays the type of the application.
Services for Windows 8.1
For Windows 8.1 devices, Asset Properties tab is replaced with Services tab.
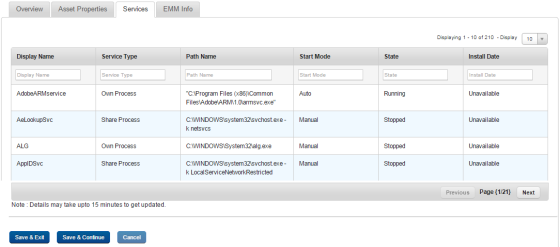
The Services list view for Windows 8.1 has the following details:
- Display Name: Displays the name of the service.
- Service Type: Displays the service type.
- Path Name: Displays path name.
- Start mode: Displays whether the service starts automatically or manually.
- State: Displays details on the running status of the service.
- Install Date: Displays the date on that the service is installed.
Removing an App
To remove an app, follow these steps:
- Select the check box next to the app name in the list view.
- Click the Remove button. In the confirmation message (Remove Application) that appears, click the OK button to return to the details page.
- Click the Save and Exit button.In the confirmation message ( Device details) that appears, click the OK button. The updated device is displayed in the list view.
- Click the Save and Continue button to remain on the same page to update other details.
Note: You can not remove any child apps from the devices manually.
Asset Properties
You can view and update the Asset Properties as captured during device enrollment. You can update the asset details through Asset Properties tab.
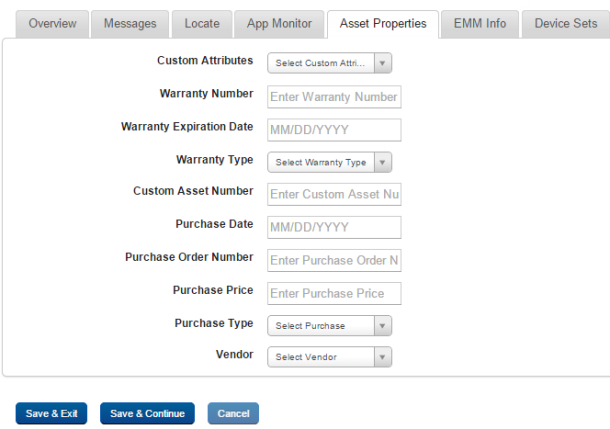
- To perform the updates, follow these steps:
- Custom Attributes: Select a custom attribute you want to add from the list.
- Warranty Number: Enter Warranty Number in the Enter Warranty Number text field.
- Warranty Expiration Date: Click in the field to open the Calendar window to select the warranty expiration date.
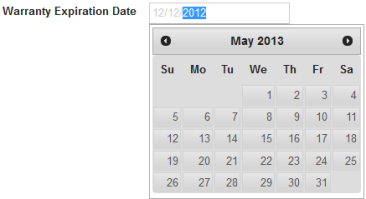
Click the required date in the calendar. The selected date appears in the date field.
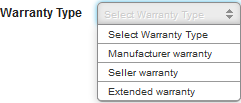
- Warranty Type: Select the required warranty type from the dropdown list.
- Custom Asset Number: Enter the custom asset number in the text field.
- Purchase Date: Click in the field to open Calendar window to select the warranty expiration date.
- Purchase Order Number: Enter the purchase order number in the text field.
- Purchase Price: Enter the price of the asset.
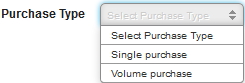
- Purchase Type: Select the appropriate purchase type from the dropdown list.
- Vendor: Select the correct vendor from the dropdown list.
- Click the Save and Continue button. In the confirmation message (Save Device Details - Success)that appears, click OK to continue.
OR
-
Click the Save and Exit button to save the updates and exit the page.
EMM Info
You can view EMM Info as captured during device enrollment.
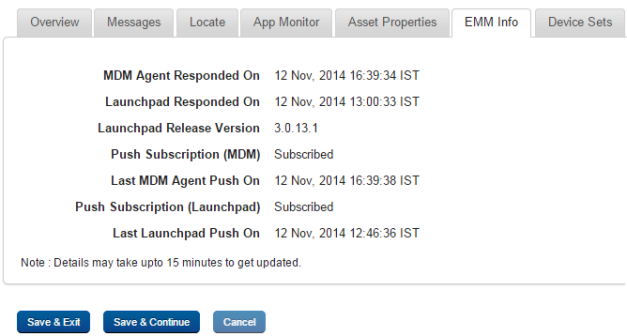
- MDM Agent Responded On: Displays details about when the MDM agent responded.
- Enterprise Store Responded On: Displays details on when Enterprise Store responded.
- Enterprise Store Release Version: Displays Enterprise Store release version number.
- Push Subscription (MDM): Displays whether MDM push is subscribed.
- Last MDM Agent Push On: Displays details on when the last MDM agent push occurred.
- Push Subscription (Enterprise Store ): Displays whether Enterprise Store push is subscribed.
- Last Enterprise Store Push On: Displays details on when the last Enterprise Store push occurred.
Device Sets
The Device Sets tab displays device set names the device belongs to.
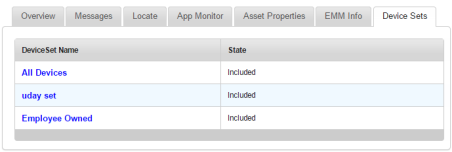
- Device Set Name: Name of the device set.
- State: Displays the device state. The state can be included or excluded. The included state denotes that the device adheres to policies of the device set. The excluded state means that the device is excluded from all policies of the device set.
Device Details Page Actions
You can perform the following activities from Device List page.
- Searching for Devices
- Updating Device Details
- Locking a Device
- Device Passcode
- Remove App Data
- Block Email Access on Device
- Allow Email Access on Device
- Power Off Device (For Android)
- Disable Sim Pin Lock (For Android)
- Enable Sim Pin Lock (For Android)
- Resume Device
- Start Mirroring
- Stop Mirroring
- Force Check-in
- Purge
Searching for Devices
You search for devices through search filters based on all grid columns. You can apply a single or a combination of search filters to define the search criteria and get the refined outcome. To search a device, follow these steps:

- Enter or select details for the following search filters:
- Device Name: Enter partial or a complete device name in the Search Device Name text field.
- Status: Select the desired option from the drop-down list.
- Device Owner: Enter partial or a complete owner name in the Search Device Owner text field.
- Ownership: Select the required category from the dropdown list.
- OS: Enter desired operating system version in the Search OS text field.
- Last
- Date
- According to your search filter criteria, the list view is updated with respective device details. By default, the list view displays ten devices according to Display settings, which you can modify through Display dropdown list. You can also scroll the list view through Previous and the Next buttons.
Updating Device Details
The primary purpose to update a device details is to fulfill the requirement of existing business rules. To update a device, click the required device in the list view. Update the details for each tab of the device as required. For more information on this, see Device Details section.
Locking a Device
This action is used to lock the selected device in the following circumstances:
- When a Device is thought to be lost or stolen. The device is locked for a duration before the status is decided as Lost.
- The Device is found to be not in compliance with the rules, and can be locked (for Android). The device is locked automatically with the existing passcode.
- If the Device is not issued to any User, the device can be locked.
If Administrator tries to manually take action on the device, Administrator selects a device from the device list and invokes the Lock action.
For iOS Devices
In case of iOS devices, the system seeks confirmation from the Administrator about the intention to lock. The Administrator receives a message with options. The administrator has to confirm the action by choosing either to Lock or Cancel the action.
By choosing Lock, the device is locked with the passcode existing on the device.
To lock a device, follow these steps:
- Click the required device in the list view. The Device Details page appears.
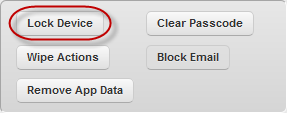
- Click the Lock Device button next to the Reset Passcode button to open the Lock Device window.
- Message: Enter text that to be appeared on the device.
Phone Number: Enter a phone number that to be displayed on the device. Once this number is dialed, your device connects to that number.
- Click Lock. The Lock Device confirmation message appears.
- Click OK to continue .
For Android Devices
For Android Devices, the Admin is informed through a message and a choice is provided for the Admin to Auto-Generate the Passcode prior locking the device with the two choices as Yes and No.
If the Admin chooses to Lock, An automated passcode is generated and applied. The system displays a message confirming that the device has been locked.
If the selected option is No and the Admin chooses to lock, the device is locked with the current passcode. The system displays a message confirming that the device has been locked.
Note: Do not use Auto-generate Passcode if you have any other administrator for the device other than EMM.
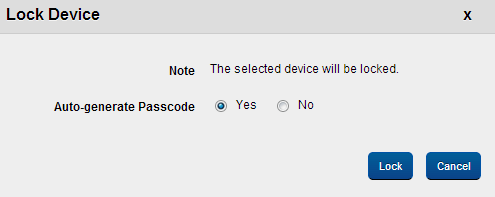
- Click the Lock Device button next to the Reset Passcode button to open the Lock Device window.
- The Lock Device window appears with the following options:
- Auto-generate Passcode:Click the Lock button. In the confirmation message (Lock Device) that appears, click OK to continue.
Device Passcode
As an Admin, you may require to reset the passcode of a device under following circumstances:
- If the Device User requests it.
- If the Device is missing and yet not declared as Lost.
- If the Device is out of compliance and the administrator wishes to stop any further access to the device temporarily (for Android).
- If the device user is changed.
- If a new Passcode is applied, then the new passcode overrides the existing passcode on the device. The device is automatically locked and you should unlock the device before use it again.
- If the passcode is cleared, no passcode exists on the device for a limited period of time. You need to assign a passcode for the device, which is in compliance with their passcode policy.
- For Android, if you fail to assign a new passcode within the stipulated duration, the system triggers an auto-generated passcode and a lock device command.
Clear Passcode for iOS Devices
To clear the passcode for iOS devices , follow these steps:
- Click the required device in the list view. The Device Details page appears.
- Click the Clear Passcode button next to Lock Device button.
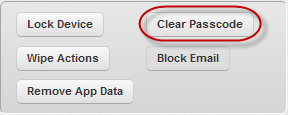
Clear Passcode window appears with the warning message that if user wishes to clear the passcode, this action will clear the passcode and a new passcode will be generated as per policy.
- Click Yes to continue.
- In the confirmation message (Reset Passcode) that appears, click OK to return to the main page.
Note: (For iOS Platform only) When a user is on Passcode lock screen, and at the same moment Administrator initiates the Clear Passcode; the device hangs and the user needs to restart the device.
Reset Passcode for Android Devices
To reset the passcode for Android devices, follow these steps:
- Click the required device in the list view. The Device Details page appears.
-
Click the Reset Passcode button next to Lock Device button.
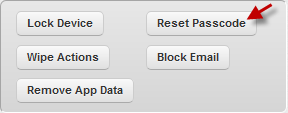
Reset Passcode window appears.
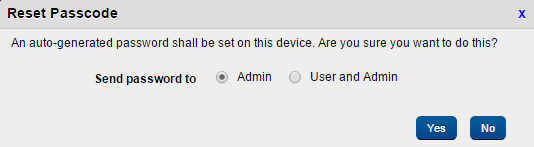
- Send password to: Select where you want to send the reset password. You can choose to end it to the admin alone or to the admin or both admin and the user. By default Send password to is set to Admin.
- Click the Yes button. The System displays the confirmation message stating that the request to reset the passcode is successfully submitted and will be executed shortly.
-
Click the Cancel button to return to the main page.
Reset Passcode for Windows 8.1 Phone Devices
To reset the passcode for Windows 8.1 Phone devices, follow these steps:
- Click the required device in the list view. The Device Details page appears.
-
Click the Reset Passcode button.
Reset Passcode window appears.
- Send password to: Select where you want to send the reset password. You can choose to end it to the admin alone or to the admin or both admin and the user. By default Send password to is set to Admin.
- Click the Yes button. The System displays the confirmation message stating that the request to reset the passcode is successfully submitted and will be executed shortly.
-
Click the Cancel button to return to the main page.
Ring Device for Windows Phone 8.x Devices
You can ring a Windows Phone 8.x device using the Ring Device feature.
To ring a Windows Phone 8.x device,
- Navigate to the Device Details page of the Windows Phone 8.x device you want to ring.
- Click Ring Device. Ring Device confirmation page appears.
- Click Ring. A confirmation message appears stating that the request is submitted.
- Click OK.
Wipe Device
This feature is used to clear the device settings.As an administrator, you may require to wipe the device under several situations:
- If the Device User requests it, for example, the device has become too slow.
- If the Device is missing and yet not declared as Lost.
- The Device is out of compliance and the administrator wishes to stop any further access to the device temporarily.
- If the device user is changed.
The generic process to wipe a device is as follows:
- The Admin selects a device, which needs to be wiped.
- The Admin invokes the Wipe action.
- For Corporate owned and Shared devices, two options are available: Enterprise Wipe or Complete Wipe.
- For Employee owned devices only Enterprise Wipe can be conducted.
- Admin defines the Status for the completion of Wipe action. The Status can be Deactivated, Retired, Device Lost or Suspended.
Note: If a user tries to re-enroll a completely wiped device listed under Enrollment Denied List, the device displays the Terms and Conditions page, in a loop every time a user tries to login. In Enterprise wiped device it works as expected.
To wipe a device follow these steps:
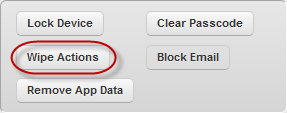
- Click the required device in the list view. The Device Details page appears.
- To open the Wipe window, click the Wipe Actions button next to the Block Email button.
- The Wipe Window appears. The Wipe window includes three steps to wipe a device.
- Step One- Wipe Configuration:Enter the following details:
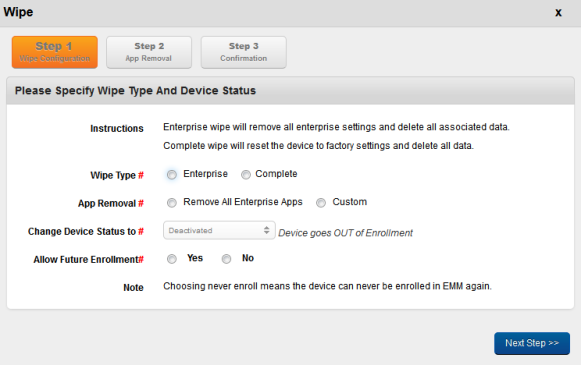
- Wipe Type: Select the Wipe Type as Enterprise or Complete.
If Enterprise Wipe is selected then the selected device is un-enrolled and all enterprise data is deleted through EMM profiles, policies and internal applications.The EMM server still holds control over the device. Enterprise Wipe can be applied on all the devices. enterprise store app data is deleted for iOS but not for Android upon Enterprise wipe.
If the device is completely wiped, the device should be reset to factory settings. All data on the device – enterprise or personal is deleted. Once this wipe is complete, EMM cannot control the device any longer. Complete Wipe can be applied on Corporate and Shared Devices.
Important:
(For Employee owned Devices only)
If you select Complete Wipe as Enforcement Action, then Enterprise Wipe with deactivated state is sent to the device.
(For Corporate and Shared Devices)
If you select Complete Wipe as Enforcement Action, then Complete Wipe occurs but future enrollment of the device is not possible. - App Removal: Click the option as Remove All Enterprise Apps or Custom.
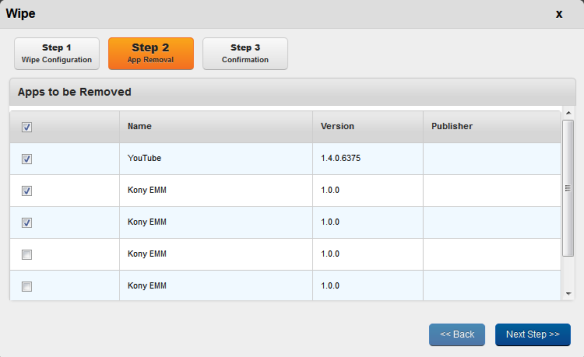
App Removal window appears in Step two only, if the Admin selects the option as Custom in App Removal. It is also possible only for Enterprise Wipe only. It is done only when certain apps are meant to be preserved even after the wipe
You as an Admin should specify to remove all enterprise apps or selectively remove enterprise apps. The default behavior is to remove all the enterprise apps.
- Change Device Status to: Select the device status from the drop-down menu. By default, it is set to Deactivated, which you can modify to following options:
- Deactivated: The device is un-enrolled and the device state is changed to Deactivated. The enrollment rule for this case is Allow Enrollment.
- Retired: The device is un-enrolled and the device state is changed to Retired. The enrollment Rule for this case is Never Enroll.
- Suspended: The device remains enrolled and the device state changes to Suspended. This ensures that Admin still has control over the device. The Admin cannot specify any enrollment Rule.
Note: In case a device is suspended, the Passcode policy and Device Restrictions policy are retained on the device. Rest of all the other policies are removed from the device. However, the device is still expected to be in compliance with the policies assigned to the same.
Note: For Android, when a user ignores Enterprise Wipe request, the system continuously prompts the user until he accepts it to fully wipe Enterprise data from the device. User can ignore Enterprise Wipe request either by clicking the Cancel button or the Home button.
- Allow Future Enrollment: If you select this option, then a device can be enrolled again. This is applicable for Deactivated, Retired, and Device Lost statuses only.Based on corporate policy and your discretion, you can select to allow enrollment or never enroll the device.
Important: : If you perform Enterprise Wipe and select any of the Device Status available, then Kony EMM enterprise store is not removed from the device, although the specific policies are removed
- Wipe Type: Select the Wipe Type as Enterprise or Complete.
- Click the Next step button to navigate to Step No 2.
- Step 2 - App Removal:By default, all the apps in the list view are selected. If required, deselect the check box adjoining app name to retain it.
Important: EMM enterprise store does not get deleted automatically when the User removes control by deleting the profile.The user is required to delete the Agent,if wishes to enroll again.
- Click the Next step button to navigate to Step No 3.
- Step
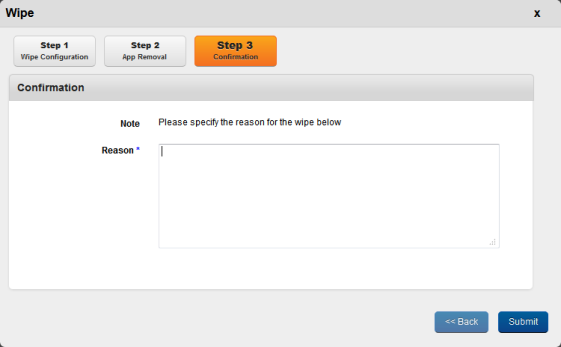
- Click the Submit button. In the confirmation message (Wipe Device Window) that appears, click OK to continue.
- Click OK to return to the main page. When you deactivate or retire the device, system returns to the Device List page. When you suspend the device, system refreshes the Device Details page and displays Resume Device button.
Wipe Device -Windows Phone 8
In win Phone 8, we have limitations in identifying control removed state. Win Phone 8 does not report a user initiated disconnection (un-enrollment).
So if a user deletes a company app/account, the user still remains as Enrolled in EMM server. The user can re-enroll with same credentials to resume the provision. If the user tries to re-enroll with different credentials, then the user is wiped after first sync, and previous record (Enrolled state) is marked as suspended.
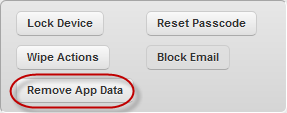
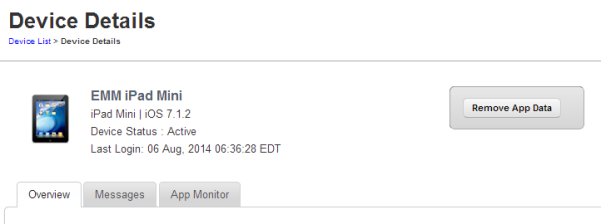
Remove App Data
Remove App Data is only applicable to Enterprise Apps that are wrapped-signed and pushed through EMM and not for side-loaded apps. This action is performed to remove all the data from the apps. This action is performed by an enterprise store to retain the apps but remove the app data to retain safety.
To remove the data from the apps, follow these steps:
- Click the required device in the list view.
The Device Details page appears.
- Click the Remove App data button.
The System displays the warning message (Remove App Data) asking the user, if really wishes to remove all the corporate data from the device.
- Click the Remove button to remove the app data.In the confirmation message (Remove App Data)that appears,click OK to return to the page.
Note: For Windows Phone 8.x devices, the remove app data policy will not work if the app is in use. The policy command will apply when the app is closed and relaunched.
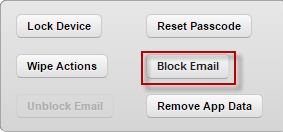
Block Email Access on Device
Block Email action prevents access to the Exchange ActiveSync. Exchange Server must be configured and Exchange Security Services installer must be run on the same. The device must also be assigned an Exchange Account for this feature to work. You cannot view emails from Exchange server again. You may wish to block email for various reasons, for example, if a device connects to a non-prescribed Wi-Fi network.
To block email communication to a device, follow these steps:
- Click the required device in the list view. The Device Details page appears.
- Click the Block Email button.
The system displays the warning message (Block Email) asking the user, if really wishes to block email for this device.
- Click the Block button to block emails for this device. In the confirmation message (Request Sent), click OK to return to the page.
Note:
1. This option is displayed for AD users only. If you come across any errors, check and ensure that Exchange server is working properly.
2. If an already enrolled Local user is overwritten with an AD User then Block Email functionality does not work.
3. On some Android devices, when Block Email option is initiated, the Native Android email client is not blocked, as Native EAS clients in some Android devices do not share their IMEI numbers with Exchange Server.
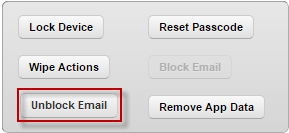
Unblock Email
Allowing emails on the device removes it from the list of Blocked devices and automatically allows the device to access Exchange ActiveSync again.
To allow email communication to a device, follow these steps:
- Click the required device in the list view. The Device Details page appears.
- Click the Unblock Email button.
-
The system displays the warning message (Unblock Email) asking the user, if really wishes to unblock email for this device.
-
Click the Unblock button to allow emails for this device. In the confirmation message (Request Sent), click OK to return to the page.
Note: This option is displayed for AD users only. If you come across any errors, check and ensure that Exchange server is working properly. Exchange must be configured and assigned to device for this functionality to work.
Power Off Device (for Android)
Power Off Device feature allows an administrator to remotely power off a device. When the administrator attempts to power off the device, the system displays a confirmation message:"Are you sure you want to power off the device {$deviceName}?". Click Yes to confirm if you want to power of the device.
Disable SIM Pin Lock (For Android)
An administrator needs a four digit pin to enable or disable a SIM , which allows the addition or removal of a password protection to the SIM card.
The same administrator who enabled a SIM Personal Identification Number (PIN) lock on a device must disable the locked SIM on the same device. The SIM can neither be locked by another Admin of MDM service, nor it can be unlocked by the same Admin.
Enable SIM Pin Lock (for Android)
When a user enables a SIM PIN lock, the SIM card is locked and cannot be used until the correct code is entered. That helps protect your account information and other data in case your device is lost or stolen.
When the User moves the SIM to another device, the PIN must be entered. As this Pin is not shared with the User, the usage of the SIM is effectively locked to the device it was locked with. Maximum two attempts for entering pin is allowed.
Resume Device
An administrator may decide to change the status of a suspended device. To bring the device out of suspension, the administrator invokes the Resume action. A suspended device is still enrolled, and the EMM server has full control over the device.
To resume a suspended device, follow these steps:
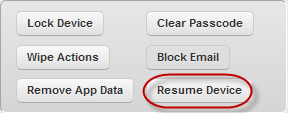
- Click the required device in the list view. The Device Details page appears.
Click the Resume Device button.
- The system displays a warning message (Resume Device) asking the user, if the user really wants to resume this device.
- Click the Resume button to resume the device. In the confirmation message (Resume Device), click OK to return to the page.
Start Mirroring (for iOS7+ Devices)
The Start Mirroring feature is a useful tool to conduct job-related presentations or to display your iPhone photos on a bigger screen. When you enable Start Mirroring, your iOS7+ device can connect with another device, such as an Apple TV or a Mac, and share a screen.
To start mirroring, follow these steps:
- Click the Start Mirroring button. The Mirroring dialog appears.
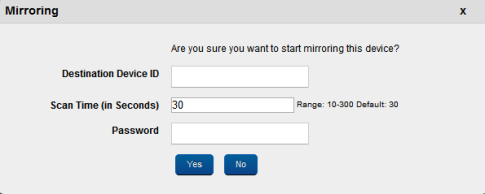
- In Destination Device ID, enter the WiFi Mac ID of the device.
- In Scan Time (in seconds), by default the time is set to 30 seconds. You can modify the scan time , which is defined by a range of 10 to 300 seconds. The scan time refers to the time that the device has to find the destination.
-
In Password, enter the password to connect the destination.
-
Click Yes. The system starts mirroring the device.
Stop Mirroring (for Supervised iOS7+ Devices)
Note: If this is applied for non-supervised devices, the command will not execute.
Stop Mirroring allows you stop an Airplay mirroring that is in progress.
- To stop airplay mirroring, click Stop Mirroring button. The system displays a confirmation message.
- Click Yes to confirm.
Force Check-in
You may wish to view the latest details of the device to analyze its current state and monitor compliance.By invoking this action, the latest device details and compliance states are refreshed and provided.
Note: Device Details displays the details according to the last heartbeat (device synchronization with the EMM server).
To perform Force Check-in, follow these steps:

- Click the Force Check-in button next to Device Details label.
- In the confirmation message (Force Check-in) that appears, click OK to return to the main page.
Purge
If a device is inactive for the number of days specified continuously, the device will be automatically purged. The device can then be enrolled again. Purge feature allows an administrator to change the status of a device whose control is removed but is unknown to the server. The administrator can delete the device, and users can then enroll the device on their names.
Note: On Android devices, enterprise store from purged devices should be deleted for device re-enrollment. On iOS devices, profile should be deleted on a purged device before it is re-enrolled.
To purge a device,
- In the Device Details page, click Purge next to the Device Details label.
- In the confirmation message (Purge ) that appears, click OK. Main page appears.
| Copyright © 2018 Kony, Inc. All rights reserved. |