
Quantum Visualizer V9 Mac Install Guide
This document explains how to install Quantum Visualizer and the required software on your Macintosh computer, using an installer program.
Prerequisites
Following are the requirements needed to complete the installation process. They include the hardware and software prerequisites required to complete the process.
System Requirements
This section helps you understand the system requirements and necessary software required to install Quantum Visualizer.
Software Requirements
Mac OS 11.5 and above
Hardware Requirements
| Component | Requirement |
|---|---|
| Processor |
x86-64 CPU (64-bit Mac, with an Intel Core i3, Intel Core i5, Intel Core i7, or Xeon processor). NOTE: From the V9 Service Pack 3 release, Quantum Visualizer is supported on MacBooks that use the M1 processor. |
| RAM | 8 GB |
| Internal Storage | 24 GB |
| Network | Ethernet Port |
Create a QuantumAccount
Before using Quantum Visualizer, you must set up an account with Quantum.
IMPORTANT: You cannot download Quantum Visualizer without a Quantum Cloud Account.
There are two ways of creating a Quantum account.
- Self-Registration: Visit the Quantum website and create a new account.
- Receive an Invitation: Receive an invitation to register with Quantum from an existing Quantum Visualizer account user.
Self-Registration
To self-register, follow these steps:
- Go to https://basecamp.temenos.com.
The Base Camp Community page appears. - Click Log In.

The Login page appears.
- Click New users register here.

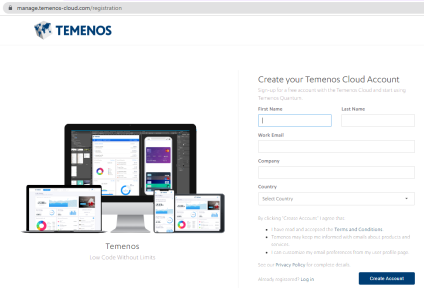
The Create your Temenos Cloud Account page appears.
- Provide the required details, and then click Create Account.
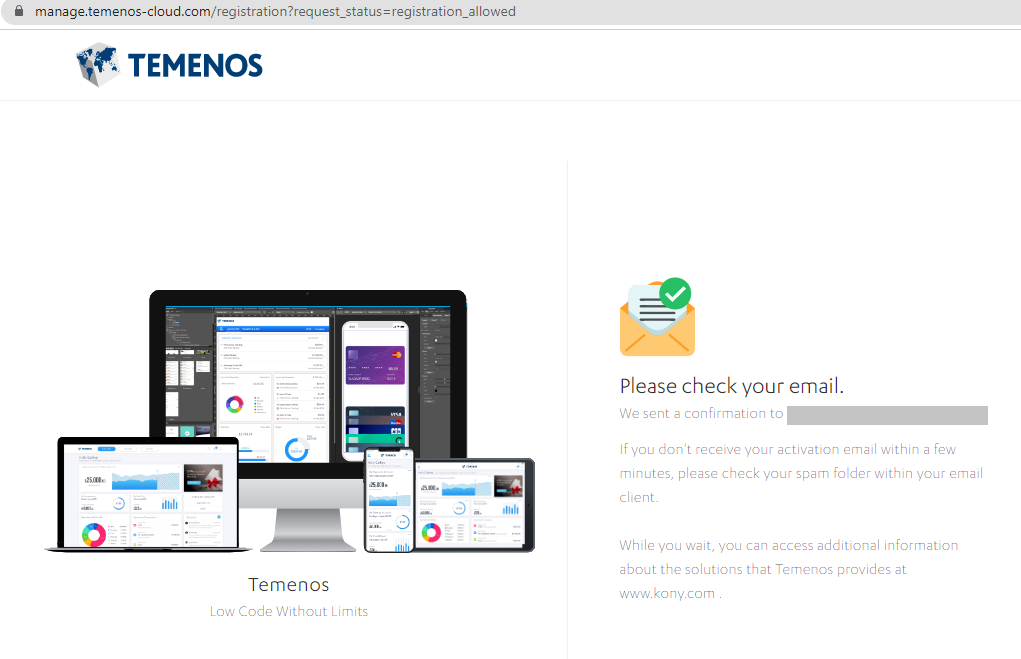
A message appears confirming that your request for registration is accepted.

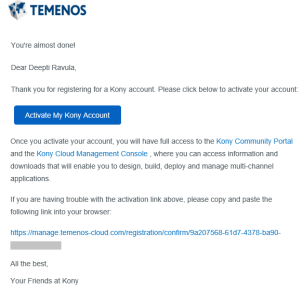
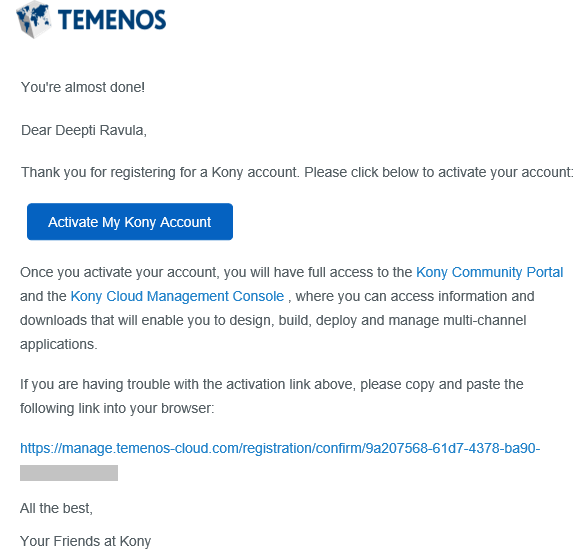
- You will receive an email from the Quantum Accounts with an activation link. Click Activate My Quantum Account.
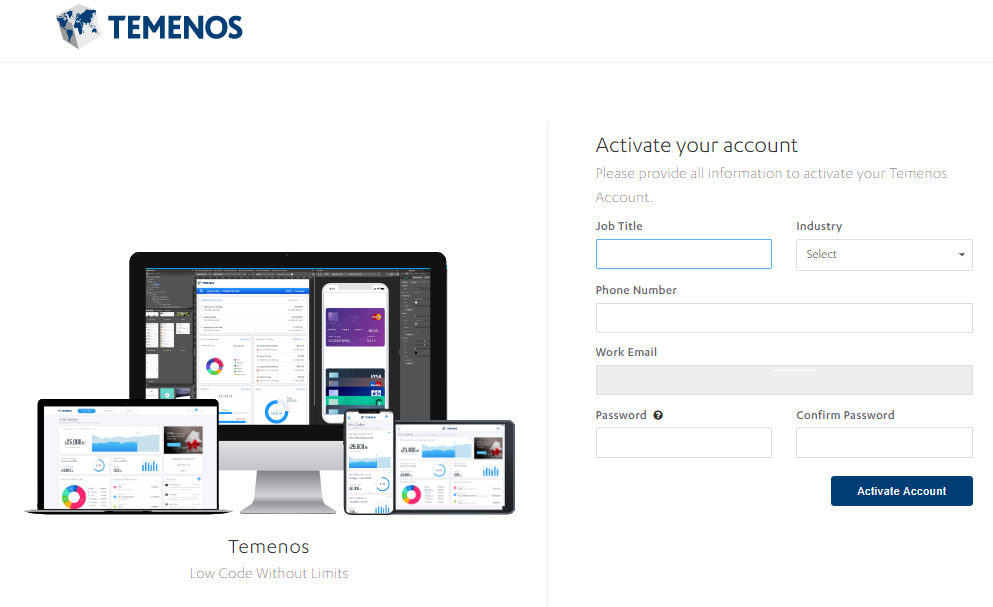
The Activate Your Account page appears.
- Provide the required details, and then click Activate Account.

Your account is activated, and the dashboard of Quantum Cloud appears.


Receive an invitation
The owner of a Quantum cloud account sends an invite to provide you with access to the cloud. You will receive an email with a Quantum account registration link.
To create a Quantum account after receiving an invitation, follow these steps:
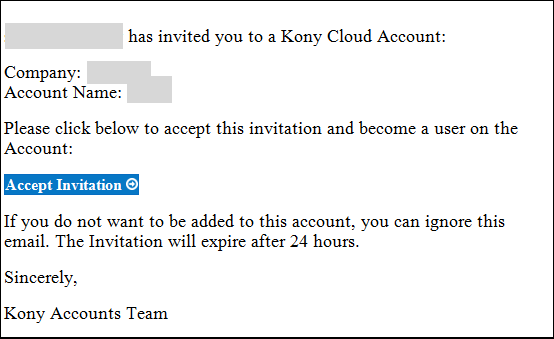
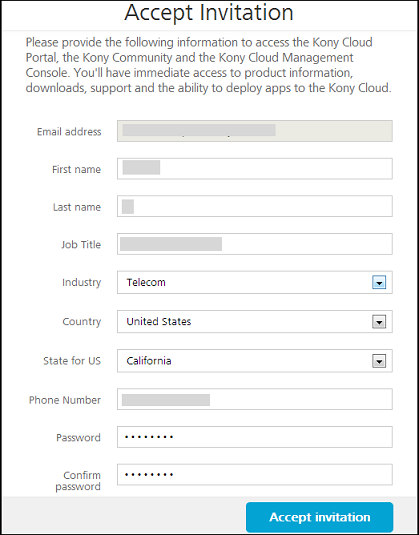
- In the invitation mail, click Accept Invitation.
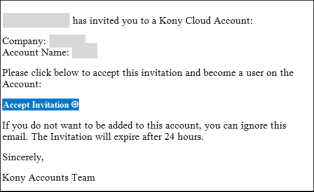
The Accept Invitation page appears.
- Provide the required details, and then click Accept invitation.
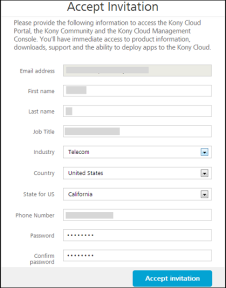
Your account is activated, and the dashboard of Quantum Cloud appears.
Download Quantum Visualizer
The following section explains the procedure to download Quantum Visualizer:
- Log in to https://basecamp.temenos.com.
- From the Product drop-down, select Quantum.
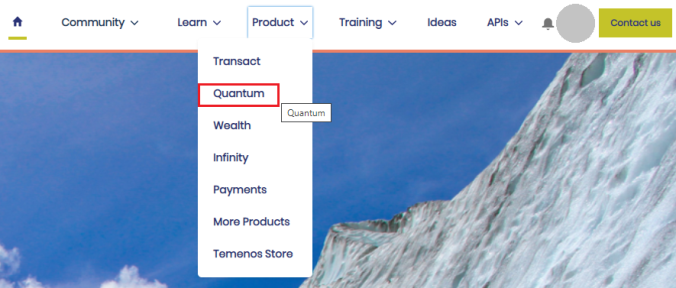
The Quantum page appears.
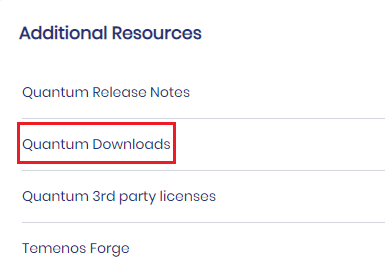
- From the Additional Resources section, click Quantum Downloads.
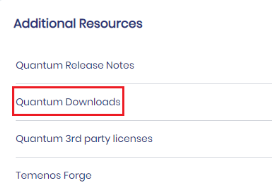
The Downloads page appears.
- Under Quantum Visualizer, click the Download button for Installer_Apple.
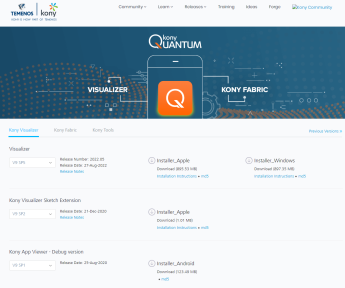
The installer is downloaded as a zip file to your computer.


You can view the Preface and Revision History here.