
Export a Quantum Visualizer Project
You can export a project to a local space on your computer or you can export a project to a Quantum Cloud account.
For more information, click any of the following sections:
Share a Local Project
You can export your Quantum Visualizer project locally so that you can share the project with stakeholders, who can then download and import the project, review it, and make necessary changes.
To export your project to a local space on your system, do the following:
- From the Project menu, go to Export > Local Project.
The Save As dialog Box appears. - Navigate to the folder where you want to save the project, and then click Save.
Quantum Visualizer exports the project as a zipped file.
Share a Project on the Cloud
By publishing your project to the cloud, your stakeholders can download the complete project, make changes, and then upload the modified project back to the cloud.
To publish your project to the cloud, do the following:
- If you are not currently logged in to your Quantum account, do so now by clicking Login in the top right corner of the Quantum Visualizer window. The Quantum Account sign-in window opens.
- Enter your email and password credentials for your Quantum account, and then click Continue. Once you are signed in, your account name displays in the top right corner of the Quantum Visualizer window.
- From the Project menu, go to Export > Cloud Project.
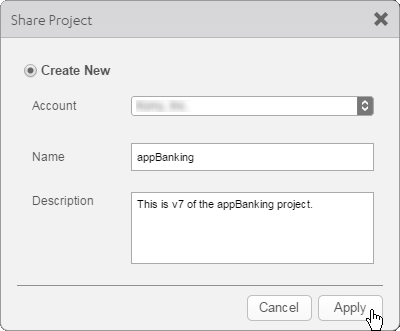
- From the Account drop-down list, select the cloud account to which you want the project published.
- In the Name text box, the project name is populated automatically. To change this, enter the name that you want people to see when they log in to the cloud account to download the project.
- If you want, in the Description text box, type a brief description of your project, such as a version number or something about what's new in this iteration.
- Click Apply. The upload begins.
- Depending on the size of your project and the speed of your internet connection, uploading the project may take some time. After the project is uploaded, Quantum Visualizer displays a confirmation message. Click Close to complete the process of sharing the project.

The maximum allowed file size is 256 MB (in .zip format).
The Share Project dialog box displays.
NOTE: If your profile is linked to a single account, the Share Project dialog box does not contain a list for the Account field.
Now that the project is uploaded to the cloud, users can download and view it using the import feature in Quantum Visualizer. For more information, see Import a Quantum Visualizer Project from a Cloud Account.
Invite Users to a Cloud Account
Publishing a project to a cloud account presumes necessitates that stakeholders have access to it. To grant access, you invite users to the cloud account.
To invite users to a cloud account, do the following:
.As an admin of a cloud, you can invite users by following the below steps:
- Visit http://manage.kony.com and enter your Quantum account credentials.
- After validating your login credentials, click the Settings icon along the left edge of the page.
- Click Invite User.
- In the Invite User dialog box,
- Enter the email address of the user you're inviting.
- Select an account role to be assigned to the user. Available roles include: Owner, Admin, Billing, and Member.
- From the existing cloud accounts, select the type of access to be provided to the user. Selecting the Full Access option results in adding the user to the cloud account.

The user receives an email invitation to join the cloud account, complete with instructions on how to do so.
Modifying a Shared Project
This procedure assumes that you have already imported the shared project into Quantum Visualizer. For more information, see Import a Quantum Visualizer Project from a Cloud Account.
To modify a shared project, do the following:
- In Quantum Visualizer, if you are not already logged in, log in to your Quantum account.
- Open the shared project in Quantum Visualizer.
- Make the necessary changes to the project and save it. To make it easier for stakeholders to recognize the changes you have made, use the Review tab on the Properties Editor to add notes. For more information, see Capture Product Requirements with Review Notes.
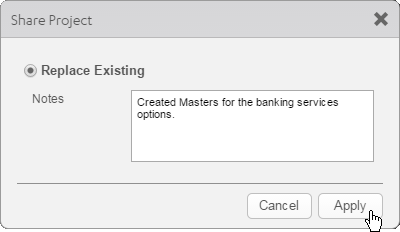
- On the Publish menu, click Project.
- Quantum Visualizer prompts you to confirm that you want to replace the existing project on the cloud. Click Apply to upload the modified project.
- Depending on the size of your project and the speed of your internet connection, uploading the project may take some time. After the project is uploaded, Quantum Visualizer displays a confirmation message. Click Close to complete the process of sharing the project.
Shared Project Limitations
You can re-upload a project to the same cloud that you imported it from. For example, a user shares a project on a cloud account A. You can import this project (assuming you have the necessary permissions) and make changes to the project, and then upload it back to the same cloud account A. But you cannot share this project on any other cloud account even if you have access to multiple accounts (like cloud account B, C and D).
Hence, it is always advisable that an admin create a cloud account specific to a project and invite all the stakeholders of the project to this account. This ensures that the project is available for all to share and modify.