
General Actions
The general actions that you can use in an action sequence are as follows:
| Action | Property |
|---|---|
| Loop Action | Repeat a set of nested statements for the specified number of times. |
| Add Local Variable | Adds a variable that is available within a function. Local variable can be of type Constant or Expression and take the following data type: String, Number, Boolean and or Collection. |
| Modify Variable | Modify an existing variable. |
| Navigate to Form |
Navigates from one form to another. |
| String Operation | Perform operations (such as combine or split) on strings. |
| Try-Catch | Marks a block of statements to try, and specifies a response, should an exception be thrown. |
| Exit App | Closes the application. |
| Set Timeout | Set a timeout variable. |
| Clear Timeout | Clear the timeout. |
Loop Action
To define an action sequence for executing a loop action, do the following:
- From the Project tab of the Project Explorer, select the widget you want to apply the action to.
The widget is highlighted on the Visualizer Canvas. - Right-click the widget and then select one of the actions for example, onTouchStart.
The Action Editor window opens and an action sequence is created. - From the General section along the left column of the Action Editor, click Loop Action.
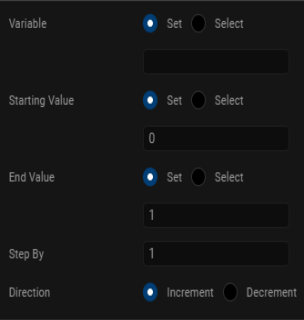
The action is added to the action sequence and is the current action of focus. - In the properties pane of the Action Editor, configure the following
- In the Variable field, you can either select
setand enter a name for the variable or selectchooseand select a variable from a list of existing variables. - In the Starting Value field, you can either select
setand enter a starting value for the variable or selectchooseand select a value from the list. - In the End Value field, you can either select
setand enter an ending value for the variable or selectchooseand select a value from the list. - In the Step By field, enter the value for the step.
- Select the direction of the count, either
IncrementorDecrement.
- In the Variable field, you can either select
- Click Save to save the action sequence, and then close the Action Editor window.
Add Local Variable
To define an action sequence to add a local variable, do the following:
- From the Project tab of the Project Explorer, select the widget you want to apply the action to.
The widget is highlighted on the Visualizer Canvas. - Right-click the widget and then select one of the actions for example, onTouchStart.
The Action Editor window opens and an action sequence is created. - From the General section along the left column of the Action Editor, click Add Local Variable.
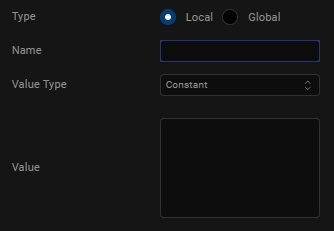
The action is added to the action sequence and is the current action of focus. - In the properties pane of the Action Editor, in the Name text box, enter a name for the variable.
- From the Value Type list, select a value type, either Constant or Expression.
- In the Value field, enter the value of the local variable.
- Click Save to save the action sequence, and then close the Action Editor window.
Modify Variable
To define an action sequence to modify an existing variable, do the following:
- From the Project tab of the Project Explorer, select the widget you want to apply the action to.
The widget is highlighted on the Visualizer Canvas. - Right-click the widget and then select one of the actions for example, onTouchStart.
The Action Editor window opens and an action sequence is created. - From the General section along the left column of the Action Editor, click Modify Variable.
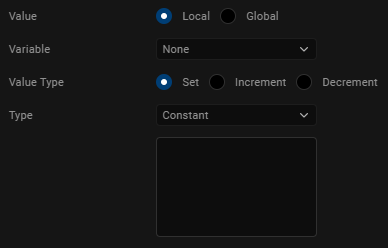
The action is added to the action sequence and is the current action of focus. - In the properties pane of the Action Editor, in the Variable field, select a variable from a list of existing variables.
- In the Value field, you can choose to either
seta value for the variable orIncrementorDecrementthe value of the variable. - Click Save to save the action sequence, and then close the Action Editor window.
If you choose to set a value for the variable, select a value type from the Type list, either Constant or Expression, and then enter the value of the variable in the text box provided below.
String Operation
To define an action sequence to execute a String operation, do the following:
- From the Project tab of the Project Explorer, select the widget you want to apply the action to.
The widget is highlighted on the Visualizer Canvas. - Right-click the widget and then select one of the actions for example, onTouchStart.
The Action Editor window opens and an action sequence is created. - From the General section along the left column of the Action Editor, click String Operation.
The action is added to the action sequence and is the current action of focus. - In the properties pane of the Action Editor, in the Type field, select the type of String operation, either Combine or Split.
- In the String 1 field, you can choose to either
seta value for the string or selectchooseand select a string from a list of existing strings. - The second field varies depending on the type of String operation you select.
- If you select the Combine option, in the String 2 field, you can choose to either
seta value for the string or selectchooseand select a string from a list of existing strings. To add additional strings, click the green + icon. To delete a string, click its corresponding red x icon.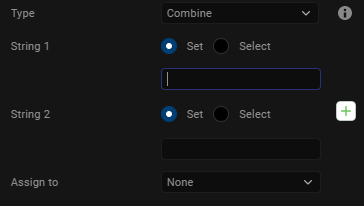
- If you select the Split option, in the Delimiter field, you can choose to either
seta delimiter for the string or selectchooseand select a string from a list of existing strings.
- If you select the Combine option, in the String 2 field, you can choose to either
- In the Assign To list, select the variable to which you want to assign the resulting String.
- Click Save to save the action sequence, and then close the Action Editor window.
Try-Catch
To define an action sequence to execute a try-catch block of code, do the following:
- From the Project tab of the Project Explorer, select the widget you want to apply the action to.
The widget is highlighted on the Visualizer Canvas. - Right-click the widget and then select one of the actions for example, onTouchStart.
The Action Editor window opens and an action sequence is created. - From the General section along the left column of the Action Editor, click Try-Catch.
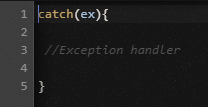
The action is added to the action sequence and is the current action of focus. - In the properties pane of the Action Editor, in the code editor, enter the code that you want to execute or paste it in from another source by pressing Ctrl+V.
- The try statement allows you to define a block of code to be tested for errors while it is being executed.
- The catch statement allows you to define a block of code to be executed, if an error occurs in the try block.
- The finally statement lets you execute code, after try and catch, regardless of the result.
-
- Click Save to save the action sequence, and then close the Action Editor window.
Navigation
To define an action sequence for navigating to a form, or exit an app, do the following:
- From the Project tab of the Project Explorer, select the widget you want to apply the action to.
The widget is highlighted on the Visualizer Canvas. - Right-click the widget and then select one of the actions for example, onTouchStart.
The Action Editor window opens and an action sequence is created. - From the General section along the left column of the Action Editor, click one of the two navigation actions.
The action is added to the action sequence and is the current action of focus. - In the properties pane of the Action Editor, select the Form that the navigational action applies to (this step isn't used for the Exit App action).

- Click Save to save the action sequence, and then close the Action Editor window.
Set Timeout
To define an action sequence to set a timeout, do the following:
- From the Project tab of the Project Explorer, select the widget you want to apply the action to.
The widget is highlighted on the Visualizer Canvas. - Right-click the widget and then select one of the actions for example, onTouchStart.
The Action Editor window opens and an action sequence is created. - From the Client section along the left column of the Action Editor, click Set Timeout.
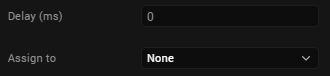
The action is added to the action sequence and is the current action of focus. - In the properties pane of the Action Editor, in the Delay field, enter a value for the time in milliseconds (ms) after which the timeout must occur.
- In the Assign To list, select the variable that you want to use to set the timeout.
- Click Save to save the action sequence, and then close the Action Editor window.
Clear Timeout
To define an action sequence to clear a timeout that has already been set, do the following:
- From the Project tab of the Project Explorer, select the widget you want to apply the action to.
The widget is highlighted on the Visualizer Canvas. - Right-click the widget and then select one of the actions for example, onTouchStart.
The Action Editor window opens and an action sequence is created. - From the Client section along the left column of the Action Editor, click ClearTimeout.
The action is added to the action sequence and is the current action of focus. - In the properties pane of the Action Editor, from the Timeout Handle list, select the variable that you want to use to clear the timeout.

- Click Save to save the action sequence, and then close the Action Editor window.