Basic Account Setup and App Preview
You will first get the Kony account setup, download Visualizer, and install the app preview app on a device.
Your Kony.com Cloud Credentials
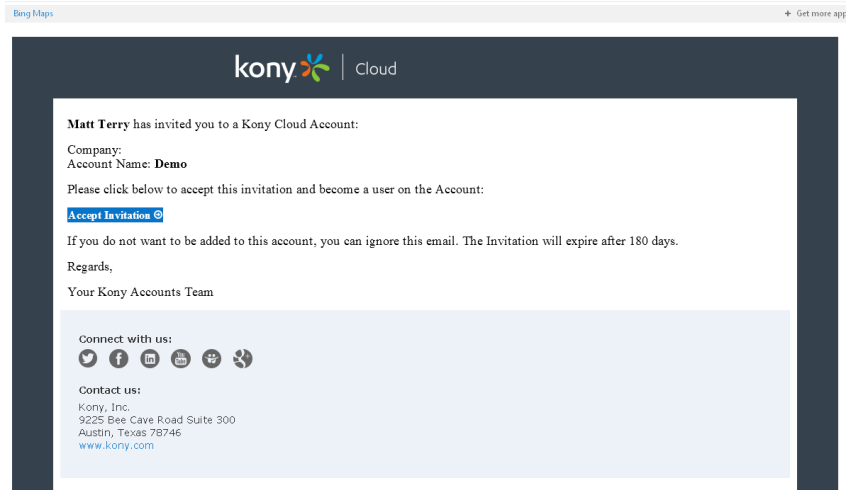
If you already have a Kony cloud account, skip this section. You should have received an invitation to a Kony cloud as seen below, select Accept Invitation to initialize your cloud user ID.
This user ID and password will be used to access:
- Downloads
- Mobile Fabric Management Console
- Visualizer Enterprise Login
- Visualizer Starter Cloud Functions (Publish, Share)
- Visualizer App Preview
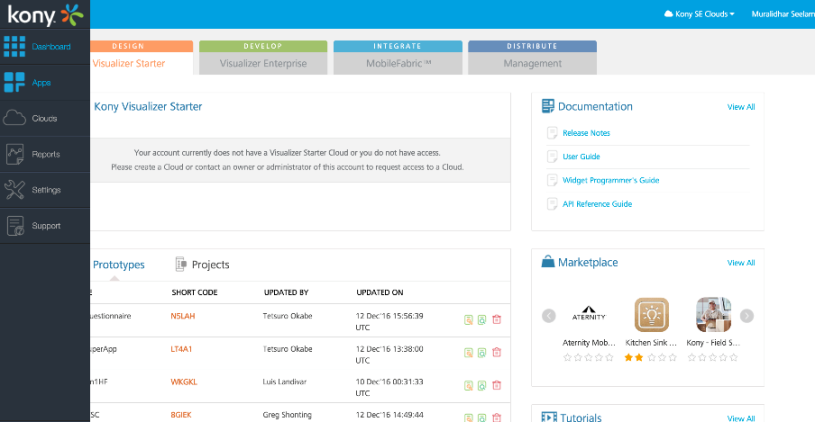
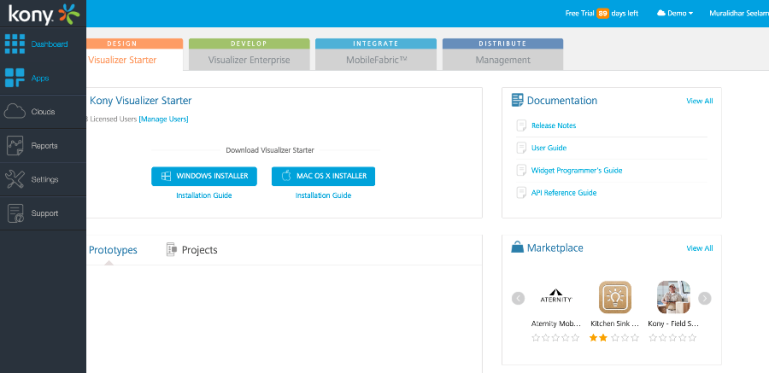
Download and Install Visualizer Enterprise
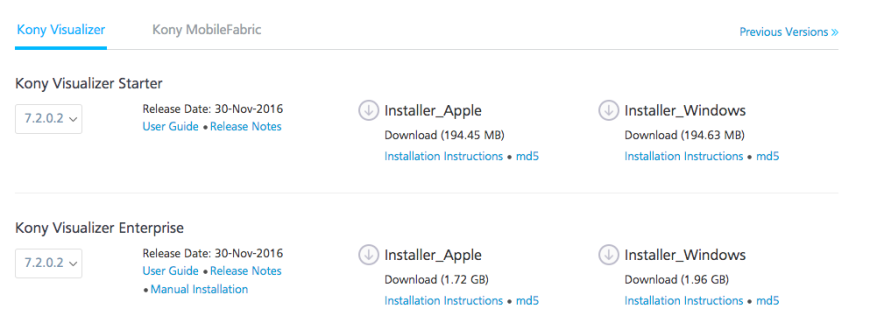
Download Visualizer Enterprise from the Kony download portal http://community.kony.com/downloads.
You will need to provide your Kony.com cloud credentials. Download Visualizer Enterprise 7.2.0.2 for either Mac or Windows, depending on preference.
Complete the installation of Visualizer Enterprise. You may be asked to provide a path to the Android SDK. If you don’t know or don’t have an installed SDK, skip this step. If you install Visualizer Enterprise on a Mac, you can easily setup your Xcode environment later.
Install the Visualizer Preview App and Run the Preview
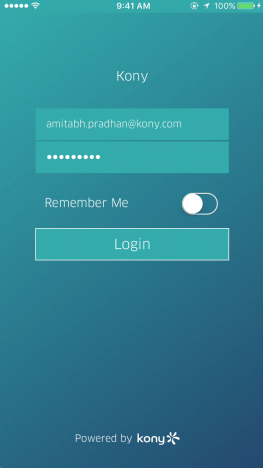
Install and Log In to the Visualizer App Preview
Navigate to the Apple or Android app store and search for Kony Visualizer. Download the Visualizer App Preview App.
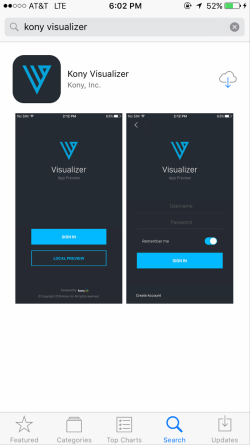
Install the app and login. Your credentials will be identical to the credentials you created when initializing your Kony cloud account.
Launch the Preview Code
To launch the sample Saleforce Pipeline App, select the Cloud option on the app menu, and then enter the following App Preview ID S88G8.
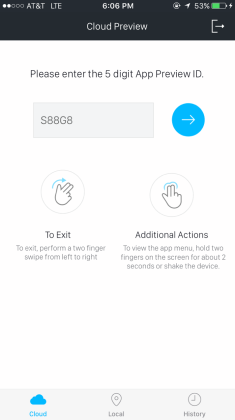
Exploring the App Preview App
Once the Preview App launches, you will be in Child App mode. To exit at any time, shake the device, and select Exit, or use two fingers and swipe from left to right.
App preview: Sample Salesforce Pipeline App
The following is a video of the app as it should appear on your device:
https://www.youtube.com/watch?v=AFAJPiAFW-w
The app consists of the following views or forms:
- Login
- Dashboard
- Menu
- Accounts Listing
- Account Detail
- Opportunities Listing
- Opportunities Detail
This app makes use of the Mobile Fabric integration and identity services, along with many of the features of the Visualizer Enterprise app design and development toolset.
Visualizer Application Tour
Next, we will launch the application in Visualizer, and take a tour of all of the basic components that make up a Visualizer app.
Launch Visualizer Enterprise and Import the Sample App
- Once Kony Visualizer Enterprise launches, you will be prompted to login using your Kony cloud credentials.
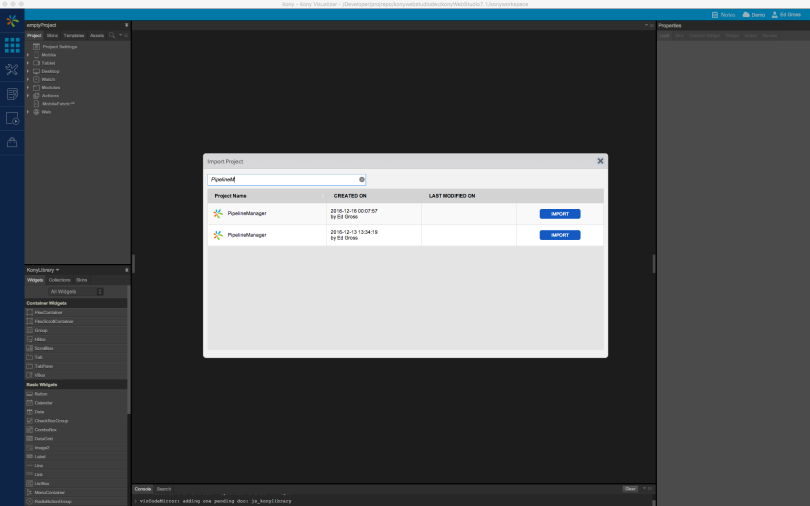
- Once Visualizer has been launched, and you have created a workspace folder, select File >Import > Cloud
- You should see the Pipeline Manager app. Select the app and import. This app will now be added to your local Visualizer workspace.
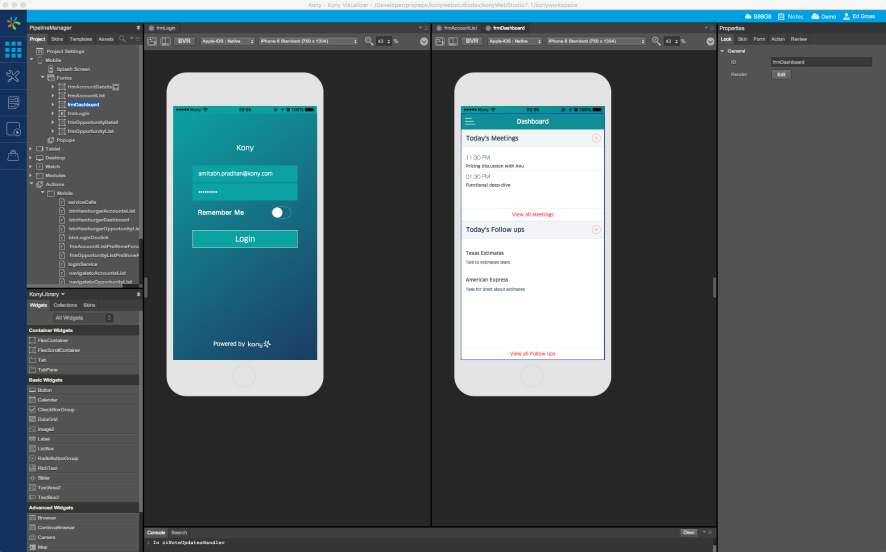
Exploring the App: Forms
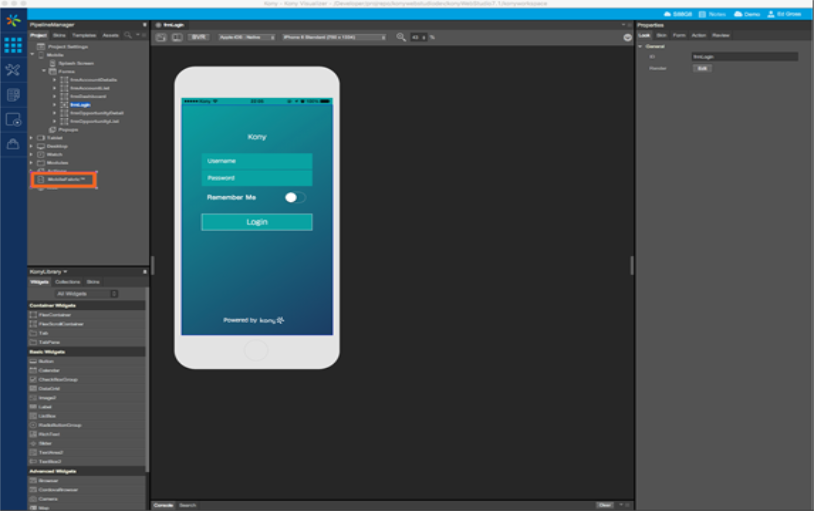
Once the app is opened, you will notice that there are several forms under the Mobile category in the project explorer. The project explorer is the outline of your project’s forms, resources, skins, actions, and JS Modules.
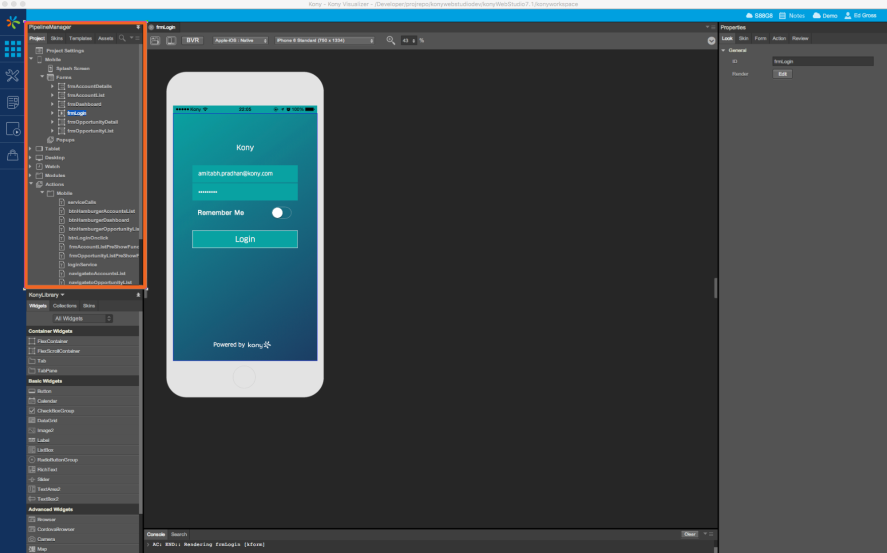
Select the form frmLogin. The form will open in the Visualizer app canvas. Select some other forms. They will open up as tabs in the Visualizer canvas palette.
To open up multiple windows, select Window > Arrange> Side by Side. You can then drag canvas tabs from one window to another:
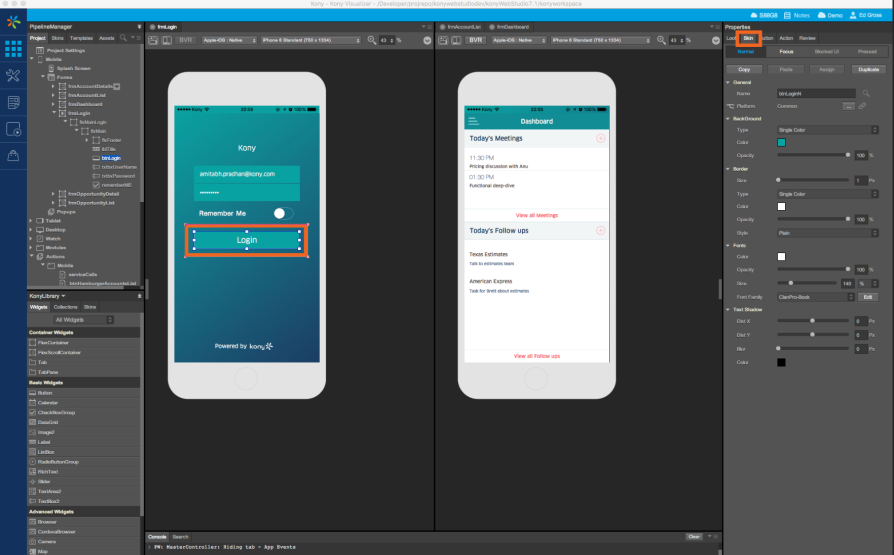
Exploring the App: Widgets and Skins
Visualizer provides a wide array of app design capabilities with skins and themes. On the form frmLogin, select the Login button in the Visualizer canvas. Then, on the right panel (the properties editor), select the Skin tab. Notice all of the various widget design properties available. All of these properties map back to native drawing properties in the underlying operating systems (iOS, Android, Windows, and HTML5)
Exploring the App: Actions
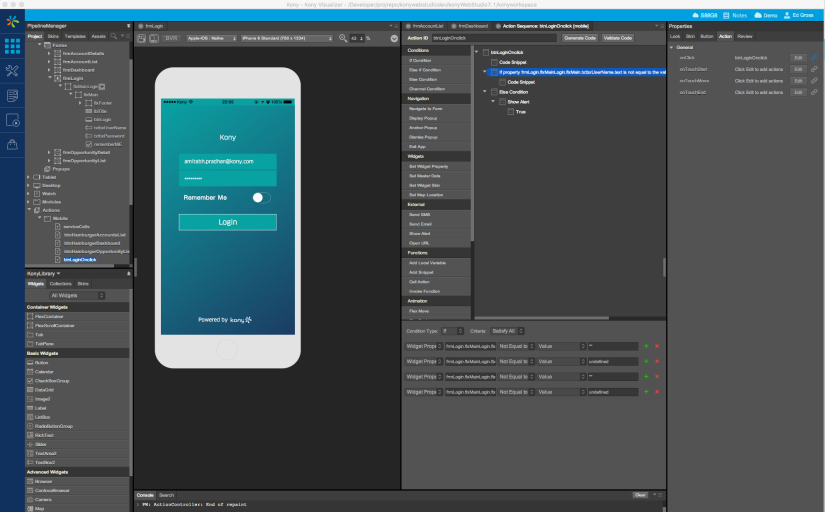
The application workflow and logic is defined through ACTIONS in Visualizer. To access the actions for the selected login button, select the Login button, and then select the Actions tab in the property editor on the right.
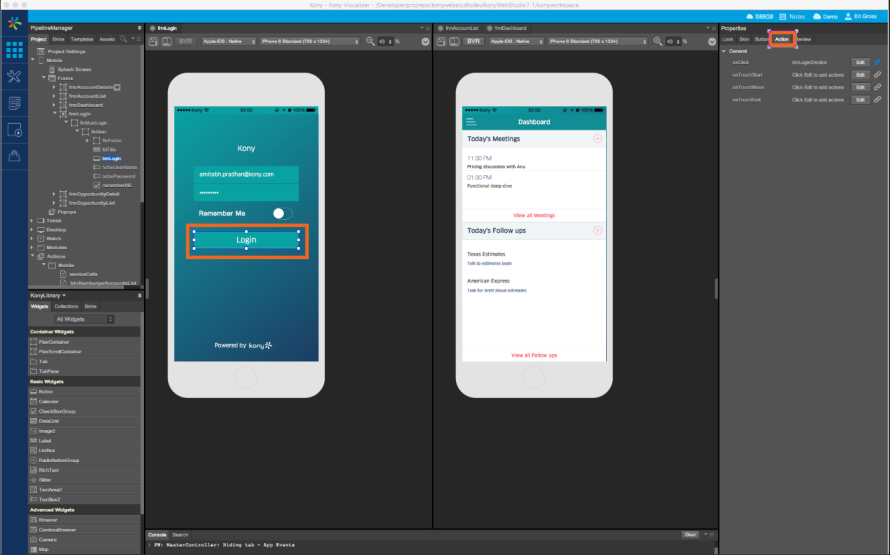
You will notice that the button has Actions for each Event. Notice that the link icon in the property editor is BLUE, indicating that there is already an Action Sequence assigned for this action of the button.
Select the Edit button. This will open the associated action sequence in a new tab.
This action sequence executes the following:
- Initializes the Salesforce Identity service through MobileFabric
- Check to see if the fields are properly populated (basic field validation)
- Validate the username and password
- If the username and password are correct,
Navigate to the form frmDashboard - If the username and password are not correct,
Show an alert (native alert)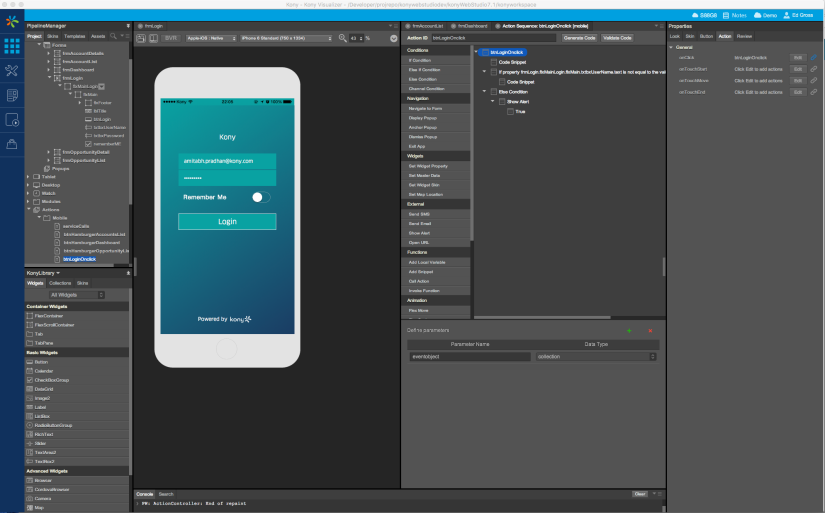
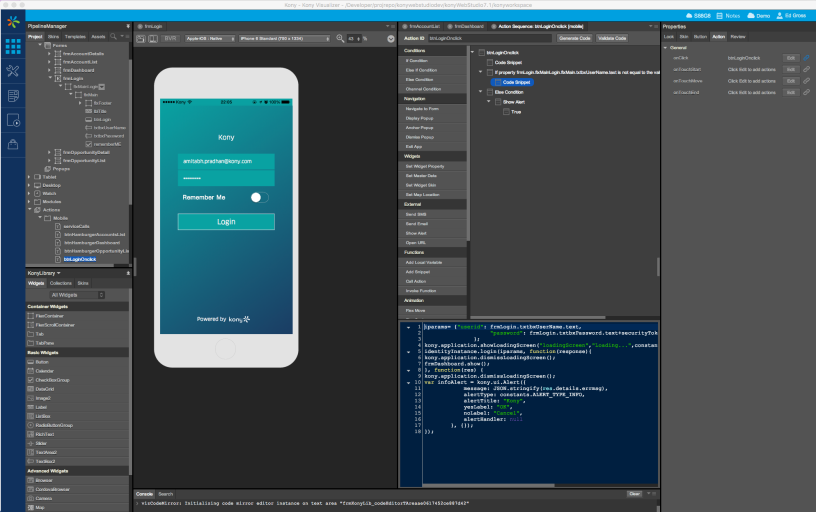
- Next select the line beginning with If property frmLogin.flxMainLogin.txtbox… – this is known as a conditional operation. This enables users who are unfamiliar with Javascript to create more complex business logic through a point and click editor.
- Next select the second Code Snippet line. This illustrates how Javascript and the full Kony development platform can also be accessed from within Action Editor.
Exploring the App: Action Editor and Mobile Fabric Integration
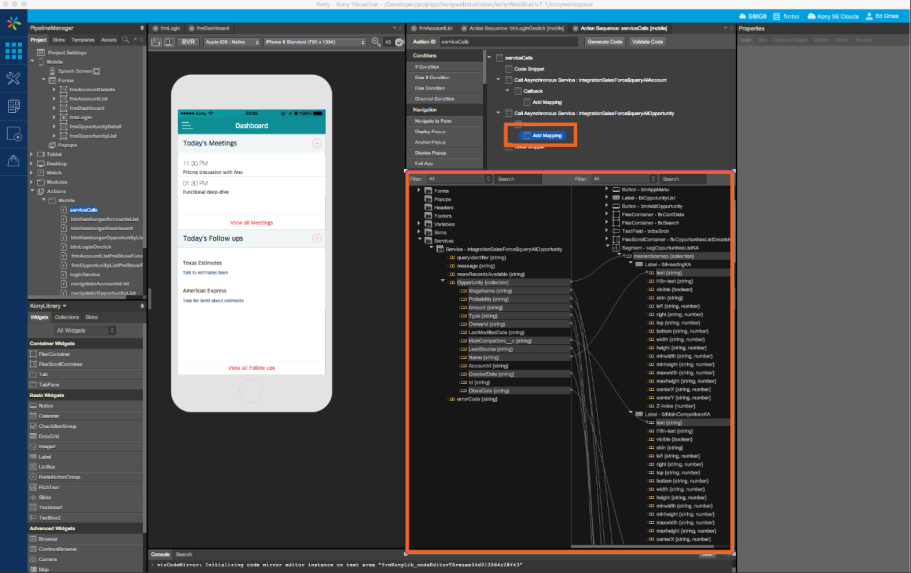
Next, we will see how using Action Editor, the user can invoke a Mobile Fabric integration service, which has been pre-configured, and map the return data to the UI in Visualizer.
- First, open the form frmDashboard.
- Then, select the Actions tab in the property editor.
- Select the Edit icon on the postShow event of the form.
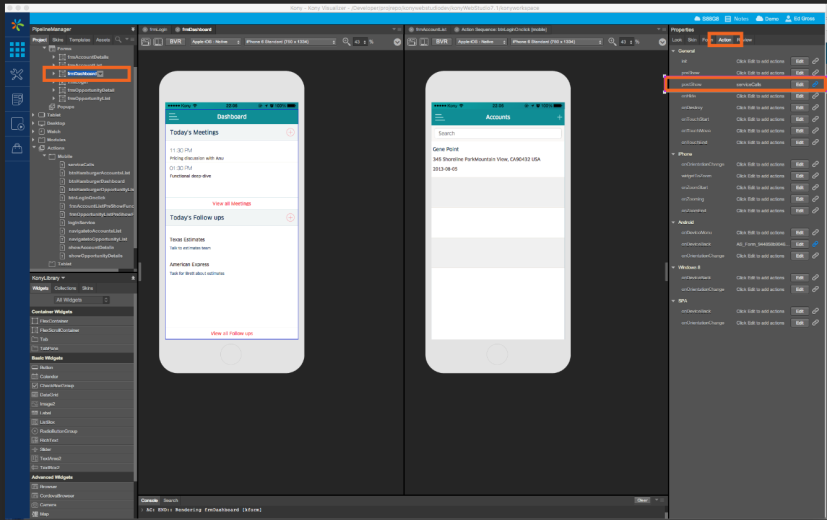
- This will open the Action Sequence associated with the postShow event for the form frmDashboard
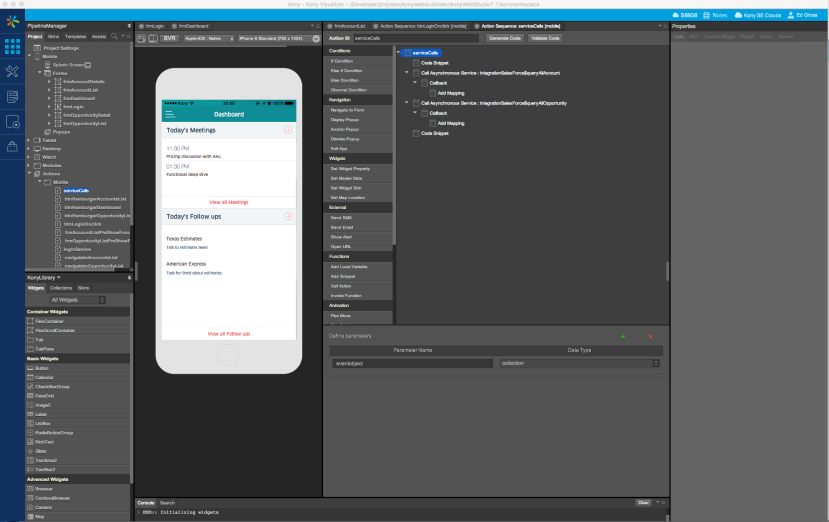
- Select the first or second Add Mapping entry in the Action Sequence. This will present the Mobile Fabric mapping editor in Visualizer, which enables users to map all of the service data to the UI without writing a single line of code. In the example below, the Salesforce integration service for opportunities is being mapped to a Segment widget (a list of entries) on the form frmOpportunitiesLis.
Recap: Kony Visualizer
So far, we have seen in this example app, integrated with Salesforce through Kony MobileFabric, utilizes the tools in Visualizer, both through point and click editors like Action Editor, and the design canvas, and through Javascript, to create an end to end Enterprise application. Next, we will dive into MobileFabric.
Tour of MobileFabric Components
Next, we will take a tour of all of the Mobile Fabric components that make up the back end of the application. If you would only like to further explore the front end of the application, you may stop here.
Review of MobileFabric’s Identity and Integration services of SF Pipeline App
This section discusses the details of the identity and integration services that are pre-configured in the MobileFabric for the SF Pipeline application. The identity service allows the SF Pipeline application to authenticate against the SalesForce identity infrastructure and the integration services use the capabilities of the MobileFabric to discover the metadata of the objects that are exposed by SalesForce.
Review Identity Services Used in SF Pipeline Application
The identity service of the MobileFabric in this test drive allows the SF Pipeline application to authenticate against the SalesForce identity infrastructure.
To review the identity service that is already set up in the MobileFabric, follow the following steps:
- From Visualizer, in the project explorer, select the Mobile Fabric line in the project explorer
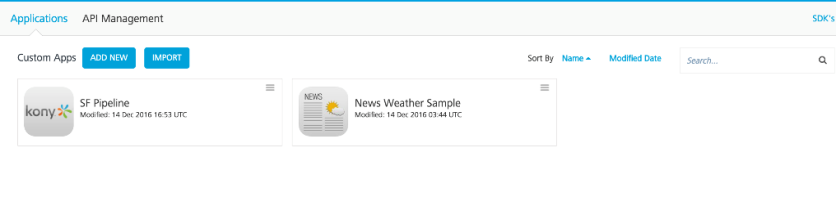
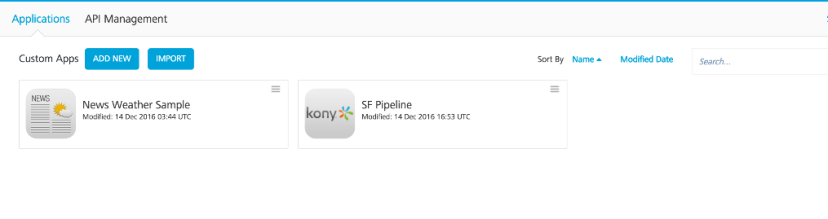
- Once logged in successfully, click on Apps on the left side to review all the apps that are installed.
- Click on SF Pipeline app in the list apps as shown below. This will display the details of this application.
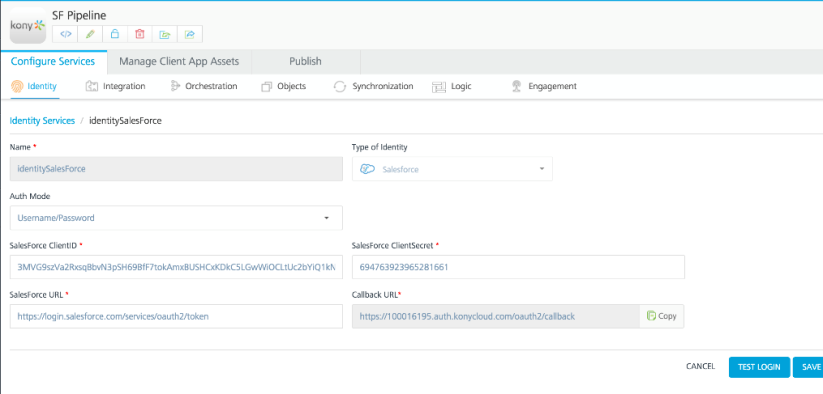
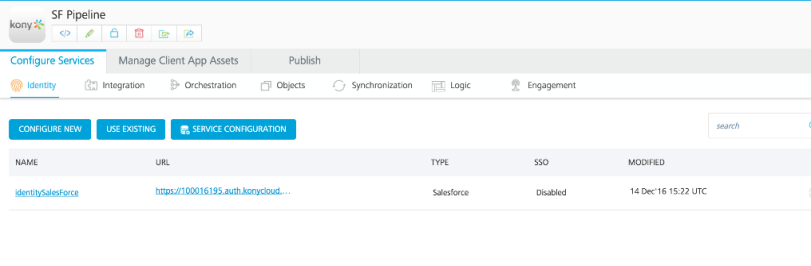
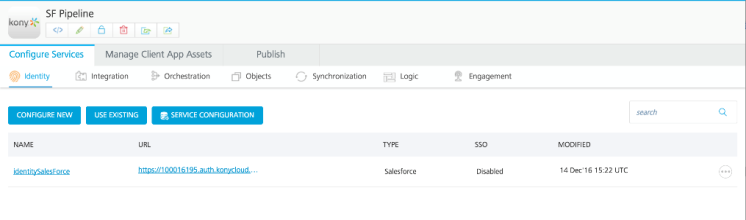
- Once the SF Pipeline App is clicked, you will see that Identity tab under Configure Services is selected by default.
The Name refers to the name of the identity service. The URL indicates the callback URL for this identity service and the Type refers to the backend system that the identity service communicates with, which in this case is SalesForce. The SSO column indicates if the single sign-on mechanism is enabled.
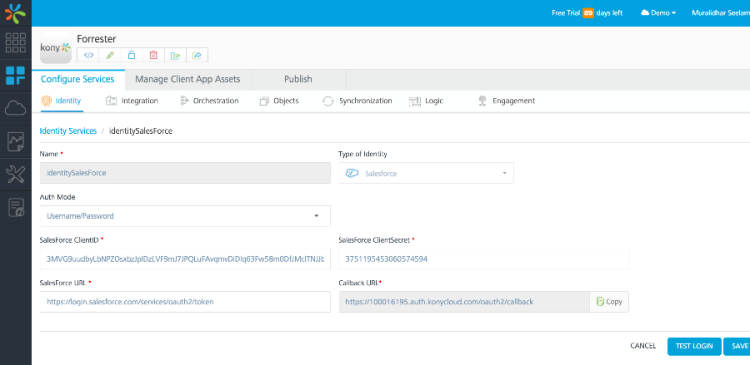
- Next, click on the identitySalesForce to see the details of the service. As you can see from the screen below, the Type of Identity is SalesForce as this identity service will be used to discover the metadata of SalesForce. The Auth Mode for this identity service is username/password hence the client id and the client secret of the SalesForce account need to be entered in the SalesForce ClientId and SalesForce ClientSecret fields respectively. This identity service will be used with the integration services that will discover and expose the SalesForce data, as we will see in the next steps.
Review Integration Services Used in SF Pipeline Application
This section discusses the integration services that are preconfigured in the MobileFabric instance and are used by the SF Pipeline Application. This application has one integration service called as integrationSalesForce. This integration service will be invoked by the client application to display the SalesForce data on the mobile screens.
To review the integrationSalesForce service of MobileFabric, follow the following steps
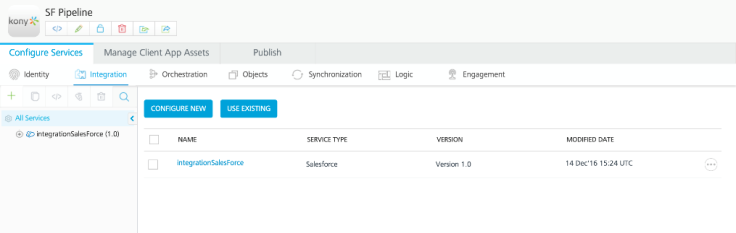
- After logging into MobileFabric, click on the integration tab to view all the integration services that are setup in the MobileFabric. You will see all the service names in the Name column. The ServiceType indicates the type of the identity services that are used and this case it is SalesForce. The Version indicates the versions of the services.

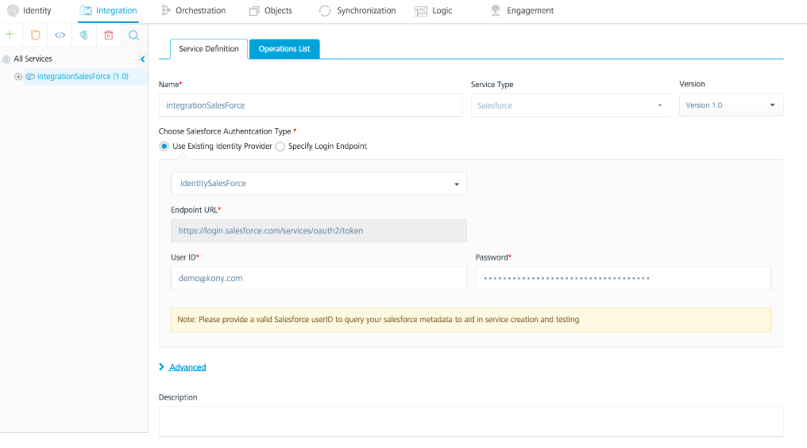
- Click integrationSalesForce to look at the service definition and the operations list of this service.
In the Service Definition section, you will see all the details of the service. You will see that the Service Type of this service is SalesForce and we using the already created identitySalesForce as the identity provider.In the UserId and Password fields, the userId and password of SalesForce account are entered.
- Next, click on the Operations List tab to see all the operations of the integrationSalesForce service. You will see that this service was created with two operations, which are queryAllAccount and queryAllOpportunity.
You will also notice there are two drop-down lists i.e. Object and Operation Name on the page. The Object drop-down is automatically populated by MobileFabric with all the SalesForce exposed objects. Choosing an object in the Object drop-down will cause MobileFabric discover and load the exposed operations in the Operation Name dropdown.
This queryAllAccount operation was created by choosing the Contact object from the drop down and then choosing the exposed queryAllAccount operation of SalesForce. Similarly, the queryAllOpportunity operation was created by choosing the Opportunity object from the drop down. These two operations were selected as they are used by the client side application to display the mobile pages.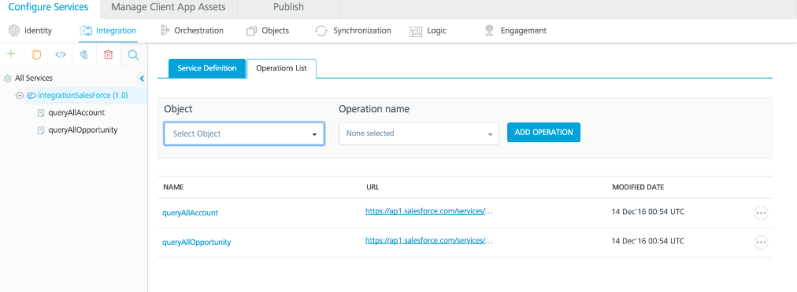
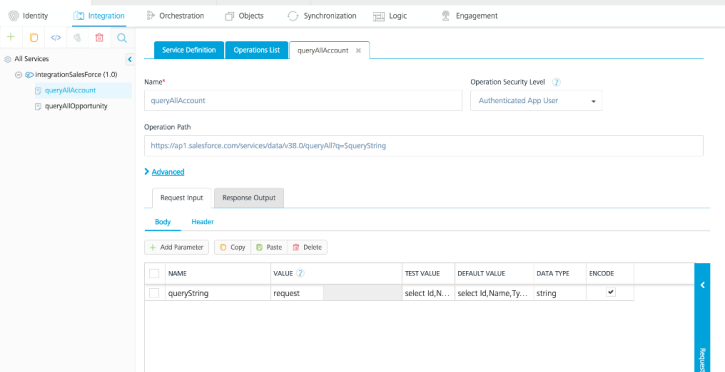
- Next, click on the queryAllAccount operation to look at the details of the operation. The MobileFabric populates the Operation Path by default as it performs the discovery of the exposed SalesForce data using the inbuilt business connectors.
The queryString in the Request Input section has a test SAL that can be used to test the operation. The value of this queryString is appended to the URL of the operation path as can be seen in the Operation Path field. The queryString is passed by the client application to display the required data on the mobile pages.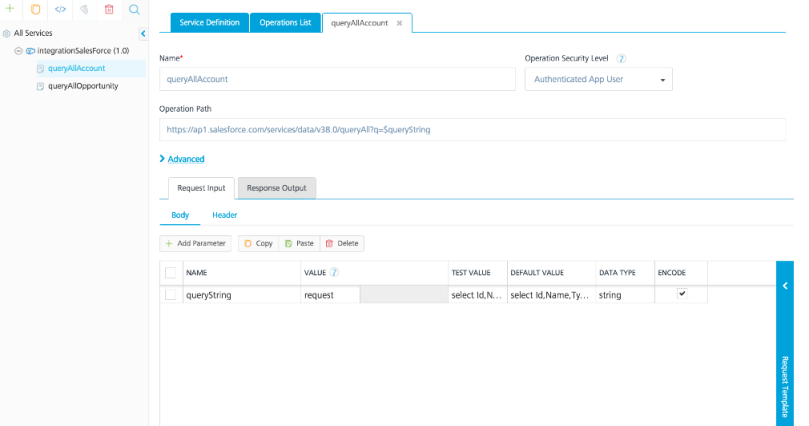
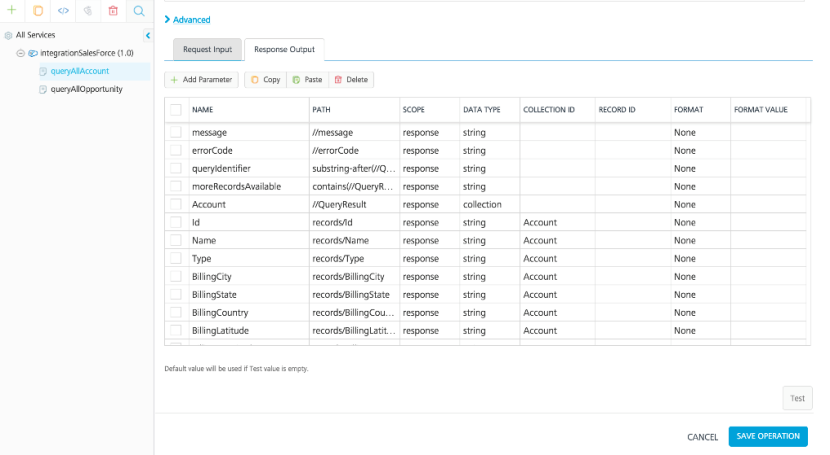
- Next, click on Response Output tab. This displays all the XPath mappings that are created to retrieve the applicable data from the response that is received from SalesForce. The data that is retrieved from the response is mapped to the output data with meaningful names. These XPath transformations also reduce the amount of code on the client side of the application.
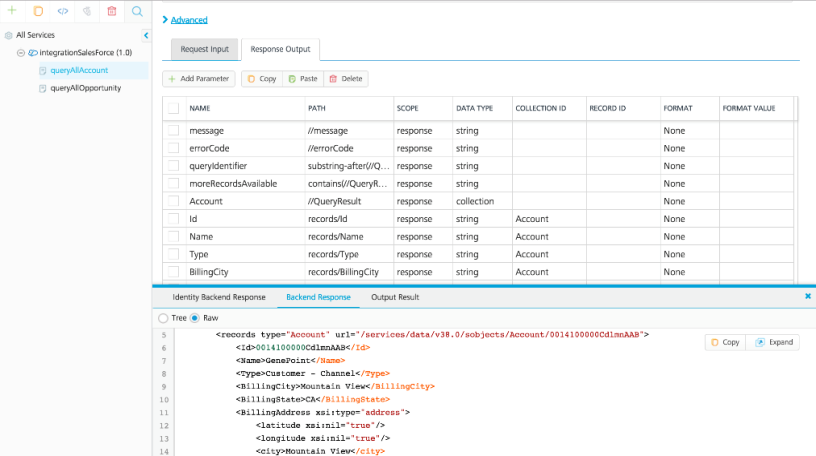
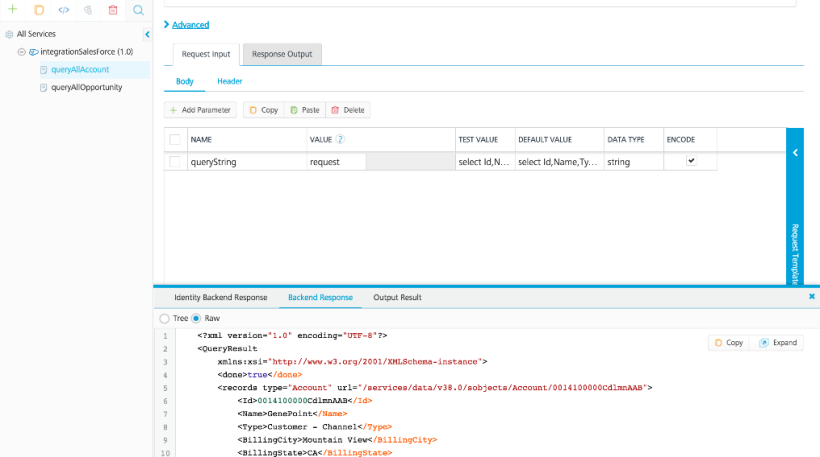
- Next, click on Test to test this operation. This will execute the test SQL that was discussed previously and will invoke the SalesForce object. The response data will be displayed as shown below.
- The details of the queryAllOpportunity operation as similar to queryAllAccount hence are not discussed in detail.
Configuring MobileFabric for a Custom Salesforce Instance
This section is for advanced users that would like to configure the MobileFabric app to point to a custom or personal Salesforce instance.
Creating SalesForce Trial Account and Connected App
This section of the guide discusses the steps that are involved in the creation of a new SalesForce developer trial account and the creation of a connected app. These account and connected app details are needed to configure MobileFabric’s identity and integration services. These identity and integration services discover the exposed metadata of the SalesForce objects and will be used for the online functionality of the SF Pipeline Application.
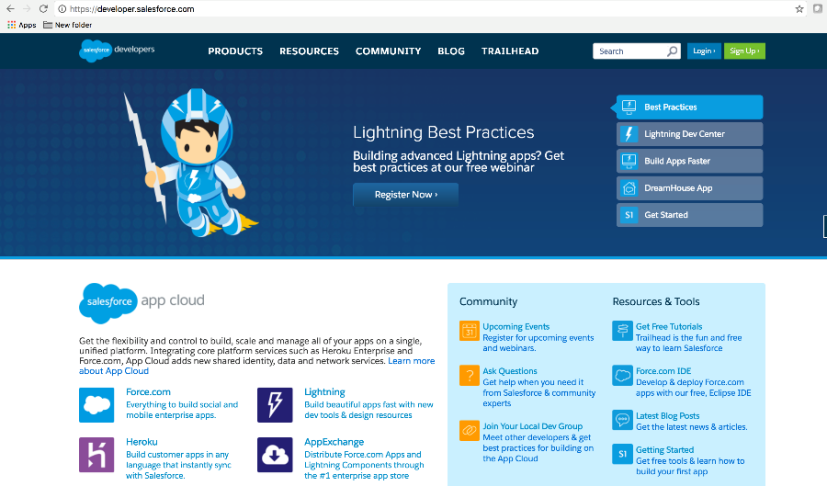
- Log on to developer.salesforce.com and click on Sign Up in the top right corner.
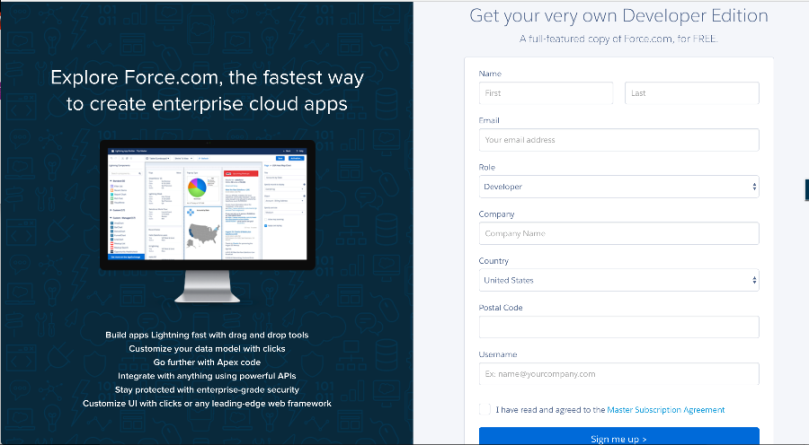
- Enter the information that is needed and click on Sign me up . This will check to see if the user id chosen is available and will send an email to the email address provided to set the password.
- Once you sign in for your account, a screen shown as below is seen and an email will be sent to setup your password.
- Click on the link to set up the password in the email that is sent. The email with the password link as shown below.
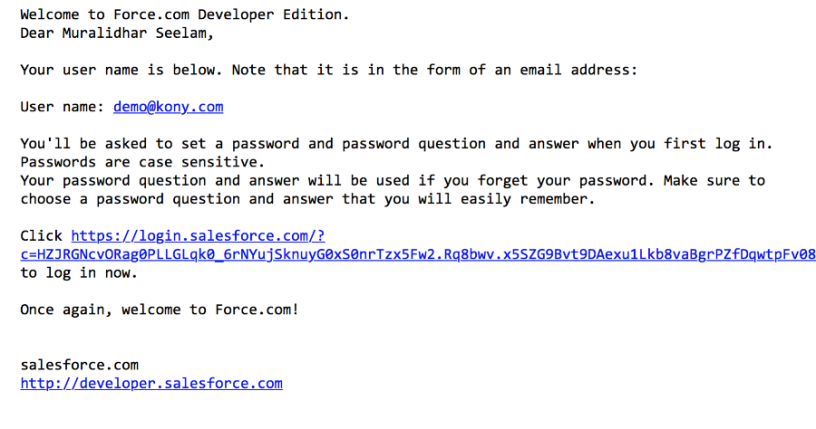
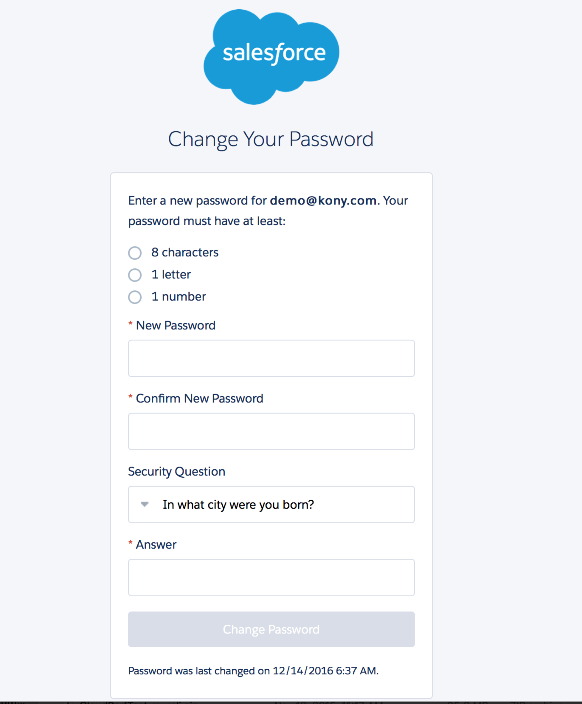
- Clicking on the URL that is sent in the email, will display the screen as shown below which will need to be used to set up the password.
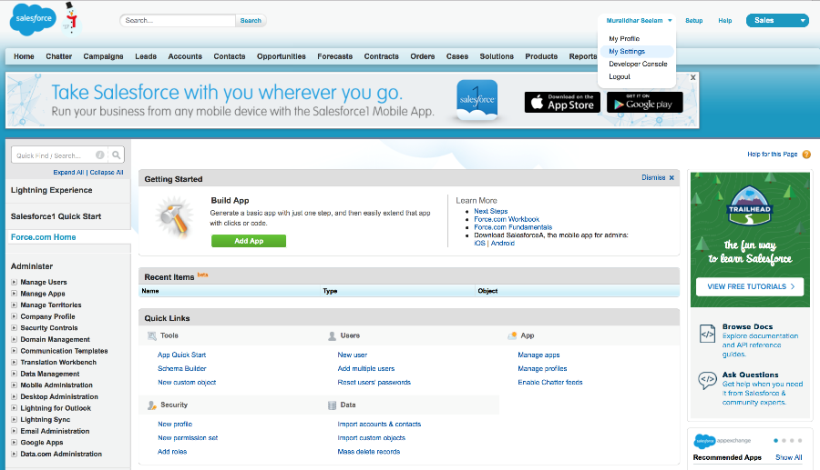
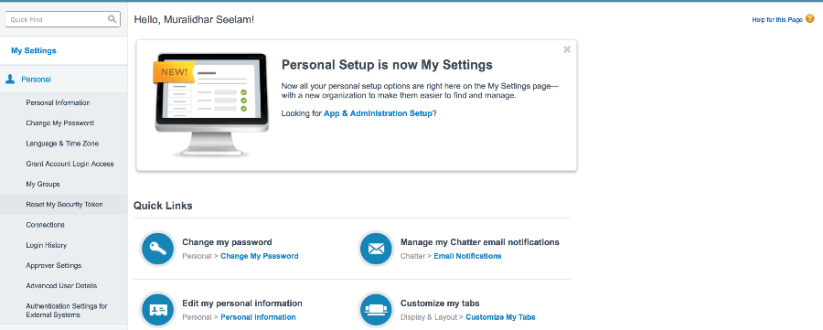
- Login into the developer.salesforce.com account with the credentials that were set up. Click on My Settings in the drop-down list to start the creation of the Security Token. Please note that the combination of the security token and the password will be needed to configure the integration services in MobileFabric.
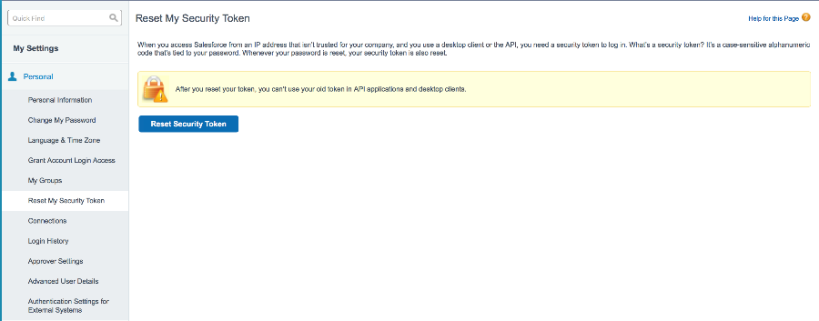
- Click on Reset my Security Token option on the left side to create the security token. This will cause the token to be mailed to the email that has been set up with the account.
- After the security token creation has been initiated a screen like below will be shown. Click on Reset Security Token to finish the creation of the token.
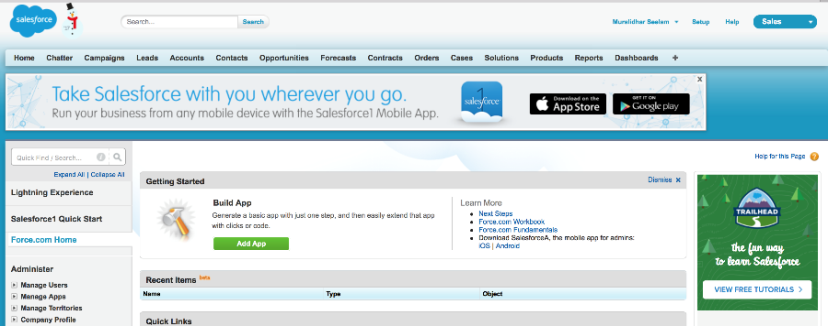
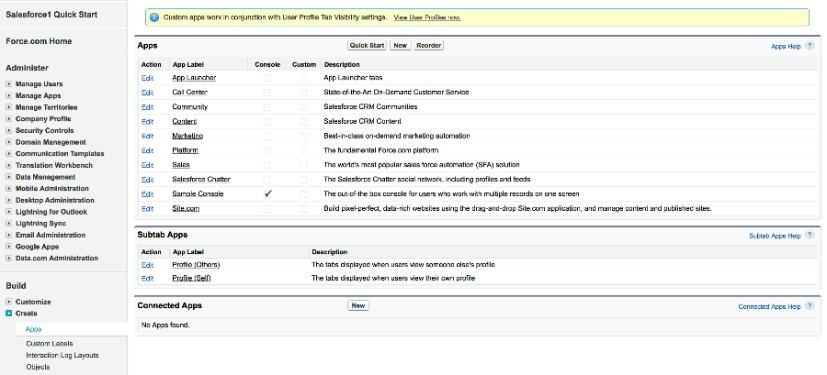
- Next, click on the Setup in the menu above to view the screen to create a new app.
- Click on the Build > Create > Apps to begin the creation of the new connected app. This creation of the connected app will provide with customer key and customer secret which you will need to configure the identity service in MobileFabric.
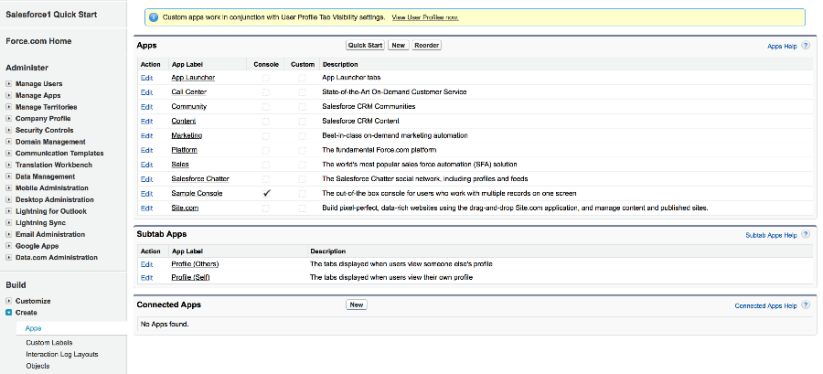
- Click on New in the Connected Apps section to continue the creation of the new connected app.
- To configure the new app that you will be creating, you will need the Callback URL for that app. The Callback URL will need to be retrieved from the services that are set up in MobileFabric. Login into the MobileFabric using your login credentials. Click on Apps on the left to display the list of all apps that are installed.
- Click on SF Pipeline App in the list of apps that are displayed.
- By default, the list of identity services of the application is displayed as shown below. Click on identitySalesForce to see the details of the identity service.
- In the details screen as shown below, you will see the Callback URL field with the callback URL. Please note this callback URL as this will be needed to configure the application.
- In the Basic Information section, enter the Connected App Name and Contact Email information at a minimum. In the API (Enable OAuth Settings) section, select the Enable OAuth Settings and enter the Callback URL and select all the Available OAuth Scopes. Enter the callback URL as noted from the earlier steps into the Callback URL field. Click on Save to generate the Consumer Key and Consumer Secret.

Configure and Publish Identity and Integration Services in MobileFabric
This section discusses the details of the configuration changes that are to be performed in the identity and integration services of the MobileFabric that were set up for the SF Pipeline application. These configuration changes are needed, to use the newly created, your own, SalesForce account credentials.
Configure and Publish Identity and Integration Services of SalesForce Pipeline App
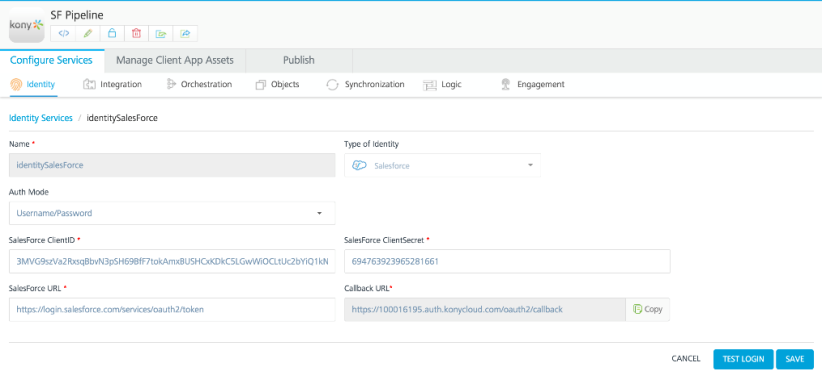
- After successfully logging into MobileFabric, you will see that Identity tab under Configure Services is selected by default. This page displays all the identity services that are currently set up. Click on identitySalesForce service, under the Name column, to modify the existing configuration.
- Modify the SalesForce ClientId and SalesForce ClientSecret data with the Consumer Key and Consumer Secret values that were generated when a new app was created in SalesForce you’re your login and password. Click on Save to save the modified identity service.
- Next, click on the Integration tab under Configure Services. This will list all the integration services that are preconfigured and will be invoked by the SF Pipeline client application to display the data.
- Click on integrationSalesForce service under the Services column to see the details of the integration service. Modify the User Id and enter your SalesForce user id. In the Password field you will need to enter the concatenated value of the password and the security token that was generated with your developer account. Click on Save to save the changes made.

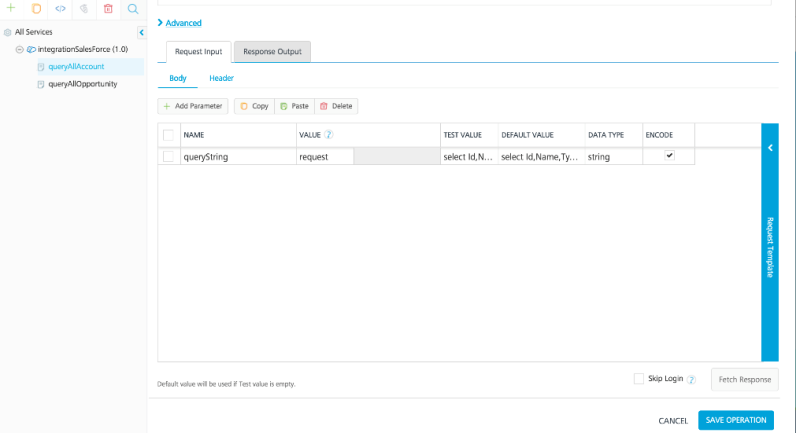
- The next step will be to test the operations of the services that are already set up. Click on the queryAllAccount operation to see all the details of the operation. The operation name can be seen in the Name field. The OperationPath has the SalesForce URL that is invoked along with the queryString appended.
- Click on Fetch Operation to execute the SQL in the Test Value column.
- After the SQL is successfully executed, the response from SalesForce, which contains the Account details, is shown in the MobileFabric as below.
- Next, we will review the second operation called as queryAllOpportunity. Click on the queryAllOpportunity operation on the left to display all the details of the operation. The operation name can be seen in the Name field. The OperationPath has the SalesForce URL that is invoked along with the queryString appended.
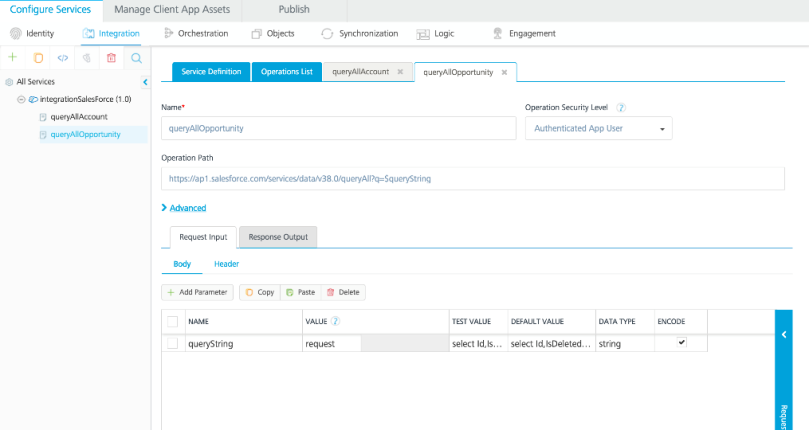
- The details of the queryAllOpportunity operation are similar to queryAllAccount operation hence is not covered in detail in this user manual. Please feel free to navigate and test this operation in MobileFabric to understand these better.
Similar to the queryAllAccount operation that was discussed before, to test the queryAllOpportunity operation, click on Fetch Operation to execute the SQL in the Test Value column. - After the identity and integration services are configured with your SalesForce account login and password, the application will need to be published so that it can be invoked by the client application. Click on the Publishtab in the screen below to begin the process of publish.
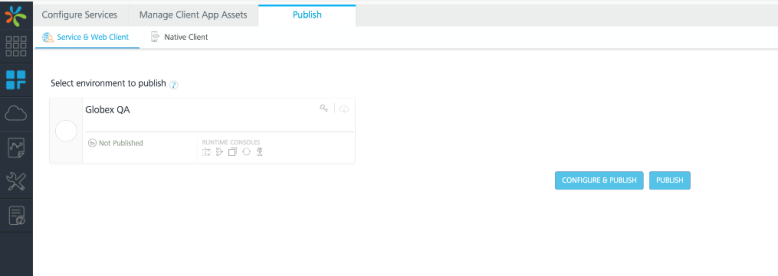
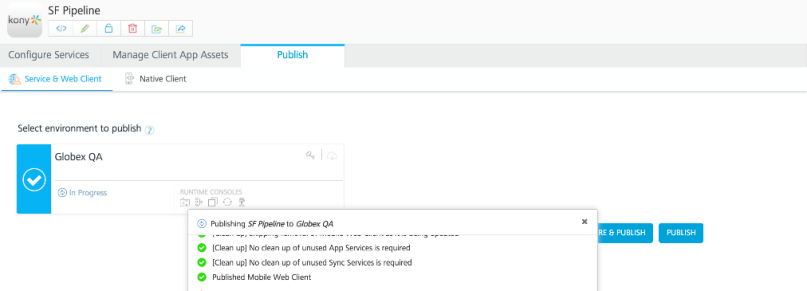
- Select the Globex QA environment to publish. Click Publish to continue the publishing process.
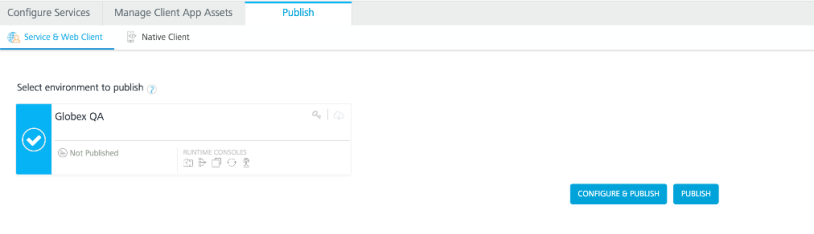
- A message pop up with the various steps of publishing along with the status is shown after publishing is complete.