Event Log
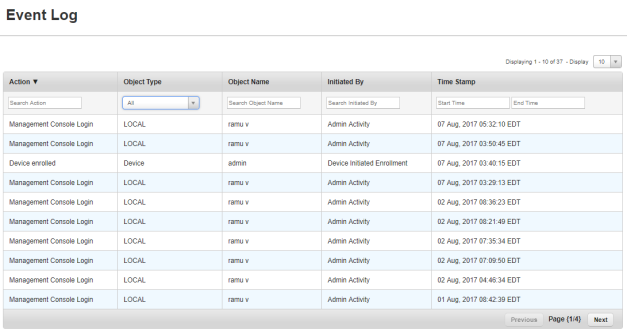
Event Log page displays a list of all the actions for a particular device, device set or policy that you or another user as admin initiated. For example, if you performed a Force Check-in, this action is displayed in the Event Log. Information from the event log can be helpful for troubleshooting.
From the Settings section, click the Event Log from the left panel. The Event Log page appears with a list of the logged events. The list view displays a list of all the actions along with other details. You can search the actions based on each column and also sort on each column.

The Event Log List view displays the following columns:
| Search Elements Properties | Description |
|---|---|
| Actions | Displays a list of all the actions that are performed on devices, policies or device sets. |
| Object Type | Displays a list of the object types, for example |
| Object Name | Displays a list of the object names. |
| Initiated By | Displays name of the administrators who initiated action on a device, policy or a device set. |
| Time Stamp | Displays a list with the duration and the time stamp. |
You can scroll the grid view through Previous the Next button. You can perform the following activities from this page:
Search Event Log
You can search a required action carried out on a device, device set or policy through search filters based on all the grid columns. You can apply a single or a combination of search filters to define the search criteria and get the refined outcome. To search for an action, follow these steps:

- Enter or select details for following search filters:
- Action: Enter partial or complete action details in the Search Action text field.
- Object Type: Select the required Object Type from the drop-down list. By default, it is set to All, which you can modify.
- Object Name: Enter partial or complete object name in the Search Object Name text field.
- Initiated By: Enter partial or complete name of the Administrator, who initiated the action.

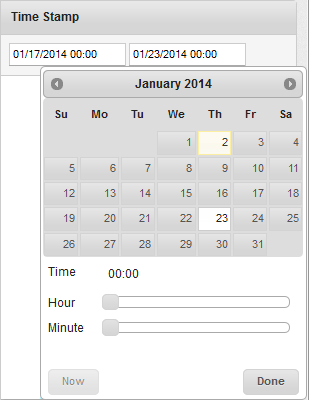
- Time Stamp: Time Stamp feature allows you to select a specific time period and view the actions performed into this time period.
This feature includes two fields.Start Time and End Time.Click in the Start Time field.
Calendar appears.
Select the date. The selected date and the current time is updated in the Start Time field.- Click Done to close the calendar.
- Repeat the same process to enter details for End Time.
- According to your search filter criteria, the list view is updated with respective event log details. By default, the list view displays ten event logs according to default Display settings, which you can modify through Display dropdown list. You can also scroll the list view through Previous and the Next buttons.
| Copyright © 2018 Kony, Inc. All rights reserved. |
