Manage Access Features in Cloud Environment
You can manage environment access for all the existing users in a particular account cloud by using the Manage Access page from the Environments page.
For example, when you are invited to an account, you are given access to Build Client App feature. So the Fabric users are limited to only build apps in Visualizer. Later you want to customize the features access to publish apps as well. In this case, you need to enable App Services feature to this user. As a result, Fabric users of this environment can build and publish apps.
NOTE: For more information on the environment permissions, refer to Feature Level Access Permissions - Fabric Cloud.
Managing Cloud Features
- From the left pane in your Quantum Fabric Console, click Environments. This displays the list of environments assigned to specific users in your Quantum Fabric Cloud account.
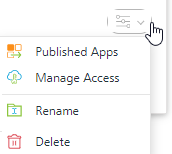
- Click the More Options button of an environment.
NOTE: The More Options button in the Environments page is available only if you have the Admin access.

- Click Manage Access. The dialog box displays the following details.
NAME Displays the clouds created for the specific account.
EMAIL Displays the user email of this Cloud user.
ACCESS Displays the feature access details available for this account.
- Under the ACCESS permissions column, click the required tab, for example, No Access, Full Access, and Custom Access.
NOTE: For more information on the feature level access permissions, refer to Feature Level Access Permissions - Fabric Cloud.
NOTE: The Custom Access permission is supported only for Quantum Fabric clouds.
- Select the required permissions for the Quantum Fabric Clouds:
- No Access
All features of this cloud are disabled for the selected user.

- Full Access
Access to all features of this cloud are enabled for the selected user. Each of these features is enabled with a tick mark.

- Custom Access - Supports from Quantum Fabric V9 onwards only for Quantum Fabric Clouds.
You can select all the features or specific ones of a cloud by using the Custom Access permission.
- Click SAVE to save the changes in the Cloud environment.
