
How to Install JasperReports Server V 8.0.2
This section explains how to install JasperReports Server V 8.0 in your local , and apply the hotfix for 8.0.2:
IMPORTANT: Ensure that you have the required hardware and access to the supporting software as provided in the Prerequisites section.
IMPORTANT: If Fabric uses the HTTPS protocol, it is necessary for the Jasper Server to be installed with the HTTPs protocol to ensure smooth connectivity. Failure to do so may result in connection issues.
If Fabric is utilizing the HTTPS protocol, it is necessary for the Jasper Server to also be configured with HTTPS in order to ensure seamless connectivity. Failure to do so may result in connection disruption
-
Download the required version 'TIBCO JasperReports Server - Professional Edition' from this link TIBCO JasperReports Server - Professional Edition.
-
Install the JasperReports Server using one of the following:
-
Windows:
-
TIB_js-jrs_8.0.0_win_x86_64.exe
-
-
Ubuntu Linux:
- TIB_js-jrs_8.0.0_linux_x86_64.run
-
-
Replace the JasperReports Server License provided by TIBCO. For example, <js-install-location>jasperserver.license.
-
Download the hotfix_JRSPro8.0.2_cumulative_20221102_0944 from TIBCO Support.
-
Apply the
hotfix_JRSPro8.0.2_cumulative_20221102_0944hotfix.
Follow the readme.txt file under thehotfix_JRSPro8.0.2_cumulative_20221102_0944and apply the hotfix. -
Start and Log into JasperReports Server 8.0.2.
-
Start your application server (Tomcat server).
IMPORTANT: During the server startup, if the following error message is displayed::
java.lang.NoClassDefFoundError: org/apache/axis/AxisFault
In this case, add the following jars to the path <Jaspersoft Install Directory 8.0.0>/apache-tomcat/webapps/jasperserver-pro/WEB-INF/lib.
- WEB-INF/lib/axis-1.4-JS-4.jar
- WEB-INF/lib/axis-jaxrpc-1.4-JS-1.jar
- WEB-INF/lib/axis-saaj-1.4.jar
- WEB-INF/lib/wsdl4j-1.5.1.jar
These jar files are available in themiscfolder of the jasper-reports.zip. -
Clear your browsing cache.
-
Log in to the JasperReports Server. You can view the JasperReports Server version upgraded to V8.0.2.
To check the upgraded version of the Jasper Reports Server, click the link specified in the footer immediately after the upgrade. The About TIBCO JasperReports Server dialog appears with upgraded details, shown below:
-
-
Perform the Post-Installation tasks as specified in the Post-Installation Tasks.
-
Clear the application server's Work and Temp folder.
- Go to
<tomcat>/workfolder and delete all the files and folders in that directory. - Go to
<tomcat>/tempfolder and delete all the files and folders in that directory.
- Go to
-
Clear the Repository Cache Database table.
- Run the following commands in the JasperServer's PostgreSQL DB with
postgresuser.update JIRepositoryCache set item_reference = null;
delete from JIRepositoryCache;
Now your JasperReports Server is upgraded to V 8.0.2, and all the analytics information from the previous version is available in the upgraded version.
- Run the following commands in the JasperServer's PostgreSQL DB with
-
Configure the JasperReports Server. Refer to How to Configure the JasperReports Server.
How to Configure the JasperReports Server
After JasperReports Server is installed, attributes such as timezone, location, and account information must be configured for the logged-in user. The Jasper reports internally use the attributes to give accurate results for account and location.
To configure the JasperReports Server, follow these steps:
-
Once the JasperReports Server is installed, the Install Complete window appears with the confirmation message. Select the Launch check box to launch the JasperReports Server.
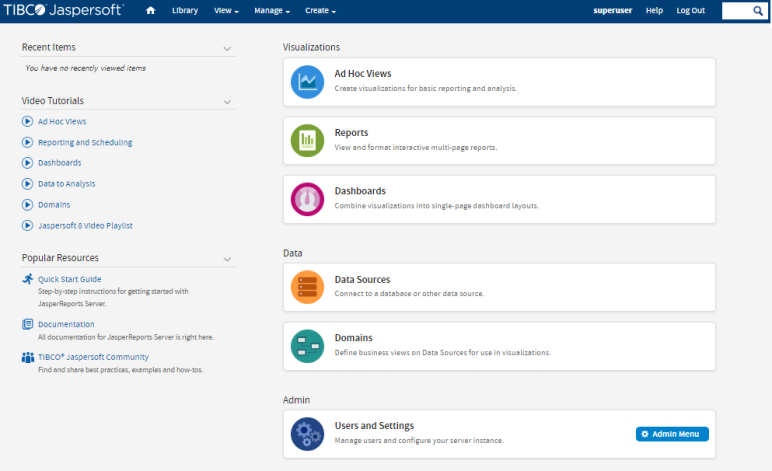
The Welcome to Jaspersoft page appears.
NOTE: To remember the URL of this portal, shown in the image below, bookmark the URL by adding it to your favorites.

- Provide your default log-in credentials (username as
superuserand password assuperuser), and then click Login.The Getting Started page appears.
- On the Manage menu, click Users.
NOTE: You need to edit
superuserattributes only if reports are going to be run outside of the Quantum Fabric Console's context for users of Quantum Fabric 9.X and above.
For most users of Quantum Fabric 9.X and above, reports can be directly accessed from Quantum Fabric Console after following the setup steps as mentioned in the Post-Installation Tasks and How to Configure Quantum Fabric in the JasperReports Server sections to finish the post-installation tasks and configuring Quantum Fabric Console to communicate with JasperReports Server. - From the Users list, click superuser, and then click Edit to continue.

- In the Attributes tab, click the Add button to add a row for the attribute.
- Add the following details:
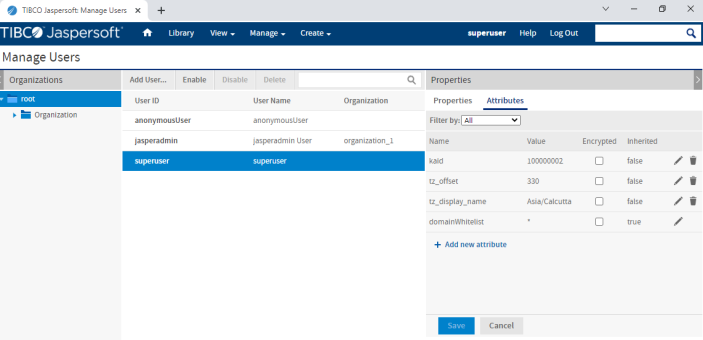
Attribute Name Attribute Value kaid - Quantum Account ID. This value needs to match the Account Id generated by Quantum Fabric Installer.
The value of
Account IDfield generated for Quantum Fabric Server can be viewed from the Settings page in Appservices. The Settings URL format is as follows:http://<mfconsoleIP:Port>/admin/console/config/configuration.html
Example:
100000002NOTE: Quantum Fabric 9.x, the default kaid value is always
100000002.tz_display_name - The timezone display name attribute appears on all reports as a footer indicating the timezone in which a report was generated. It is generally set to the Country/City Example: America/New_Yorktz_offset - The timezone offset attribute indicates the offset in minutes from UTC time. Date calculations are adjusted according to this attribute while running reports to ensure that time is based on a user's timezone.
The offset contains sign (+ or -) with minutes to indicate if it is behind or ahead of UTC. For example: UTC - 5:00 for New York City would be set as -300 minutes varies for Japan which is at UTC + 9:00 would be set as 540 minutes.
Example: -300 - Click Save to save the new attributes.
NOTE: To change the default password of a user, you can change the password from the edit section of the user as well (optional).
- Re-login to JasperReports Server portal with the user to test the reports.
-
To modify the attributes of a user, repeat Step 1 through Step 7 in this procedure, after modifying attributes, re-login to JasperReports portal.