
Build an Adaptive web Application
To build an Adaptive Web application for Quantum Visualizer, do the following:
- In Quantum Visualizer, open the project in which you want to build the Adaptive Web app.
- From the Project menu, go to Build > Build and Publish Web.
The Build and Publish Web window appears. - Under Platform and Channels, for Adaptive Web, select the checkbox next to Mobile or Tablet.
- Click Build.
If a Fabric app is not associated with the app, you will receive an error. You can choose to use an existing Fabric app or create a new one. - Click Create.
You will see a Creating new Fabric application message. Once the app is created, you will get a success message. - Click OK.
- After the build is completed, open your browser. Ensure that it is in Developer mode.
- Open the app. The URL for doing so should be as follows:
localhost:9989/<ProjectName>/p
For Desktopweb, the URL should be:localhost:9989/<ProjectName>/kdw
Securing your Web Applications
Client- side attacks leave your web applications vulnerable, allowing attackers to steal data. Obfuscators protect your apps from reverse engineering and malware attacks. Using Quantum Visualizer V8 SP4, you can create a post-build hook for your Adaptive Web or Desktop Web applications.
- Quantum Visualizer supports the obfuscation of files only through post build hooks. Temenos does not provide the obfuscation tool or the required licenses. Ensure that you purchase, manage, and maintain the license of the obfuscation tool that you want to use.
- Ensure that the Quantum Visualizer Application is working before you implement obfuscation.
- Ensure that the obfuscation of the web artifact works before importing it into Quantum Visualizer.
To implement obfuscation in your web apps, do the following:
- Navigate to the location of your project.
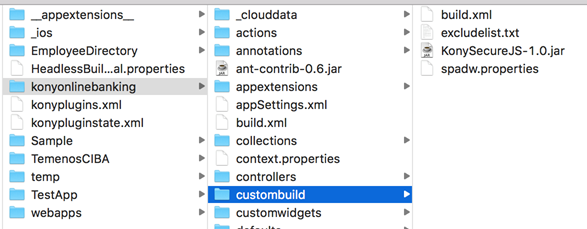
For example,<your workspace folder>/<appid>/. - Create a New Folder with the name custombuild.
- In the custombuild folder, create a new file, build.xml.
-
In the build.xml file, create an ANT task, postbuild.
- In the postbuild task, write a code that implements an obfuscation of your choice.
- After you implement an obfuscation, write a code to replace the existing artifact in the web artifact folder with the protected artifact.
The protected artifact is generated as the output from the obfuscator tool.
Here is an example of the contents of the build.xml file with the postbuild task:
<?xml version="1.0" encoding="UTF-8"?> <project name="CustomBuildTask" basedir="."> <target name="postbuild" description="post build for spa/desktopweb"> <echo message="Post Build Started for Project :: ${projname}" /> <!-- Code to generate protected artifact from chosen obfucator and replacing the existing webartifact --> <!-- App Developer Code start --> <exec executable="cmd" failonerror="true"> <arg line="${project.loc}\custombuild\somebatch.bat --app ${webartifactpath} -- ANY OTHER INPUTS FOR YOUR OBFUSCATOR" /> <redirector output="${basedir}\protected_ob.log" alwayslog="true"></redirector> </exec> <!-- start error message code - to halt the system when any error occurs --> <loadfile srcfile="${basedir}\protected_ob.log" property="errorline"> <filterchain> <linecontains> <contains value="ERROR, UNEXPECTED EXCEPTION"></contains> </linecontains> </filterchain> </loadfile> <fail message="Unable to obfuscate - ${errorline}"> <condition> <contains string="${errorline}" substring="ERROR, UNEXPECTED EXCEPTION"/> </condition> </fail> <!-- error message Code end --> <!-- replacing old artifact with protected artifact start--> <move file="${webartifactfolder}/${projname}.${webartifacttype}" tofile="${webartifactfolder}/${projname}-old.${webartifacttype}"/> <move file="${basedir}/protected_${projname}.${webartifacttype}" tofile="${webartifactfolder}/${projname}.${webartifacttype}"/> <!-- replacing old artifact with protected artifact end--> <!-- App Developer Code end --> </target> </project> - Once you create the ANT task, save and close the file.
- Build the project. After the project is built, the protected binary is uploaded to Quantum Fabric.
Once the build is completed, you must publish the app to your Fabric environment. Once you publish the app, you will get the Web Application URL.
NOTE: Ensure that you exclude any variables with global scope from obfuscation.
Web App Obfuscation using Arxan Web Protection
NOTE: Temenos does not provide the license for the Arxan obfuscation tool. Ensure that you purchase, manage, and maintain the license of the Arxan obfuscation tool.
If you want to implement obfuscation for your web apps by using the Arxan Obfuscation Tool in Quantum Visualizer, follow these steps:
Before you get started, raise a ticket with the support team to get a securejs.properties file.
Ensure that you provide the App ID, Client ID, and Client Secret from your Arxan License in the support ticket.
- Navigate to the location of your project.
For example,<your workspace folder>/<appid>/ - Download the custombuild.zip file.
- Copy thesecurejs.properties file received over customer service ticket into the
<your workspace folder>/<appid>/custombuildfolder. - To exempt certain files from protection do the following, in the custombuild folder, create a text file excludefilelist.txt. In the text file, add sections of the application(you can add both files and/or directors) to exclude.
- Ensure that each path is defined in a new line. For example,
@cacheid@/desktopweb/jslib/tparty
@cacheid@/desktopweb/resources/stringsNOTE: @cacheid@ is the placeholder to be replaced within the build.xml in the custombuild folder.
- Ensure that each path is defined in a new line. For example,
- Build the project.
After the project is built, the protected binary uploads to the Fabric environment. - Once the build is completed, publish the app to your Fabric environment.
Once the app is published, you will receive the Web Application URL.