
Use Test Scripts in Kony Visualizer
You can create test scripts and use them in Kony Visualizer from Kony Visualizer SP3 GA onwards. Even though testing scripts were supported by Kony earlier, they were never supported in Kony Visualizer directly. In previous releases of Kony Visualizer, you could create scripts and place them in the Other Resources folder in the Project View of Kony Visualizer.
The new Test Resources folder in Kony Visualizer allows you to create test scripts for specific channels such as Mobile, Tablet, Desktop Web etc. The new feature also allows you to use multiple testing frameworks. For each one of the testing framework, the test resources folder has separate child folders for each channel. This allows you to easily identify the script types and use the ones which are appropriate for the channel you are testing. You can now manage your scripts directly from the Kony Visualizer UI.
The Test Resources folder contains a TestNG folder by default. This folder further contains default channel folders.
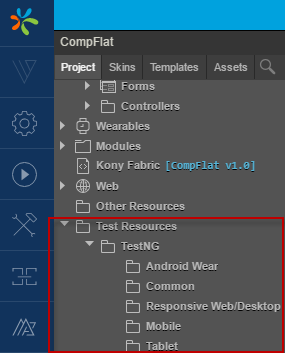
You can add another testing framework, Jasmine, by editing the projectproperties.json file located in your project folder (<workspace><project>/projectProperties.json). Enter the following key-value pair in the projectproperties.json file and the Jasmine testing framework will be added to the Test Resources folder in Kony Visualizer.
"enableJasmineAutomation": "true"
Once you refresh the TestResources folder, the Jasmine folder will be listed.
You can create a new test script specific to the channel by placing a test script within the channel's sub folder. If the file is created under the TestNG sub directory, the new file contains an empty shell with the basic TestNG test script. When you make edits to a script, it is saved when the project is saved.
The following sections in the document describe about creating and executing testscripts for TestNG and Jasmine test frameworks.
Create a test script for TestNG
Execute test script for TestNG
Create a test script for Jasmine
Execute test script for Jasmine
Create a New TestNG Test Script
To create a new test script in TestNG folder, do the following:
- In Kony Visualizer, open the project you want to create the test scripts.
- Navigate to the TestNG folder in the Project Panel.
- Click on the drop-down icon of the channel in which you want to create the test script.
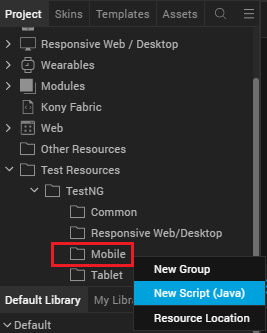
- Select New Script (Java)
A new test script is created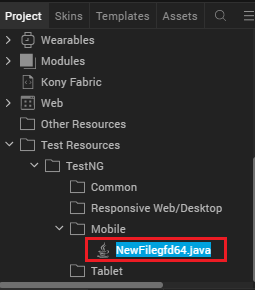
- Edit your script using Java.
Execute your Test Script in TestNG
To execute test scripts in TestNG, do the following:
-
Open Visualizer.
-
In the File menu, navigate to Product > Build.
Build the app for the channel you are testing the script.
-
Run your app on the simulator.
-
Copy the workspace location of your test scripts.
-
Open Command Prompt on your system.
-
Run the following command
ant build.xml/Project name/<location_of_scripts_in_workspace>Your test scripts are executed.
Create a New Jasmine Test Script
To create a new test script in the Jasmine folder, do the following:
- In Kony Visualizer, open the project that you want to create the test scripts for.
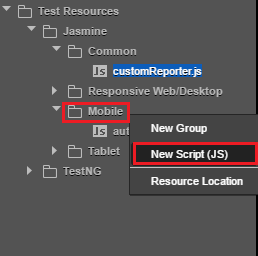
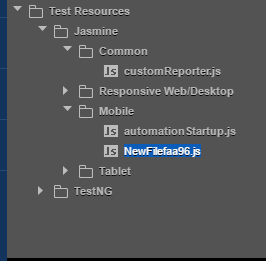
- From the Project explorer, go to Test Resources > Jasmine.
- Click on the drop-down icon of the channel in which you want to create the test script and then select New Script (JS).
Note: It is not mandatory to create the new file. You can write all your automation scripts in the automationStartup.js file, that is auto generated. You must create a new file only when you want to segregate test scripts for each of your app flow.
- A new test script is created.
- Enter your automation code in the new test script created. For instance, following is the code for testing a button on-click action.
describe("sample", function() {

    beforeEach(function() {
        //gets executed once before each spec in the describe
    });

    afterEach(function() {
        //gets executed once after each spec.
    });

    it("sample_testCase", async
        function() {
            kony.automation.button.click(["Form1", "Button0ec5b6258f1504e"]);
        });

});
To execute the script, enter the code in the following format, in the automationStartup.js file.
require(["testScripts/sample-suite"], //prepending testScripts
    function() {
        jasmine.getEnv().execute();
    });
You must prepend each file that is being required with a key word testScripts. In the require callback, you must appropriately call the jasmine execution. If you want to require multiple files, jasmine execution must be called in the last required file.
Important: The name customReporter.js file is reserved for the Jasmine test scripts common js file. If you name any of your test scripts with customReporter.js, testing feature as explained in this section will not work. Ensure that you give unique test javascript file names across channels.
With the customReporter.js test script, you can access all Kony APIs and methods used in Kony Visualizer . In any test script that you create on your own in the common folder, you can only access the kony.print API. Ensure that you do not modify anything in the customReporter.js. You can write your code in the jasmine callbacks.
Execute your Test Script in Jasmine
To execute test scripts in Jasmine, do the following:
- Open Visualizer.
- From the Project Explorer, right click on Jasmine and then select Deploy.
From the File menu, go to Product > Build.
Build the app for the channel that you are testing the script, in debug mode.
Run your app on the target simulator or device.
Note: The test scripts are hosted on the Visualizer node server. The target device should have access to this server (Visualizer needs to be running). Ensure that the system on which the Kony Automator runs and the target device are on the same network. If the network changes, you must rebuild the app.Although the system and the target device are connected on the same network, you may have trouble executing your test script when the app uses an inaccessible IP address. To modify the IP address, follow these steps:
- Open the konyviz_preferences.json file located at Users\<user ID>\Kony Visualizer\ vizdata.
- Set the "autoDetectIP" key as false.
- Under the "general" Object, specify the required IP address against the "staticIP" key.
Note: In Jasmine, the jasmine.DEFAULT_TIMEOUT_INTERVAL property is not considered for Native channels. This is because the Async/Await command support in Jasmine is only applicable for the Responsive Web channel, but not for Native. However, if you specify an Async/Await command as part of your test script for Native channels, your script still works as expected.
For more information about APIs and automation in Kony, click here.
Debug Test Script for Jasmine in Android
To debug an Android application while using Jasmine test scripts, follow these steps.
- In Kony Visualizer, from the File menu, go to Product > Build.
- In the Build Generation dialog box, select Android platform.
- Select the Build Mode as Test and click Build.
-
If you have not set the debugging as true:
- Go to the <workspace location>/<app name> folder.
- Open the projectProperties.JSONfile and then add the following script.
“enableJasmineJSDebuggingForAndroid” : "true"
- Switch back to Kony Visualizer. From the Project Explorer, right-click Jasmine, and then click Deploy.
- Start the app on your device. The Waiting for Debugger to connect... dialog box appears on your device.
- From Kony Visualizer, go to Product>Debug As>Debug android application. The Google Chrome web browser opens with the chrome devtools URL.
For example,
chrome-devtools://devtools/bundled/inspector.html?experiments=true&v8only=true&ws=127.0.0.1:9222
For more information about how to debug an Android application, click here.
Note: The chrome devtools URL uses only the 9222 port while using Jasmine test scripts.
| Copyright © 2013 Kony, Inc. All rights reserved. |