
iOS SDK and Emulator
Applies to Kony Visualizer Classic.
Building and testing iOS applications in Kony Visualizer requires two primary resources: Java SE 7 runtime, which is required by Eclipse, the hosting application of Kony Visualizer; and Xcode, the SDK for iOS and Mac OS. You are prompted to install these two resources the first time you launch Kony Visualizer.
Note: iOS-related code and applications can only be developed on a Mac OS computer.
In all, getting your system set up to build and test iOS applications in Kony Visualizer involves five tasks. This section describes them.
- Confirm your system meets iOS development requirements
- Download and install Java SE 7 runtime
- Download, install, and configure Xcode
- Configure iOS simulators in Kony Visualizer
- Test your set up with the HelloWorld sample app
Confirm your system meets iOS development requirements
To develop for the iOS platform and run its emulators, your computer needs to meet certain hardware and software requirements.
- Apple computer with a x86-64 CPU (64-bit Intel Core 2 Duo, Intel Core i3, Intel Core i5, Intel Core i7, or Xeon processor.)
- 150 GB of internal storage
- 4 GB of memory
- Network interface card
- Mac OS Catalina version 10.15.6 and higher
Download and install Java SE 7 Runtime
Eclipse, the integrated development environment (IDE) application that hosts Kony Visualizer, requires Java SE 7 to run, but it is not automatically installed when you install Kony Visualizer. You are prompted to install it when you first launch Kony Visualizer.
To download and install Java SE 7, do the following:
- Launch Kony Visualizer. By default it is installed in the Applications folder.
- As Eclipse and Kony Visualizer load, a dialog box displays informing you that Java SE 7 runtime is required. Click More info to launch the Apple download site for Java SE 7 runtime.
- The Apple Support website opens in the Safari web browser. Follow the prompts to download Java SE 7 runtime. It will likely have an alternate name, such as Java for OS X.
- Once the download package has downloaded to your Mac, open the Downloads folder, and double-click the file you just downloaded.
- Follow the prompts to install Java SE 7 runtime.
Download, Install, and Configure Xcode
Xcode, the Apple SDK for creating iOS apps, contains the simulators you need to emulate iOS devices in Kony Visualizer. However, it is not automatically installed when you install Kony Visualizer. It is imperative to install Xcode before working with Kony Visualizer. Kony recommends using Xcode 12. With new capabilities, Kony plug-ins are supported on Xcode 12.
Important: You must install, at a minimum, Xcode version 7.
To download, install, and configure Xcode, do the following:
- In a browser, navigate to the Apple Developer site, and log in to your Apple developer account. If you do not have one, create one.
- Navigate to the Apple developer download page. The URL is as follows:
https://developer.apple.com/downloads/index.action - From the list of downloads, double-click the listing of the version of Xcode you want to download, and then click the listed .dmg file to initiate the download.
- Once the download package has downloaded to your Mac, open the Downloads folder, double-click the file you just downloaded, and then follow the prompts to install Xcode.
- When Xcode has finished installing, launch it. To do so, open the Applications folder, and then click Xcode.
Important: It is imperative that you launch Xcode so that it runs its initialization and configuration routines. Until it does so, you cannot use iOS simulators in Kony Visualizer.
- Once it has finished its automated configuration, quit Xcode.
Important: You must install, at a minimum, Xcode version 7.
Configure iOS Simulators in Kony Visualizer
Now that you have downloaded, installed, and configured Xcode, you can configure an iOS Simulator in Kony Visualizer.
To configure an iOS Simulator in Kony Visualizer, do the following:
- On the Product menu, click Emulators & Devices Configuration.
- Click the gray arrow for Emulators to expose the available channels (Desktop, Mobile, and Tablet), and then click the gray arrow of the channel you want to configure an emulator for. Within that channel, click iOS.
- The details of your Xcode installation should automatically populate the iOS Build Options fields. If they don't, click Fetch Xcode Details.
- To configure a new emulator, click the green plus button, and then in the Name text box, type a name for the emulator. If you want to open the project in Xcode, check the Open project in Xcode checkbox. Additionally, if you want the simulator to support rendering for Apple Watch, check the Enable Watch checkbox.
- When you are finished configuring the emulator, click Save.
- To configure additional emulators, repeat steps 2 through 5.
- When you are finished, click OK.
Note: To use an emulator enabled for Apple Watch, your project must have at least one form created for the Watch channel. If you select to emulate a project using a Watch-enabled emulator but your project has no forms for the Watch channel, an error message displays.
Note: If you navigate away from the emulator configuration pane or click OK or Cancel without first saving the changes you made to the emulator, any changes you made to the emulator configuration are lost.
Test your Set Up with the HelloWorld Sample App
Having configured an iOS Simulator in Kony Visualizer, you can ensure everything is working properly using the HelloWorld sample app.
Note: If you want to take advantage of Kony Visualizer's right-click functionality on your Mac, make sure your right mouse button is set up properly. To do so, open Mouse in System Preferences, and then assign Secondary Button to the right portion of the mouse.
To test the iOS emulators with the HelloWorld sample app, do the following:
- Download the HelloWorld sample app and import it into Kony Visualizer. To do so, navigate to the HelloWorld sample app page on GitHub, and then click Download ZIP. Next, in Kony Visualizer, on the File menu, click Import, and then in the Import Kony Application dialog box, click the Browse button for Select project root, navigate to the .zip file that you downloaded, open the HelloWorld-master folder, click the HelloWorld folder, click Open, and then click Finish.
- If you have not done so already, in Kony Visualizer, log in to your Kony account. To do so, in the top right corner of the Kony Visualizer window, click Login. The Kony Account sign-in window opens. Enter your email and password credentials for your Kony user account, and then click Sign in. Kony Visualizer uses the The Kony Fabric URL configured in Window > Preferences > Kony Visualizer > Kony Fabric to sign in to Kony Fabric.
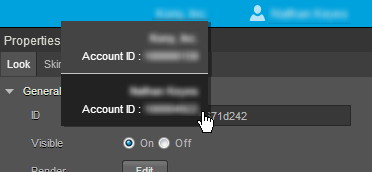
- With Kony Kony Fabric, you can create multiple cloud accounts and connect to any one of them. Now that you're logged in to your Kony account, select the cloud account that you want to use. To do so, in the status bar located over the Properties Editor, click the current cloud account name to display a drop-down list of available accounts, and then click the one you want.
- If you have not yet selected a default environment for the particular cloud account that you selected in the previous step, you need to do so. On the File menu, click Settings. Next, click the Kony Fabric Details tab. At the top of this tab, under Kony Fabric Environment, select an environment from the drop-down list. Click Finish. If you do not see any environments listed, you need to create one. For more information, see Environments in the Kony Fabric Console User Guide.
- To build the project and have it run in an iOS simulator, on the Product menu, point to Run As, next under iOS, point to the simulator you want to use, and then select whether you want it rendered as Native or SPA. Alternately, if you don't want to rebuild the project, from the Product menu, point to Launch Emulator, next under iOS, point to the simulator you want to use, and then select whether you want it rendered as Native or SPA.
- If prompted enter your license information, either by logging in to Kony Fabric, or browsing to the license file located on your Mac. After making your selection, in the License Information dialog box, click Finish. In the case of logging in to Kony Fabric, its log in page appears. Enter your credentials.
- The app proceeds to build. If prompted, choose the iOS simulator application, which is
Xcode.app. - When prompted, if you have a particular debugger port that you use, enter it in the Debugger Host Port text box, and then click Start. If you want to forgo the use of a debugger port, click Cancel.
Important: If you are not able to get beyond the login page for the Kony Fabric Console, it may be that you set up Kony Fabric using a self-signed certificate that made it possible to install Kony Fabric, but which Windows and Google Chrome does not trust to allow you to log in. To resolve this, locate the certificate (you may need to contact your system administrator to do so), and then import it into the Windows Certificate Store, into the Trusted Root Certification Authorities folder. For more information on how to import a certificate into the Windows Store, see Import or export certificates and private keys on the Microsoft web site.
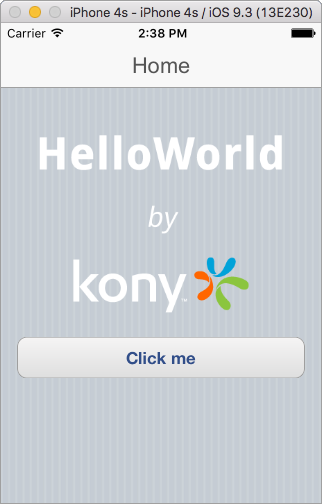
After a while, the simulator renders the HelloWorld app.
| Copyright © 2013 Kony, Inc. All rights reserved. |