
Import a Kony Visualizer Enterprise Project
Applies to Kony Visualizer Classic.
You can import a project that is located locally on your computer or you can import a project from a cloud account to Kony Visualizer Classic.
For more information, click any of the following sections:
Import a Local Kony Visualizer Classic Project
Import a Kony Visualizer Classic Project from a Cloud Account
Important:
If the project you are importing includes Cordova content, ensure the following:
- The Cordova content needs to be in the following location:
<ProjectName>/web/cordova - Within the Cordova folder, the content must be structured in the following way:
config.xml
hooks
www
www/css
www/img
www/index.html
www/js
- Notes:
- If your project was built using a version of Kony Studio older than 6.0, you first must import it into Kony Studio 6.0 (with the latest hotfix) and then you can import it into Kony Visualizer.
- If yours is a Kony Visualizer 2.5 or earlier project, importing it updates it so that it can take advantage of all the features of Kony Visualizer, but your earlier version of Kony Visualizer you will no longer be able to open it.
Import a Local Kony Visualizer Classic Project
When you import a local Kony Visualizer Classic project, you are essentially locating an archive (.zip) file, which Kony Visualizer Classic then extracts into the proper location of your workspace.
To import a local Kony Visualizer Classic project, follow these steps:
- On the File menu, point to Import, and then point to Local Project.
- You can do any of the following:
- Click Open as New Project to import the local project as a new Kony Visualizer Classic project.
- Click Add to Current Project to import the local project to the current Kony Visualizer project.
The Import into project dialog box appears.
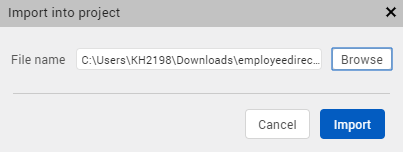
- Click Browse to locate the archive file that you want to import, select it, and then click Import. The project is imported to your new or current project. On successful import of the local project, Kony Visualizer Classic does the following:
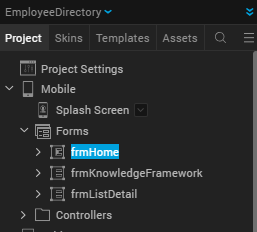
- The startup form is highlighted in the Project Explorer. Here, Employee Directory is the imported sample app and frmHome is the startup form.
- The startup form of the imported project is displayed on the Project Canvas.
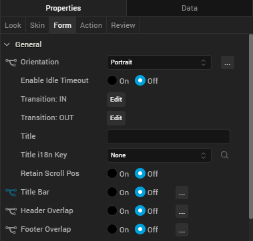
- The Form tab is auto-selected and displayed on the Properties panel.
- The startup form is highlighted in the Project Explorer. Here, Employee Directory is the imported sample app and frmHome is the startup form.
Note: If a project with the same name exists already, the Conflict dialog box appears, asking you if you want to overwrite the existing project. Click OK to overwrite the existing project. Click Cancel to end the import process.
Import a Kony Visualizer Classic Project from a Cloud Account
It is assumed that you have access to the cloud account where the Kony Visualizer Classic project is located. For access, contact someone with admin privileges to the cloud account. They can invite you by referring to Invite Users to a Cloud Account.
To import a Kony Visualizer Classic project from a cloud account, follow these steps:
- In Kony Visualizer Classic, if you are not already signed in, sign in to your Kony account.
- On the File menu, point to Import, and then click Cloud Project. The Import Project dialog box appears.
- Scroll through the list of available projects, and then click Import for the project you want to download.
- In the list of projects, hover over the project you want to import. The project's field highlights, and an Import button appears along the right-edge of the project's field. Click Import. The project is imported to your current project. On successful import of the local project, Kony Visualizer Classic does the following:
- The startup form is highlighted in the Project Explorer. Here, Employee Directory is the imported sample app and frmHome is the startup form.
The startup form of the imported project is displayed on the Project Canvas.
- The Form tab is auto-selected and displayed on the Properties panel.
- The startup form is highlighted in the Project Explorer. Here, Employee Directory is the imported sample app and frmHome is the startup form.
Note: If a project with the same name exists already, a dialog box appears, asking if you want to overwrite the existing project or rename the project you're importing with a different name. Click Overwrite to overwrite the existing project. Click Rename to open a dialog box where you can enter a new name for the app that you are importing. Then you can either click OK to proceed with the import process from the cloud or click Cancel to end the import process without downloading the project from the cloud.
| Copyright © 2013 Kony, Inc. All rights reserved. |